
Red Velvet Cheesecake
This post may contain affiliate links. Read the full disclosure here.
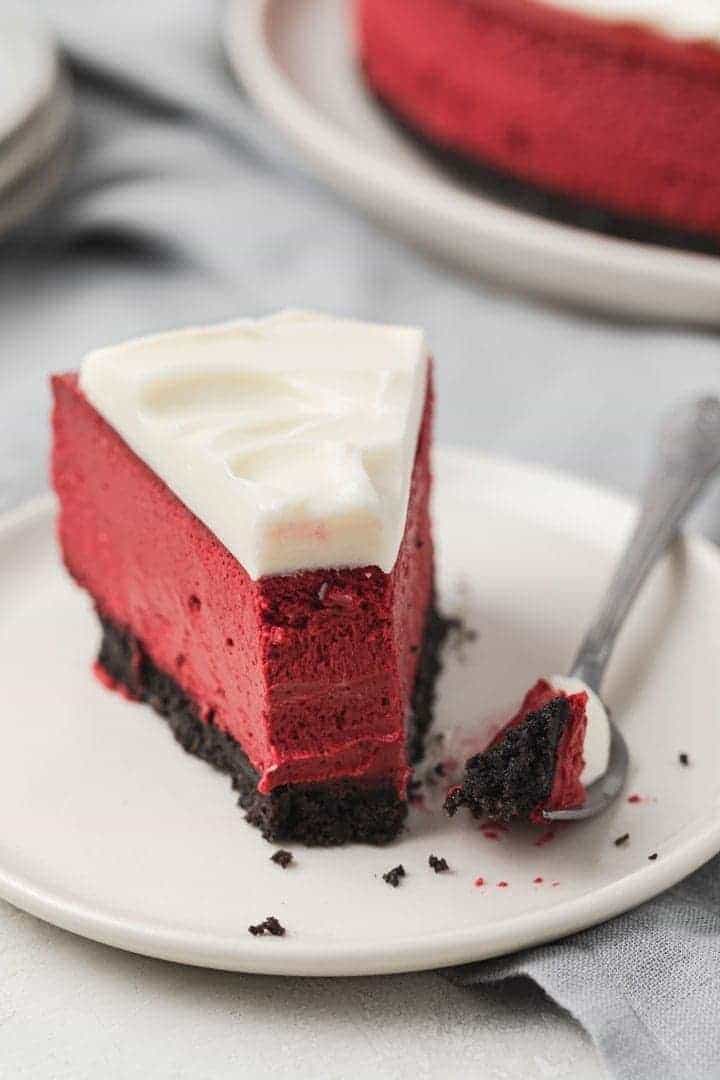
This creamy red velvet cheesecake recipe is a show-stopping dessert suitable for many occasions. The silky red velvet batter sits on an Oreo cookie crust and is topped with cream cheese frosting.

This red velvet recipe is not like anything else you’ve tried. Instead of cake or cupcakes, it’s made with cheesecake and the combination is incredible.
A lot of people get confused about what red velvet cake is. The cake got the name because it was so velvety smooth.
This velvety texture is the result of leavening mixed with buttermilk and vinegar. Cocoa powder is also thrown into the reaction to create the signature red color.
And traditionally, red velvet wasn’t as red as it is today. Today’s recipes rely on food coloring to enhance the bright red hue.
When deciding to make the classic flavor into a cheesecake, I knew right away it would be a success.
I used my best cheesecake recipe as a base. It’s supremely creamy and velvety. And the tangy cream cheese paired with sour cream, cocoa powder, a splash of vinegar, and vanilla give this cheesecake the signature red velvet flavor.
If you like red velvet, you may also enjoy these red velvet crinkle cookies.
What is red velvet flavor?
Red velvet is a tangy, sweet flavor with notes of chocolate and vanilla. The tang comes from the acidity in buttermilk and vinegar. Sometimes coffee is added to enhance the overall flavor of the cake.
Ingredients
I kept most of the fundamental ingredients needed for an authentic red velvet flavor. I omitted the buttermilk because cream cheese is tangy and the cheesecake base uses sour cream. Let’s discuss this in detail.
- Oreos: Regular Oreos* ground into a fine crumb is needed for the crust. Don’t worry about scraping out the filling. It will help bind the crust together.
- Butter: Unsalted sweet cream butter tastes best for the cheesecake crust.
- Cream cheese: Use full-fat brick-style cream cheese. This makes up the base of the cheesecake filling so choose a quality brand like Philadelphia.
- Sugar: Regular granulated sugar is all you need here.
- Cocoa powder: It’s important to use Dutch-processed cocoa*. This means it has been treated with an alkalizing agent to make the taste milder. This is important since we’re adding a splash of vinegar.
- Sour cream: Choose full-fat sour cream. This will give you the best results.
- Vinegar: Just a splash of white vinegar* is all that’s needed to enhance the tangy flavor.
- Vanilla: Look for pure vanilla extract*. It has the best flavor and really shines through in the cheesecake. Or you can make homemade vanilla.
- Eggs: You’ll need 4 large eggs to bind the filling together.
- Red food coloring: I’ve found that 1.5 ounces worked perfectly for a rich red color. Use liquid coloring that comes in 1-ounce bottles*.
- Cream cheese frosting: I scaled down my favorite cream cheese frosting recipe to add to the top. You can skip it if you wish.
To bake this cheesecake you’ll need:
- 9-inch round pan: I like to use a 9-inch springform pan* with the bottom wrapped in foil.
- A cheesecake pan* works well also.
- Stand mixer: This recipe yields quite a bit of batter and a stand mixer* makes it easier to mix.
- The paddle attachment* with silicone scrapers on the side will be your best friend when using a stand mixer.
- Silicone spatula: A heavy duty silicone spatula* is a must when folding the eggs into the batter.
- Food processor: I’ve used my Ninja express chop* for a variety of things, including grinding cookies into crumbs. It’s my 2nd most used kitchen tool.

How to make red velvet cheesecake
It’s super easy to whip up this red velvet cheesecake recipe. Combine everything in a stand mixer, pour the batter over an Oreo crust and bake. I think you’ll be surprised by the decadent results from so little effort.
The Crust – The crust is made from ground Oreos combined with melted butter. The mixture is pressed into the bottom of a springform pan and baked to form a solid bedding to hold the filling.
The Filling – The batter comes together in just a few minutes. A stand mixer will make the process easier since there’s a lot of batter. Mix it all together until you have a mousse-like filling with all the key notes of red velvet.
The Topping – The topping is a reduced version of my cream cheese frosting. It’s totally optional but really makes the cheesecake take on the form of red velvet cake.

Step 1: Make the crust
Before you begin, Set the cream cheese, sour cream, and eggs out on the counter to come to room temperature. It will take about an hour.
Position the top oven rack to the lower third position. This is right below the center of the oven. Then move the bottom rack to the lowest position. And preheat the oven to 350°F.
Combine the Oreo crumbs and melted butter. Make sure to mix well so the crumbs are evenly coated in butter.
Press the crumbs firmly into the bottom of a 9-inch springform pan. Take the crust 1-2 inches up the sides of the pan as well. This forms a shallow bowl for the filling to rest in.
Bake the crust for 10 minutes then set it on a wire rack. Let the crust cool down some before you add the filling.

Step 2: Make the filling
Turn the oven temperature down to 300°F.
In the bowl of a stand mixer fitted with the paddle attachment, or using a handheld electric mixer, beat the cream cheese on medium-low speed for about 1 minute until it’s smooth and creamy.
Add the sugar and cocoa powder. Mix on medium-low speed until well combined. Stop to scrape down the sides and bottom of the bowl as needed.
Add the sour cream, vinegar, vanilla, and 1 ounce of food coloring. Mix on medium-low speed until well combined.
At this point, you need to decide if the color is dark enough for you. Liquid coloring will fade slightly during baking so keep that in mind. Add half or all of the second bottle of food coloring if you wish to make it darker. I used 1 and a half bottles for my cheesecake.
Once you have the color the way you’d like it, lightly beat the eggs in a separate bowl and gently fold them into the batter with a silicone spatula.
This method eliminates any excess air that could get whipped into the eggs by vigorous mixing methods, which could cause the cheesecake to crack.
Pour the filling over the crust and smooth the top.

Step 3: Bake the cheesecake
Bake the cheesecake in a water bath for 1 hour. Turn the oven off, leave the door closed, and let the cheesecake sit for another hour. This provides a luxuriously silky texture that can’t be achieved any other way.
Water baths scare people. I get it! It’s painful to spend so much money on the ingredients for cheesecake only to have the water bath leak into the pan and ruin the final product.
There are ways to prevent this from happening. My favorite is to use an oven bag. Like a large bag for turkey.
Wrap the pan in two layers of heavy-duty foil. Set the pan inside an oven bag and roll the bag down until it meets the sides of the pan.

Step 4: Cool and refrigerate
Set the cheesecake on a cooling rack. Run a butter knife around the edge to loosen it from the pan. Leave the cheesecake to cool to room temperature.
Cover the pan with plastic wrap and refrigerate the cheesecake for at least 4 hours but overnight is best.
Step 5: Make the topping
Add the ingredients to a medium bowl and mix until smooth and creamy.
remove the cheesecake from the pan and spread the frosting over the top. If the frosting is a bit loose, pop the cheesecake back into the refrigerator until the frosting had firmed enough to stay in place.

How to serve
Run a large knife under hot water to warm the blade. Very carefully dry the blade with a kitchen or paper towel.
Make a slice in the cold cheesecake. Rinse the blade with hot water, dry it, and make another slice. Repeat with each slice.
Let the cold slices sit a room temperature for 30-45 minutes before serving.
How to store
Keep the red velvet cheesecake covered and store it in the refrigerator for up to 4 days.
The cheesecake can also be frozen for up to 3 months. Wrap it in plastic wrap and a double layer of aluminum foil. Allow the cheesecake to thaw in the refrigerator overnight.

More cheesecake recipes
If you like this recipe, you’ll love these other cheesecake recipes:
Red Velvet Cheesecake

Ingredients
For the crust
- 2 ½ cups (250 g) crushed Oreo cookies, about 30 cookies
- 5 tablespoons unsalted butter, melted
For the cheesecake
- 32 ounces (908 g) cream cheese, softened
- 1 ⅓ cups (267 g) granulated sugar
- ½ cup (42 g) Dutch-processed cocoa powder
- 1 cup (227 g) sour cream, room temperature
- 1 tablespoon white vinegar
- 1 tablespoon vanilla extract
- 1-2 ounces red food coloring
- 4 large eggs, room temperature, lightly beaten
For the frosting
- 4 ounces (113 g) cream cheese, softened
- ¼ cup (56 g) unsalted butter, softened
- 2 cups (260 g) confectioners' sugar
- 1 teaspoon vanilla extract
Instructions
Make the crust
- Move the oven rack to the lower third position (the notch right below the center of the oven) and heat the oven to 350°F. Wrap the outer bottom of a 9-inch springform pan tightly with two layers of heavy-duty aluminum foil.
- Combine the Oreo cookie crumbs and melted butter. Press the crumb mixture into the bottom and about 2-inches up the sides of the pan. Bake for 10 minutes. Set aside to cool while you make the filling.
Make the cheesecake
- Reduce the oven temperature to 300ºF.
- In the bowl of a stand mixer fitted with the paddle attachment, or using a handheld electric mixer, beat the cream cheese on medium-low speed until smooth and creamy, about 1 minute.
- Add the sugar and cocoa powder. Mix on medium-low speed until well combined. Add the sour cream, vinegar, vanilla, and food coloring; mix on medium-low speed until smooth.
- Using a silicone spatula, gently stir in the eggs just until combined.
- Pour the batter over the prepared crust. Set the cheesecake inside a large roasting pan and carefully slide the pan onto the oven rack.
- Very carefully fill the roasting pan with enough boiling water to come halfway up the springform pan.
- Bake for 1 hour, OR until the edges are set and the center is slightly jiggly. Turn the oven off, leave the cheesecake in the water bath in the oven for another hour.
- Remove the cheesecake from the water bath and place it on a wire rack. Run a small knife around the outer edge of the cheesecake to loosen it from the pan and leave it to cool completely. Cover and refrigerate for at least 4 hours, preferably overnight.
- Remove the sides of the pan just before serving.
Make the Frosting
- In the bowl of a stand mixer fitted with the paddle attachment or with a handheld electric mixer, beat the cream cheese and butter together until smooth and creamy.
- Add the sugar and vanilla. Beat on low until just incorporated then turn the mixer to medium speed and beat until smooth.
- Spread over chilled cheesecake.
Notes
- Food coloring: I used 1.5 ounces in my cheesecake. Start with 1 ounce, then add a little more until you reach the color you desire.
- You can line the inside bottom of the springform pan with parchment paper or aluminum foil if desired. It’s not completely necessary but does make it easier if you plan to transfer the cheesecake to a serving platter.
- Oven temperatures can vary which means your cheesecake may need more time to bake. You’ll know it is done cooking when the outer edges of the cheesecake feel firm to the touch while the center looks wet and jiggles when shaken. If the cheesecake doesn’t look this way after an hour of cooking, let it cook until it does. Then you can turn the oven off and let the cheesecake rest for another hour in the oven.
- This cheesecake is baked in a water bath. Please familiarize yourself with how to create a leakproof water bath.
- The cheesecake will keep for up to 4 days covered and stored in the refrigerator.
- The cheesecake will keep for up to 3 months stored in the freezer. Thaw in the refrigerator overnight.
Nutrition
The nutrition information provided is for convenience and as a courtesy only. It is not guaranteed to be accurate because nutrition information can vary for a variety of reasons. For precise nutritional data use your preferred nutrition calculator and input the exact ingredients and brands you used in the recipe.
I did it, but it tasted bitter.
I’m sorry you didn’t like the cheesecake.
It turned out so runny and took 3 times the amount of time to cook.
Hi there. In all previous baked cheesecakes I’ve made, there is an element of heavy cream added. I’ve also seen other red velvet cheesecakes with buttermilk in the ingredients. Would you advise using either of these? Thank you.
I always recommend you use what the specific recipe you are making calls for. Each recipe is tested with the ingredients that are called for and that will work best.
Hi, I noticed the video on youtube calls for 1/2 cup cocoa and this written version said 1/4. Is this a typo or an update? Thank you 🙂
Thanks for pointing that out! It was a type. It should be 1/2 cup of cocoa powder.
I made this cheesecake over the weekend. It turned out perfectly except for the red colouring. But that was a minor thing. All your notes helped a lot. This was my first time making a cheesecake.
Thank you for posting your tips and recipe.