
Oreo Cheesecake
This post may contain affiliate links. Read the full disclosure here.
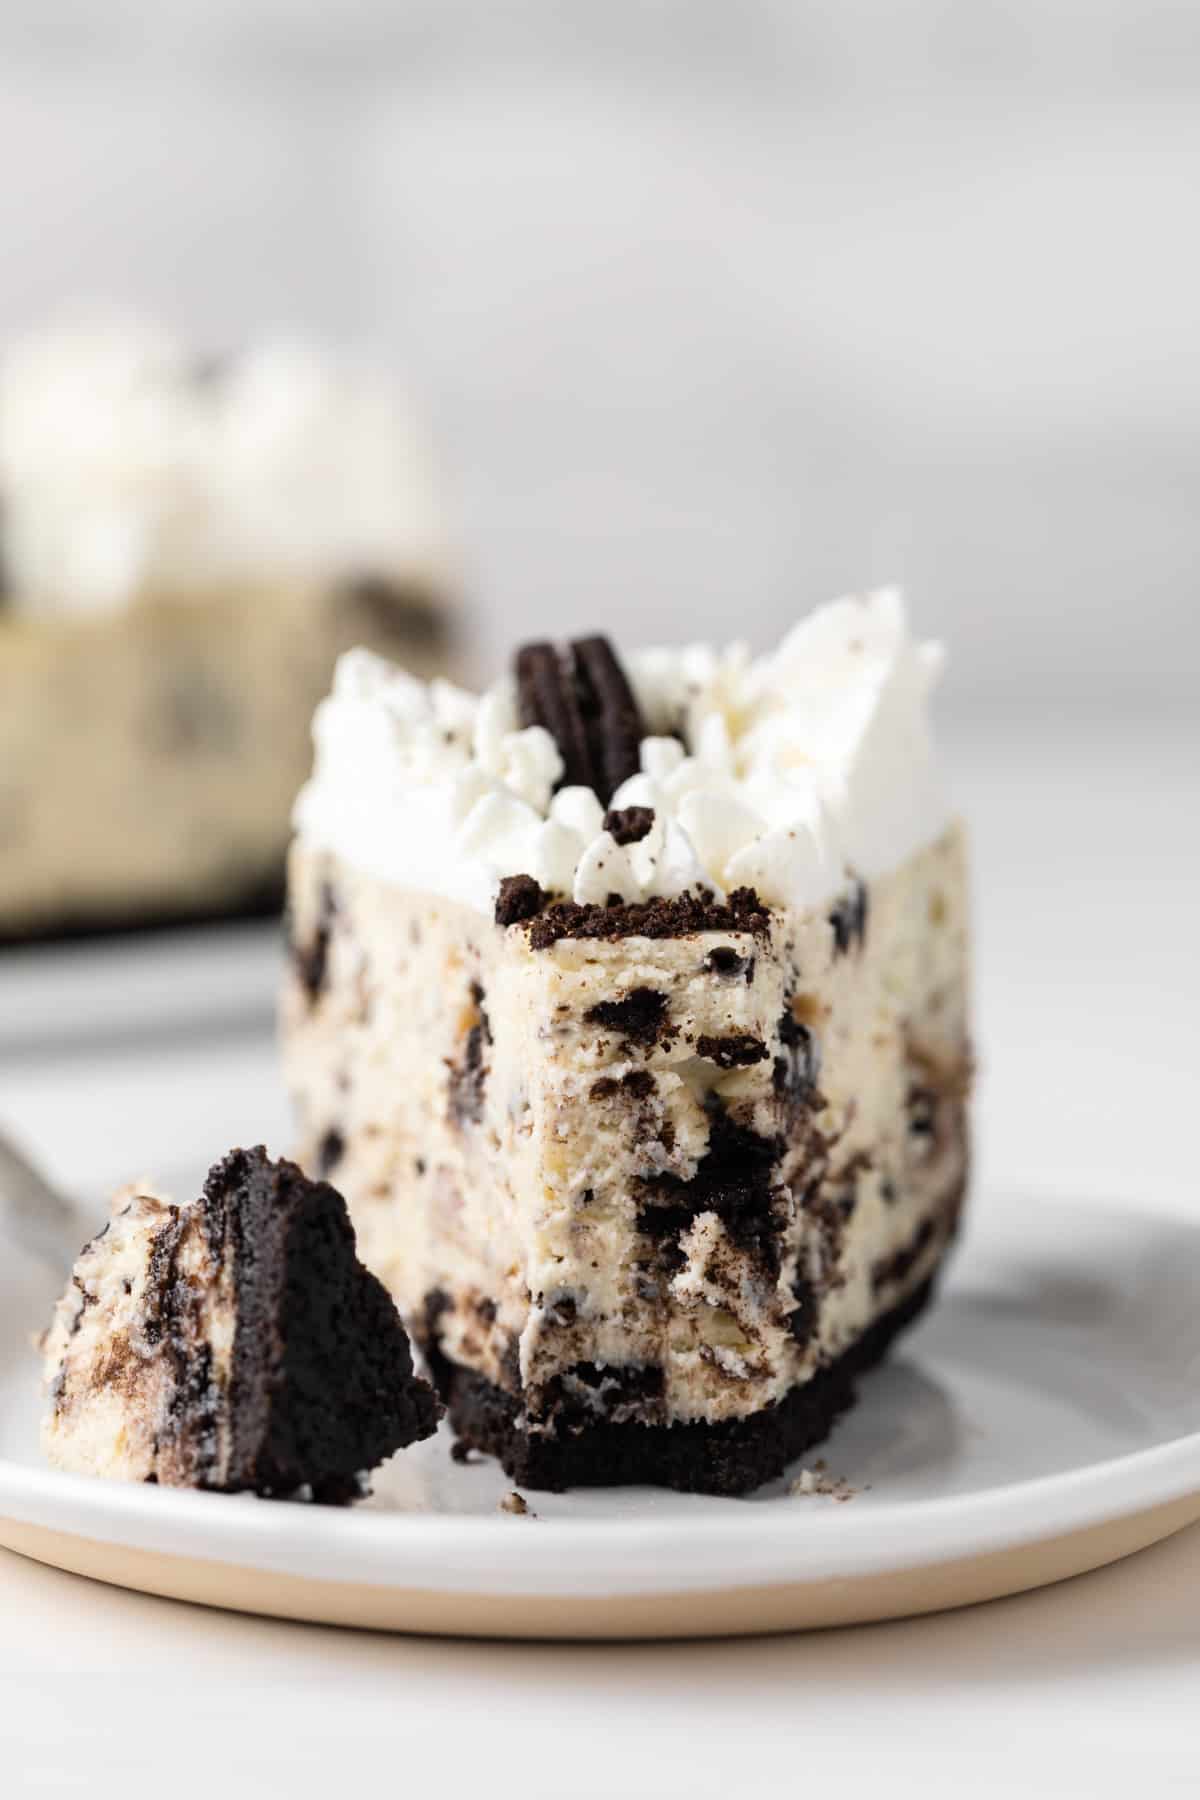
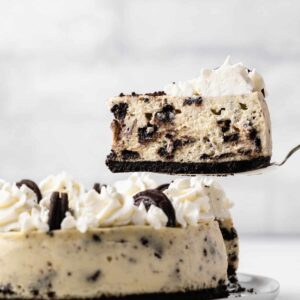
This is the perfect, creamy oreo cheesecake speckled with cookie chunks on an oreo crust. It’s so easy to make ahead for any celebration.

I adapted this delicious oreo cheesecake recipe from my best cheesecake recipe.
While it may take some time to make, the steps are relatively easy and perfect for even a beginning baker.
This recipe is stuffed full of that signature oreo flavor.
The crushed oreos will create some air pockets in the filling, which may cause the top to crack.
Not to worry though, you’ll be able to cover it with homemade whipped cream and cookie crumbs. Yum!
Try my no bake oreo cheesecake for a quicker option!
Why this recipe works
- All the cold ingredients are brought to room temperature before mixing, which results in a smoother finished texture.
- The full-fat brick-style cream cheese in this recipe produces the richest and most flavorful cheesecake.
- The cheesecake is baked in a water bath to provide even heating and prevent browning of the top of the cheesecake.
This is the perfect cheesecake for celebrating any occasion.

What you need
This oreo cheesecake recipe is packed full of cookie goodness and rich cream cheese flavor. Let’s discuss just a few of the key ingredients:
Ingredients
This is a short overview of the ingredients I used and why I chose them. The full recipe can be found at the bottom of the post!
- Oreos: These make up the crust and are scattered throughout the filling.
- Cream cheese: Make sure to use brick-style cream cheese for the very best results.
- Sugar: This adds the right amount of sweetness to the crust and the filling.
- Sour cream: This ingredient adds richness and complements the cream cheese.
- Eggs: The eggs help thicken the filling of the cheesecake.
- Vanilla: This extract adds a sweet, woody flavor and aroma to the recipe.
- Butter: The butter acts as the glue of the crust and holds it together.
Equipment
This is a list of tools I used to make the recipe.
- Cheesecake pan: A 9-inch cheesecake pan is ideal for making any cheesecake.
- Mixer: You’ll need an electric mixer to mix the ingredients for the filling.
- Silicone pan wrap: This helps prevent leaks during the water bath. It is more effective than aluminum foil.

How to make oreo cheesecake
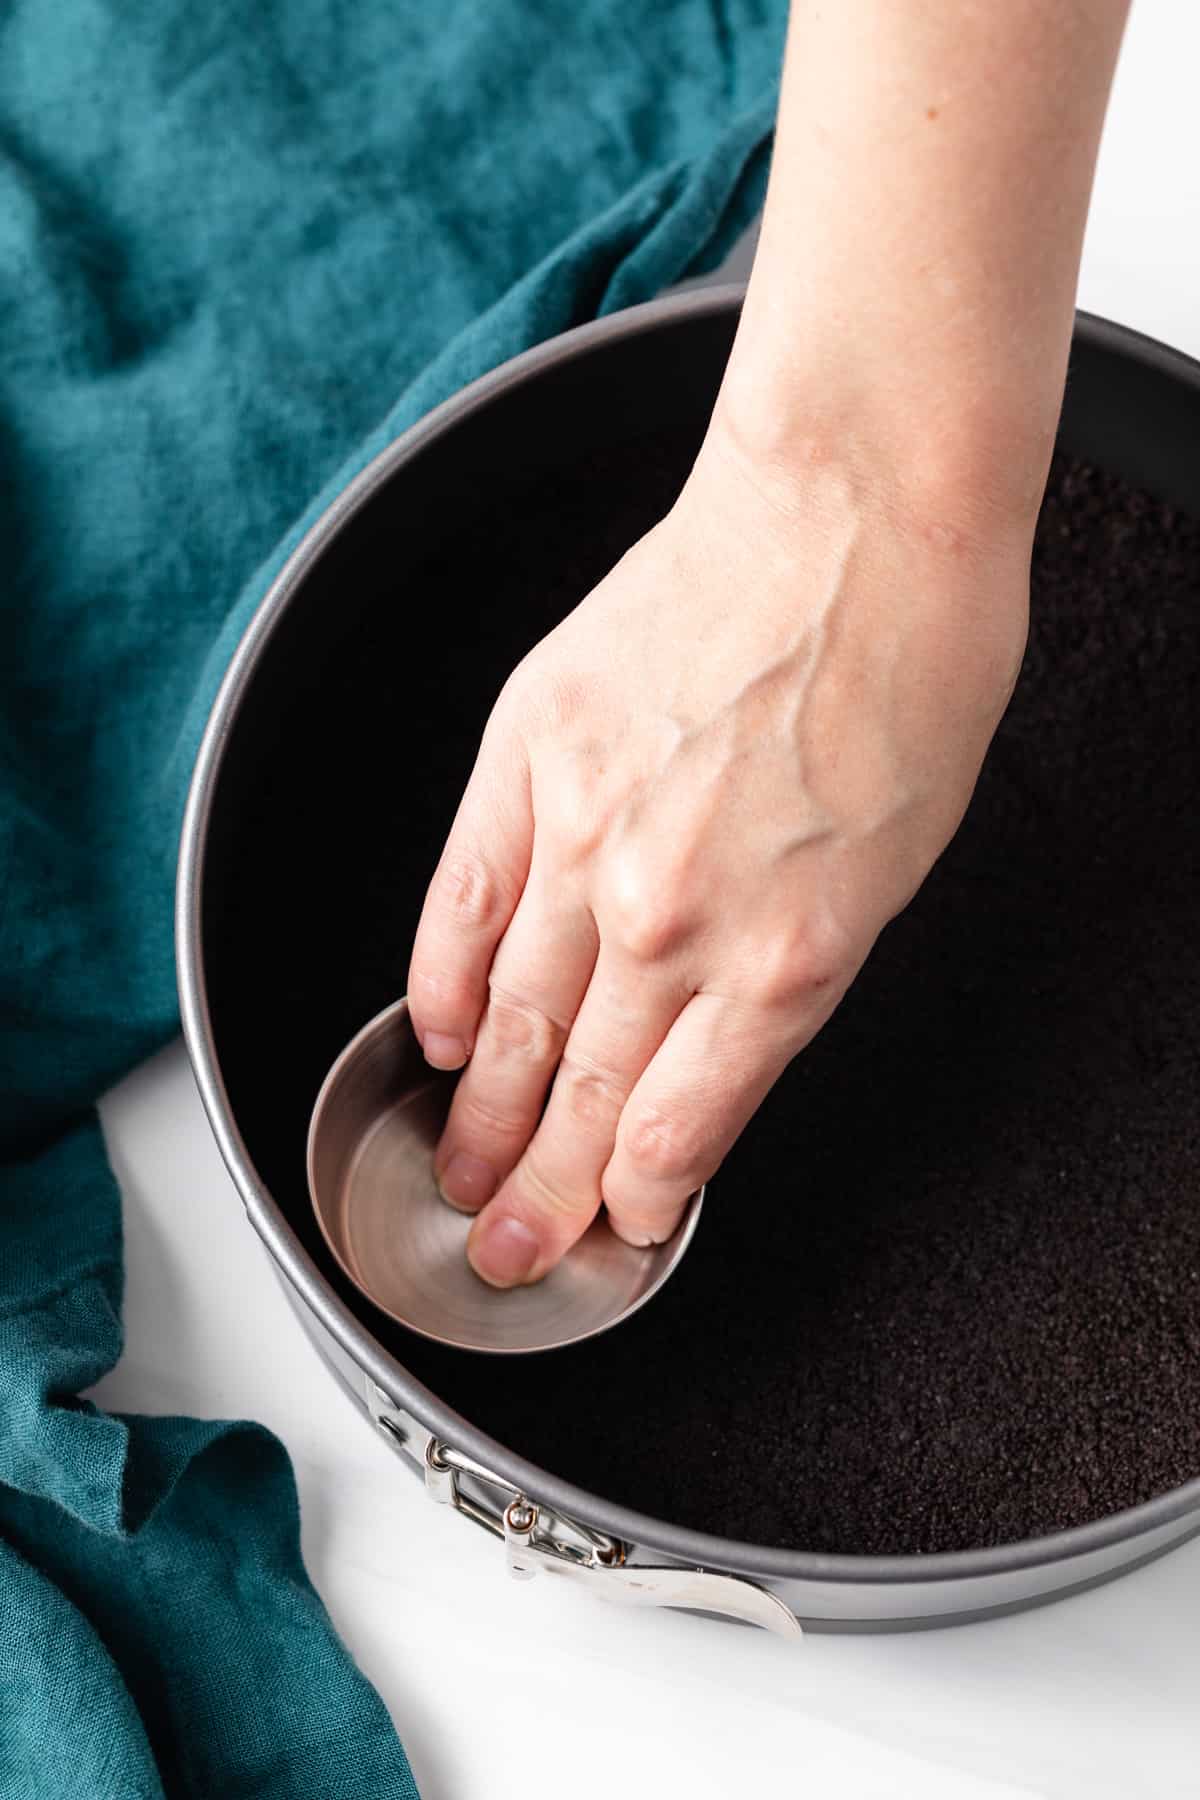
1. Make the crust
You’ll turn the oreos into fine crumbs and combine with other ingredients to form the crust.
- Move the oven rack to position described in the recipe below. Then, preheat oven to 325oF.
- Wrap the outer bottom of the pan with aluminum foil or set the pan inside a silicone pan wrap.
- Use a food processor to make the oreos into fine crumbs. This takes about 30 seconds.
- Combine the crumbs, sugar and melted butter. Toss with a fork until evenly moistened.
- Press into the bottom of the pan using a dry measuring cup or the bottom of a clean glass.
- Bake 12 minutes. Set aside to cool.
2. Make the filling
Combine cream cheese, oreos and other ingredients to make the oreo cheesecake filling.
- Reduce the oven temperature to 300oF.
- In a large bowl, beat cream cheese with an electric mixer on medium-low speed until smooth and creamy, about 1 minute.
- Then, add in the sugar and salt. Beat on medium-low until well combined, about 1 minute.
- Next, add the sour cream and vanilla. Beat on low speed until combined, about 1 minute.
- Gently stir in the eggs to the mixture with a silicone spatula until just combined.
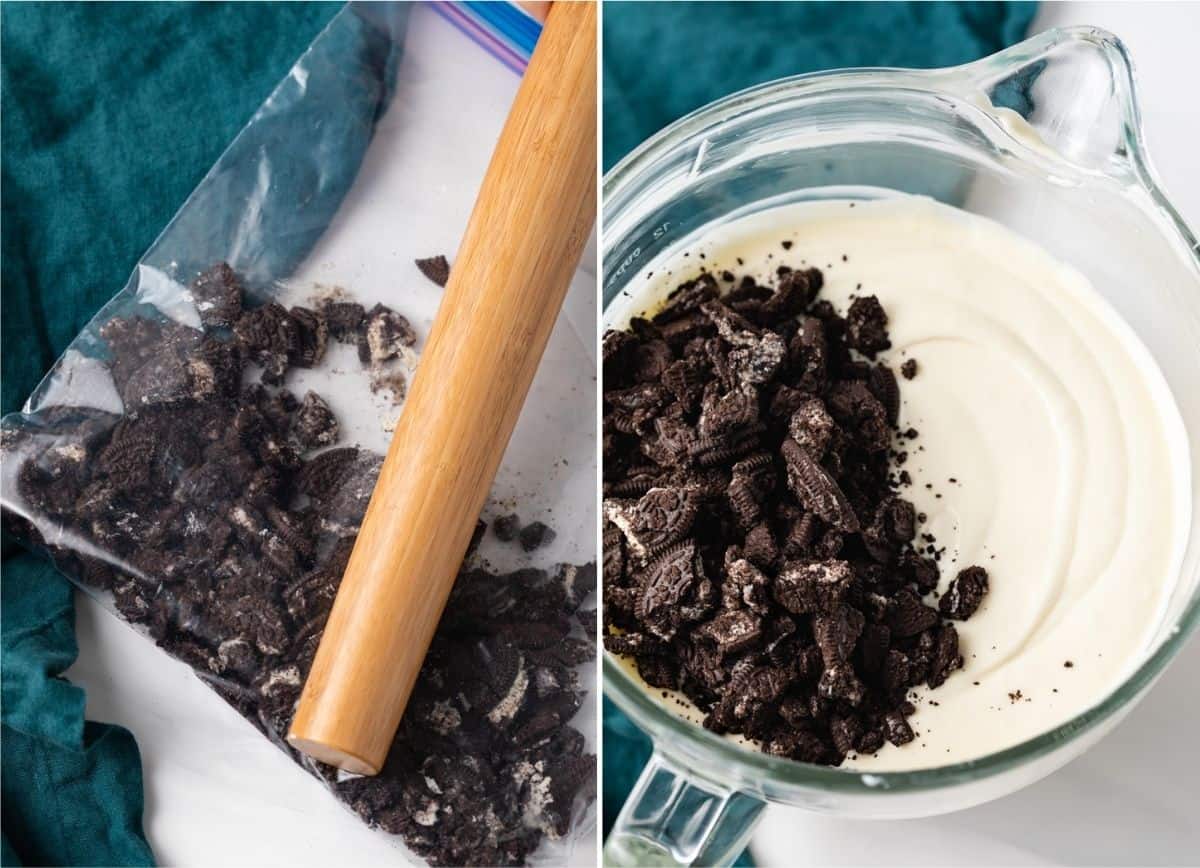
- Place oreos in a zip-top bag and crush them into bits. Then, add them into the batter. Gently fold to evenly distribute throughout the batter.
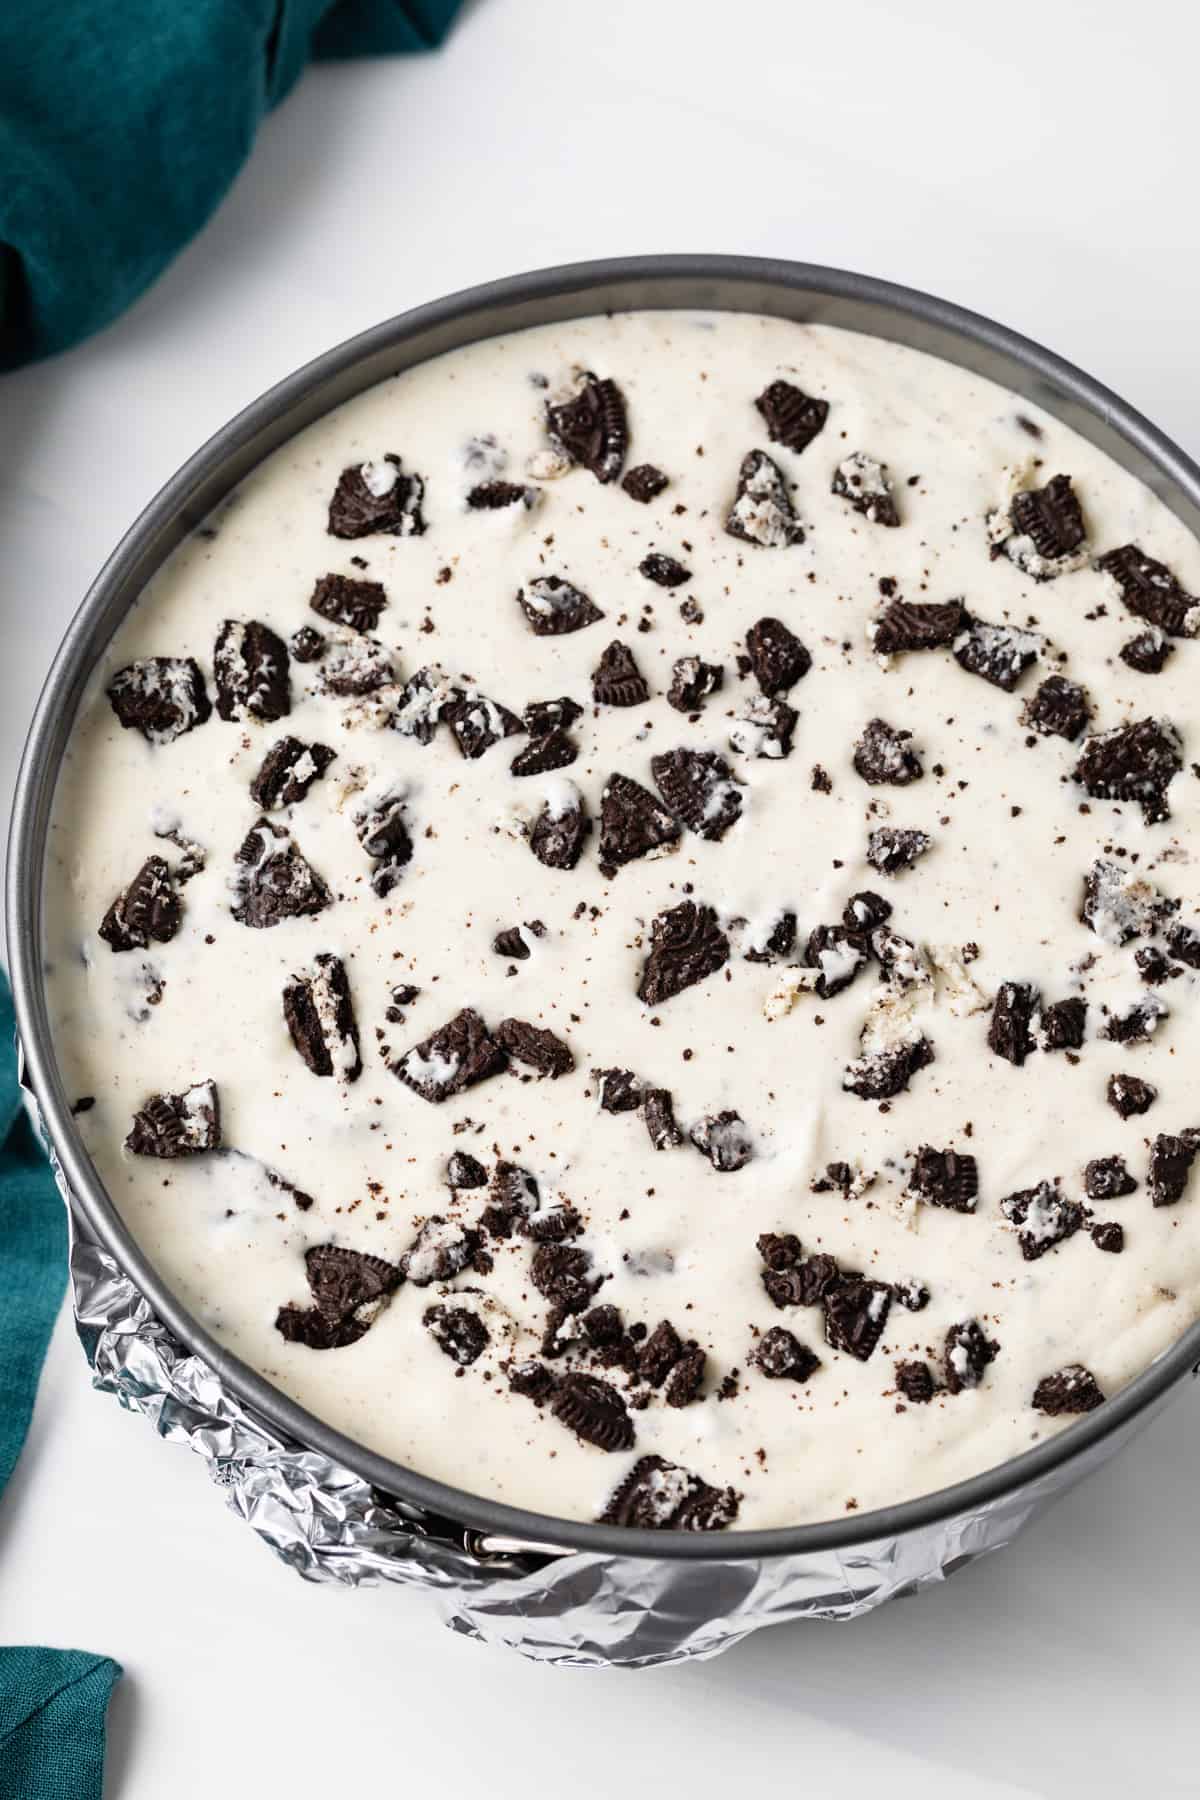
- Pour batter into prepared crust.
3. Bake and chill
You’ll bake the oreo cheesecake low and slow before chilling to prepare for serving.
- Create a water bath for your cheesecake by filling a roasting pan with a couple inches of boiling water. Place the cheesecake in the center.
- Bake for 1 hour. Or, until the edges are set and the center is slightly jiggly.
- Turn the oven off, but leave the cheesecake in the water bath in the oven with the door closed for another hour.
- Remove from the water bath and then, place on a wire rack.
- Run a small knife around the outer edge of the cheesecake to loosen it from the pan. Leave it to cool until barely warm, about 3 hours.
- Cover tightly in plastic wrap and refrigerate for at least 4 hours, preferably overnight.
- Remove the slides of the pan. Finally, garnish with whipped cream and oreos as desired just before serving.
Jen’s Best tips
- If you can’t find or don’t like oreos, you can use digestive biscuits, chocolate chips cookies, ginger snaps or your favorite cookie!
- Plan ahead because this recipe takes time to make. Ideally, you should make it the day before you plan to serve it.
- Avoid overmixing. Keep the electric mixer on medium-low to low speed to limit incorporating too much air into the batter.
- Bring all the cold ingredients to room temperature before using them in the batter.
Storing & Freezing
To store: You can store the oreo cheesecake for up to 4 days covered in the fridge.
To Freeze: This recipe freezes well. You can freeze the whole cheesecake by cooling and chilling as directed.
Wrap it tightly in two layers of plastic wrap, and then, two layers of aluminum foil. Freeze for no more than 3 months. To use, thaw in the fridge overnight.
To freeze individual slices, wrap each slice in plastic wrap, and then, place in a freezer-safe zip-top bag for up to 3 months.
Thaw overnight in the fridge or at room temperature for 30-45 minutes.
More cheesecake recipes to try
Cheesecake is such a classic dessert. These are some of my favorites:
Oreo Cheesecake
Ingredients
For The Crust
- 8 ounces (229 g) Oreo cookies, about 20 whole cookies
- 1 tablespoon granulated sugar
- ¼ cup (56 g) unsalted butter, melted
For The Cheesecake
- 32 ounces (904 g) cream cheese, room temperature
- 1 ½ cups (300 g) granulated sugar
- ⅛ teaspoon salt
- 1 cup (227 g) sour cream, room temperature
- 1 tablespoon vanilla extract
- 4 large eggs, room temperature & lightly beaten
- 10 ounces (285 g) Oreo cookies, about 25 whole cookies
- whipped cream, for garnish
- crushed Oreos, for garnish
Instructions
Make The Crust
- Move the oven rack to the lower-middle position and heat the oven to 325°F. Wrap the outer bottom of a 9-inch springform pan tightly with aluminum foil or set the pan inside a silicone pan wrap.
- Process oreos in a food processor to fine crumbs, about 30 seconds.
- Combine the crumbs, sugar, and melted butter and toss with a fork until evenly moistened. Press the crumb mixture firmly into the bottom of a 9-inch springform pan using a dry measuring cup or the bottom of a clean glass.
- Bake for 12 minutes. Set aside to cool while you make the filling.
Make The Cheesecake
- Reduce the oven temperature to 300ºF.
- In a large mixing bowl beat the cream cheese with an electric mixer on medium-low speed until smooth and creamy, about 1 minute. Add the sugar and salt, beat on medium-low until well combined, about 1 minute.
- Add the sour cream and vanilla, beat on low speed until combined, about 1 minute.
- Using a silicone spatula, gently stir in the eggs just until combined.
- Place Oreos in a zip-top bag and crush them into bits. Add them to the batter and gently fold until they’re evenly distributed.
- Pour the batter over the prepared crust.
- Fill a roasting pan with a few inches of boiling water and place the cheesecake in the center.
- Bake for 1 hour, OR until the edges are set and the center is slightly jiggly. Turn the oven off, leave the cheesecake in the water bath in the oven with the door closed for another hour.
- Remove the cheesecake from the water bath and place it on a wire rack. Run a small knife around the outer edge of the cheesecake to loosen it from the pan and leave it to cool until barely warm, about 3 hours.
- Cover tightly in plastic wrap and refrigerate for at least 4 hours, preferably overnight.
- Remove the sides of the pan. Garnish with whipped cream and oreos as desired just before serving.
Notes
- Oreos: If you simply don’t like Oreos or can’t get them, you can use digestive biscuits, chocolate chip cookies, ginger snaps, or whichever cookie you prefer.
- If the crust puffs up during baking, use a clean glass or dry measuring cup to press it back down.
- Cream cheese: Use full-fat brick-style cream cheese for the very best results.
- Plan ahead: The recipe requires a lot of time. It’s best to make it a day before you plan to serve it.
- Room temperature ingredients: All of the cold ingredients should be brought to room temperature before using them in the batter.
- Don’t over mix: Keep the mixer on medium-low to low speed and use the paddle attachment. Otherwise, you could incorporate too much air into the batter which will cause the cheesecake to crack.
- The cheesecake should appear slightly underdone after baking. It will continue to set and firm up once cooled and refrigerated.
- Prevent a soggy cheesecake! Read through my helpful tips on how to prevent the water bath from leaking.
- The cheesecake will keep for up to 4 days covered and stored in the refrigerator.
- Or freeze the whole cheesecake. Cool and chill as directed. Wrap tightly in two layers of plastic wrap, then again in two layers of aluminum foil. Freeze for up to 3 months. Thaw in the refrigerator overnight.
- You can also freeze individual slices. Wrap each slice in plastic wrap, then place them in a freezer-safe zip-top bag for up to 3 months. Thaw in the refrigerator overnight or at room temperature for about 30-45 minutes.
Nutrition
The nutrition information provided is for convenience and as a courtesy only. It is not guaranteed to be accurate because nutrition information can vary for a variety of reasons. For precise nutritional data use your preferred nutrition calculator and input the exact ingredients and brands you used in the recipe.
This is my daughter’s request every year for her birthday. I use gluten free Oreos because of an allergy and it is amazing every year. Thank you for sharing.
Hi there
Would love to try it but I am a bit confused. To make the crust, do you scrape off the cream filling of each Oreo and then just use the cookie shell?
Or do you use the whole Oreo cookie?
Thanks for your help 🙂
You use the whole cookie.
How long should I cook it in an 8inch pan?
Unfortunately, I’ve not made the cheesecake in an 8-inch pan so I can’t tell you the cooking time.
Hi there, what if I wanted to bake a 10 inch, what more would I need to add to the recipe ?
I’ve never attempted to adapt the recipe for a 10-inch pan so I can’t really give you advice on adjusting the ingredients to fit the pan. I would honestly, stick to the recipe as it is so it turns out how it’s meant to.
I made your apple pie cheesecake and it was 10/10. I was wondering why does that cheesecake not require a water bath but this one does? It also looks like the ratios of ingredients are a little different. Why is this? New to making cheesecake. Thank you!
Water baths help prevent cracks. Since the apple pie cheesecake is has a topping, small cracks will not matter. Also, the water baths will create a softer, creamier cheesecake but these tend to sink when heavy toppings are applied. So I skipped the water bath to ensure the filling was sturdy enough to hold the topping.
Thank you Jen! Looking forward to making this soon. If it’s half as good as your apple pie cheesecake it’ll still be the second best dessert I’ve ever made.