
Rice Krispie Treats
This post may contain affiliate links. Read the full disclosure here.
This super easy rice krispie treats recipe features extra flavor from brown butter. They are perfectly soft and gooey!
These rice krispie treats are so easy and fun to make with your family.
The extra flavor from the brown butter makes these the best ever! I adapted this recipe from Alton Brown’s Brown Butter Krispy Rice Treats.
My marshmallow to cereal ratio makes the treats perfectly sweet and gooey.
I don’t like to go too dark with my brown butter because it’s very easy to burn.
I always err on the side of caution. If you like darker brown butter, then, feel free to do so.
Why this recipe works
- This recipe calls for almost fully melting the marshmallows, which creates extra gooey treats.
- The unsalted butter limits the salt in the recipe, so the treats don’t become too salty.
These are the perfect rice krispie treats. They are loved by kids and kids at heart.
What you need
Fresh ingredients make this recipe pop! Let’s discuss just a few of the key ingredients:
Ingredients
This is a short overview of the ingredients I used and why I chose them. The full recipe can be found at the bottom of the post!
- Butter: Make sure to use unsalted butter, so you can control the amount of salt added to the recipe.
- Marshmallows: I prefer mini marshmallows for this recipe. Make sure they are fresh or your results may be subpar.
- Crispy rice cereal: You can use any brand of cereal. The key is making sure it is fresh as stale cereal will not taste good.
- Salt: I only use a pinch of salt in this recipe as I don’t like my treats to be salty.
Equipment
This is a list of tools I used to make the recipe.
- Heavy-bottomed saucepan: This is the key equipment for melting the butter and the marshmallows.
- Baking pan: You’ll need a 9×13-inch pan for the treats.
- Spatula: A silicone spatula will help you mix this recipe with ease.
How to make rice krispie treats
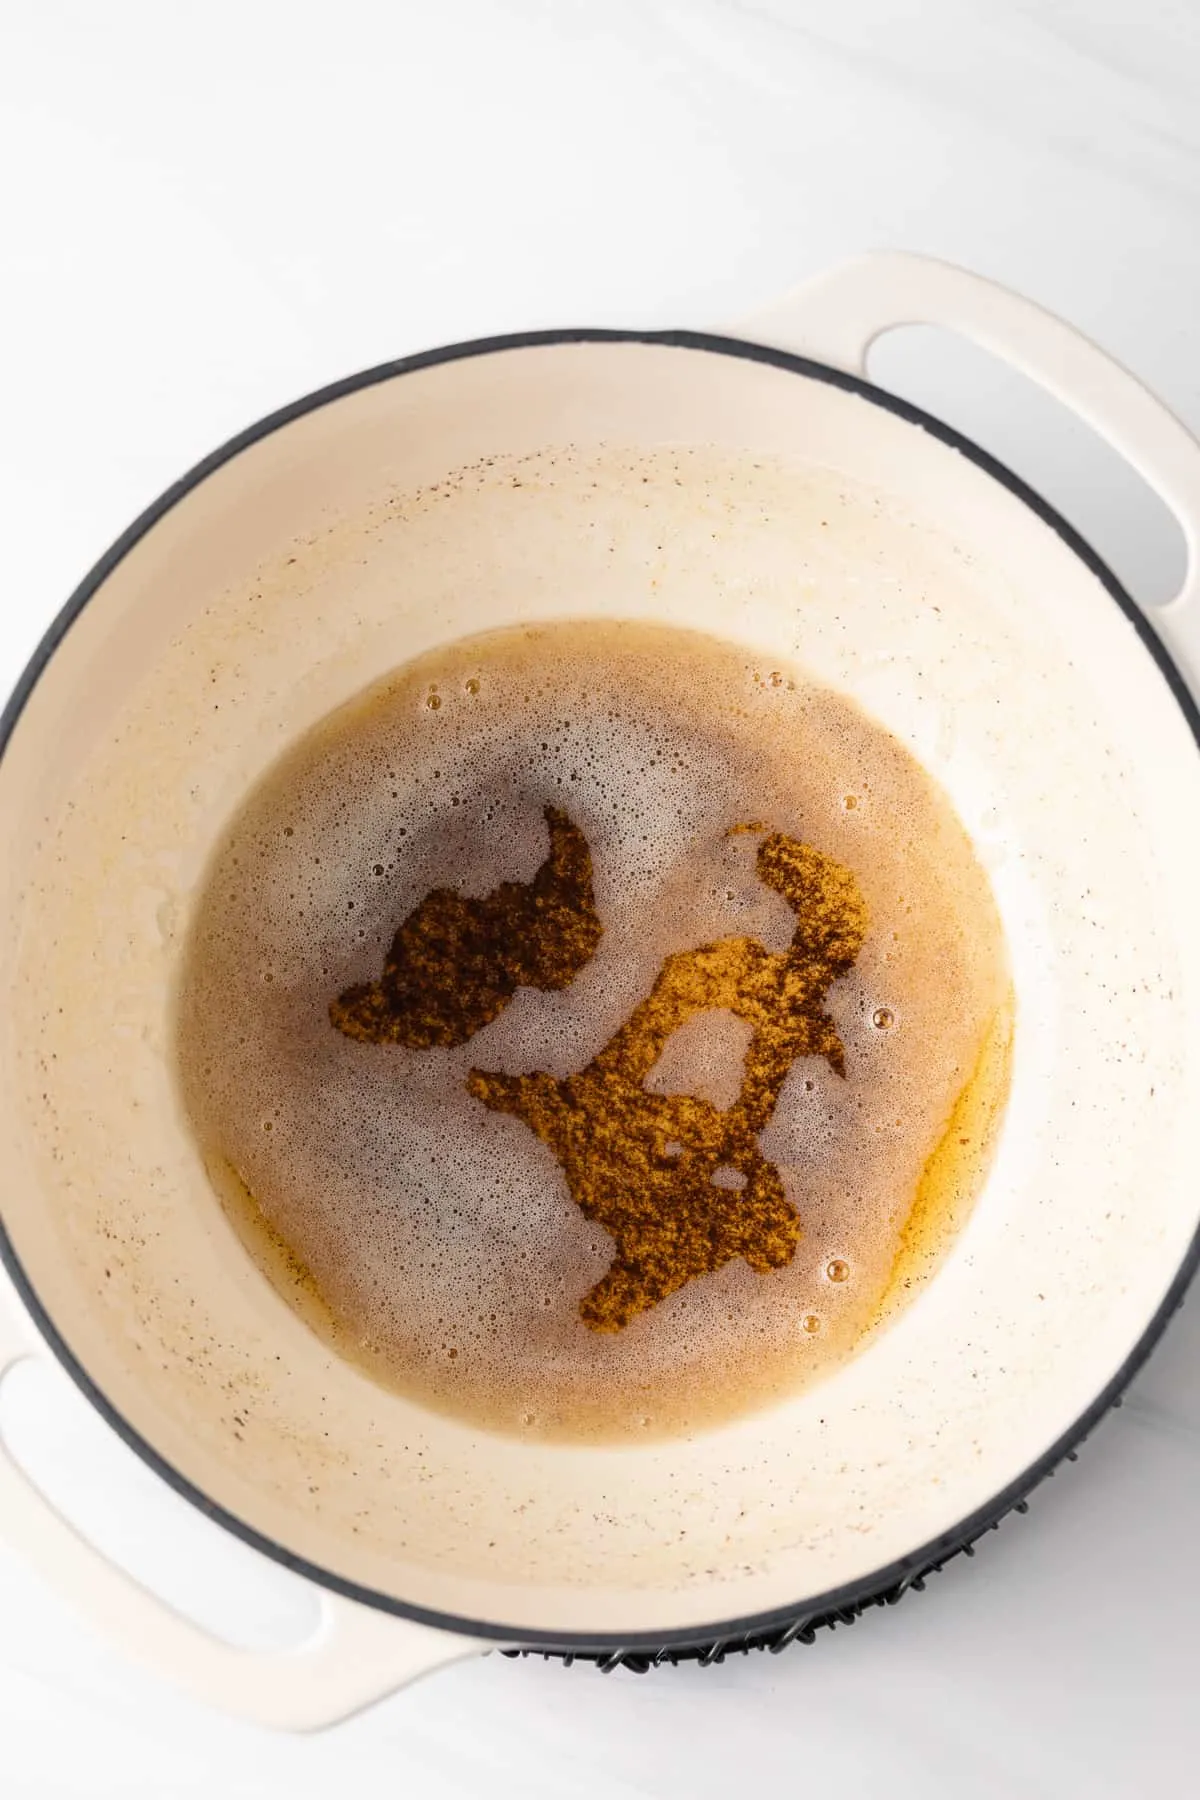
1. Brown the butter
You’ll brown the butter to add flavor to the recipe.
- Prepare a 9×13-inch pan by lightly greasing with cooking spray. Set aside for later.
- In a large pot, melt the butter over medium heat.
- Cook and stir constantly until the butter reaches a light brown color. It will foam prior to turning brown.
2. Melt the marshmallows
You’ll melt the marshmallows to until mostly melted.
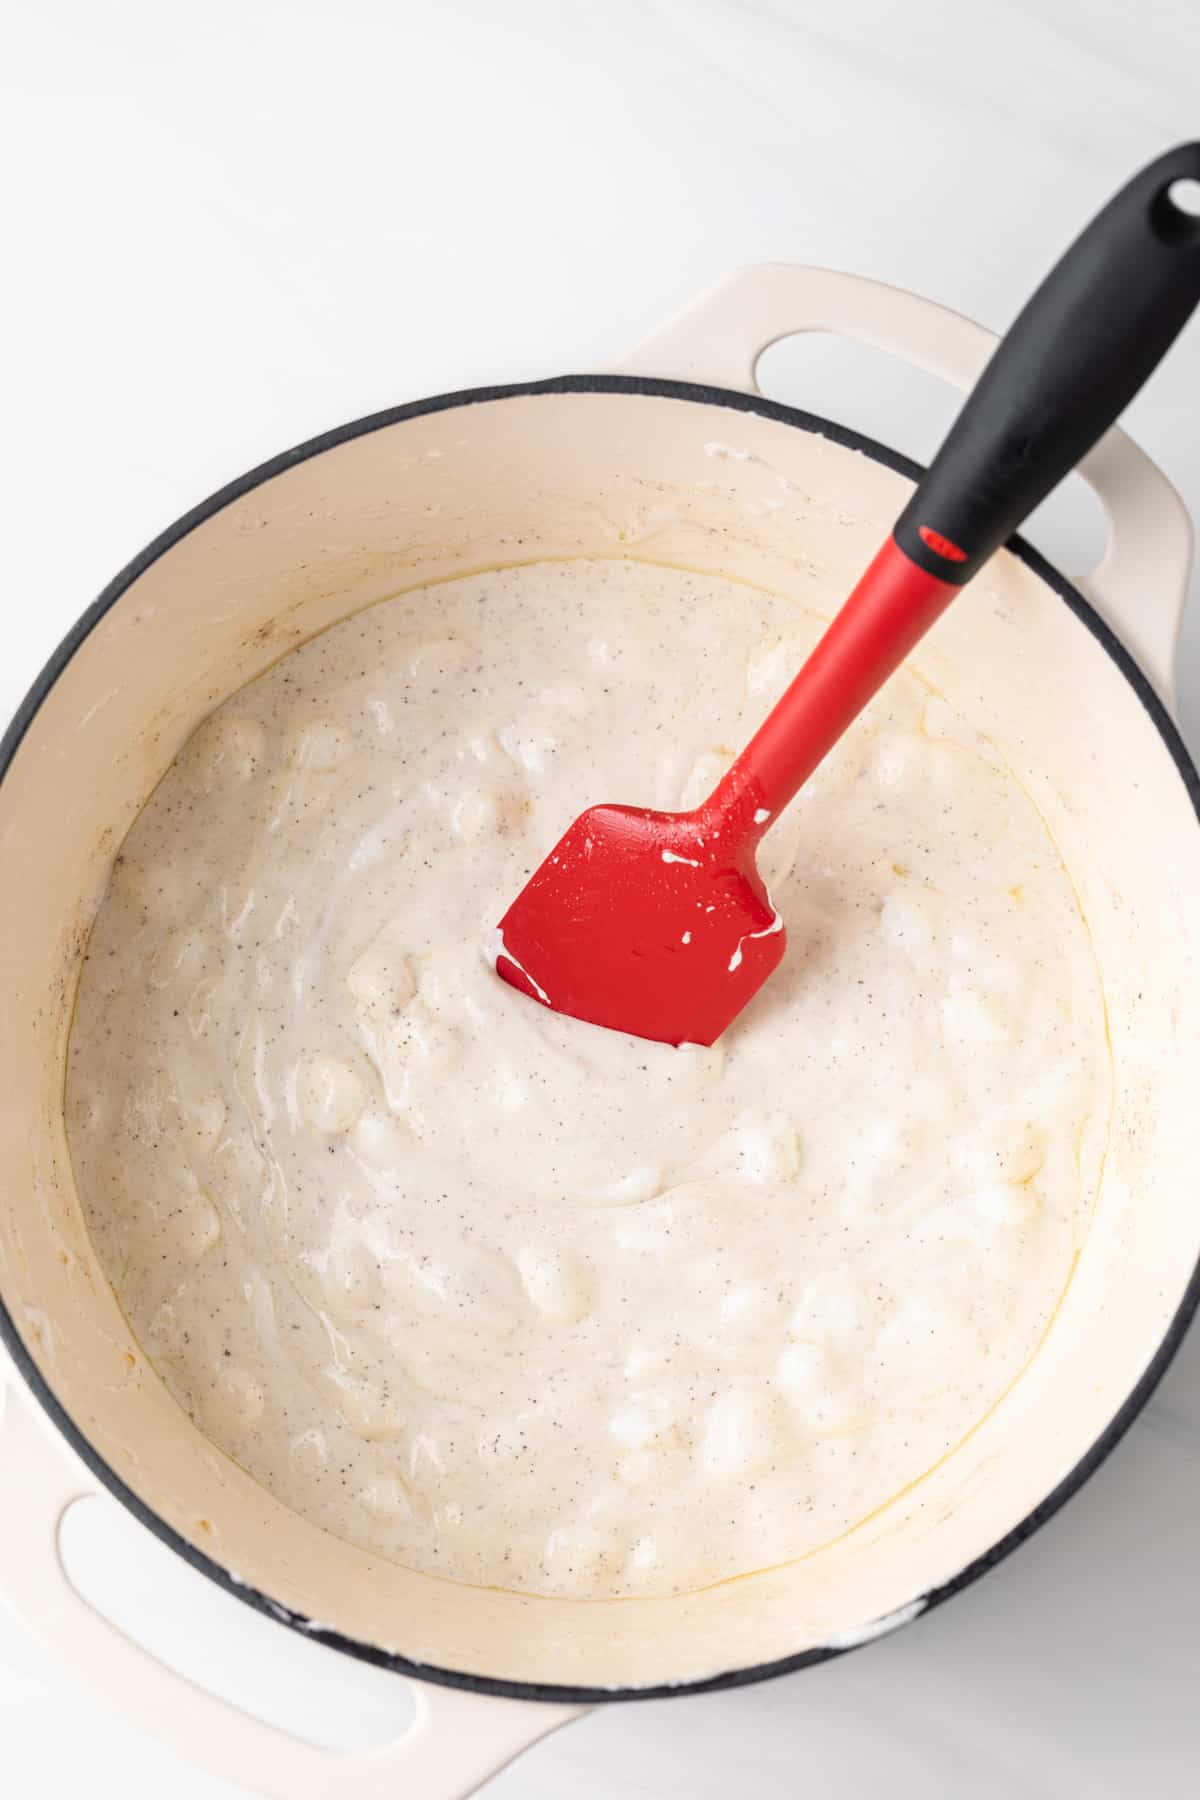
- Reduce the heat. Then, stir in marshmallows.
- Cook and stir constantly until they are mostly melted. A few unmelted ones are OK – this allows for extra gooey treats!
- Then, stir in the salt.
3. Add crispy rice cereal
You’ll add the cereal and coat it with the marshmallow mix.
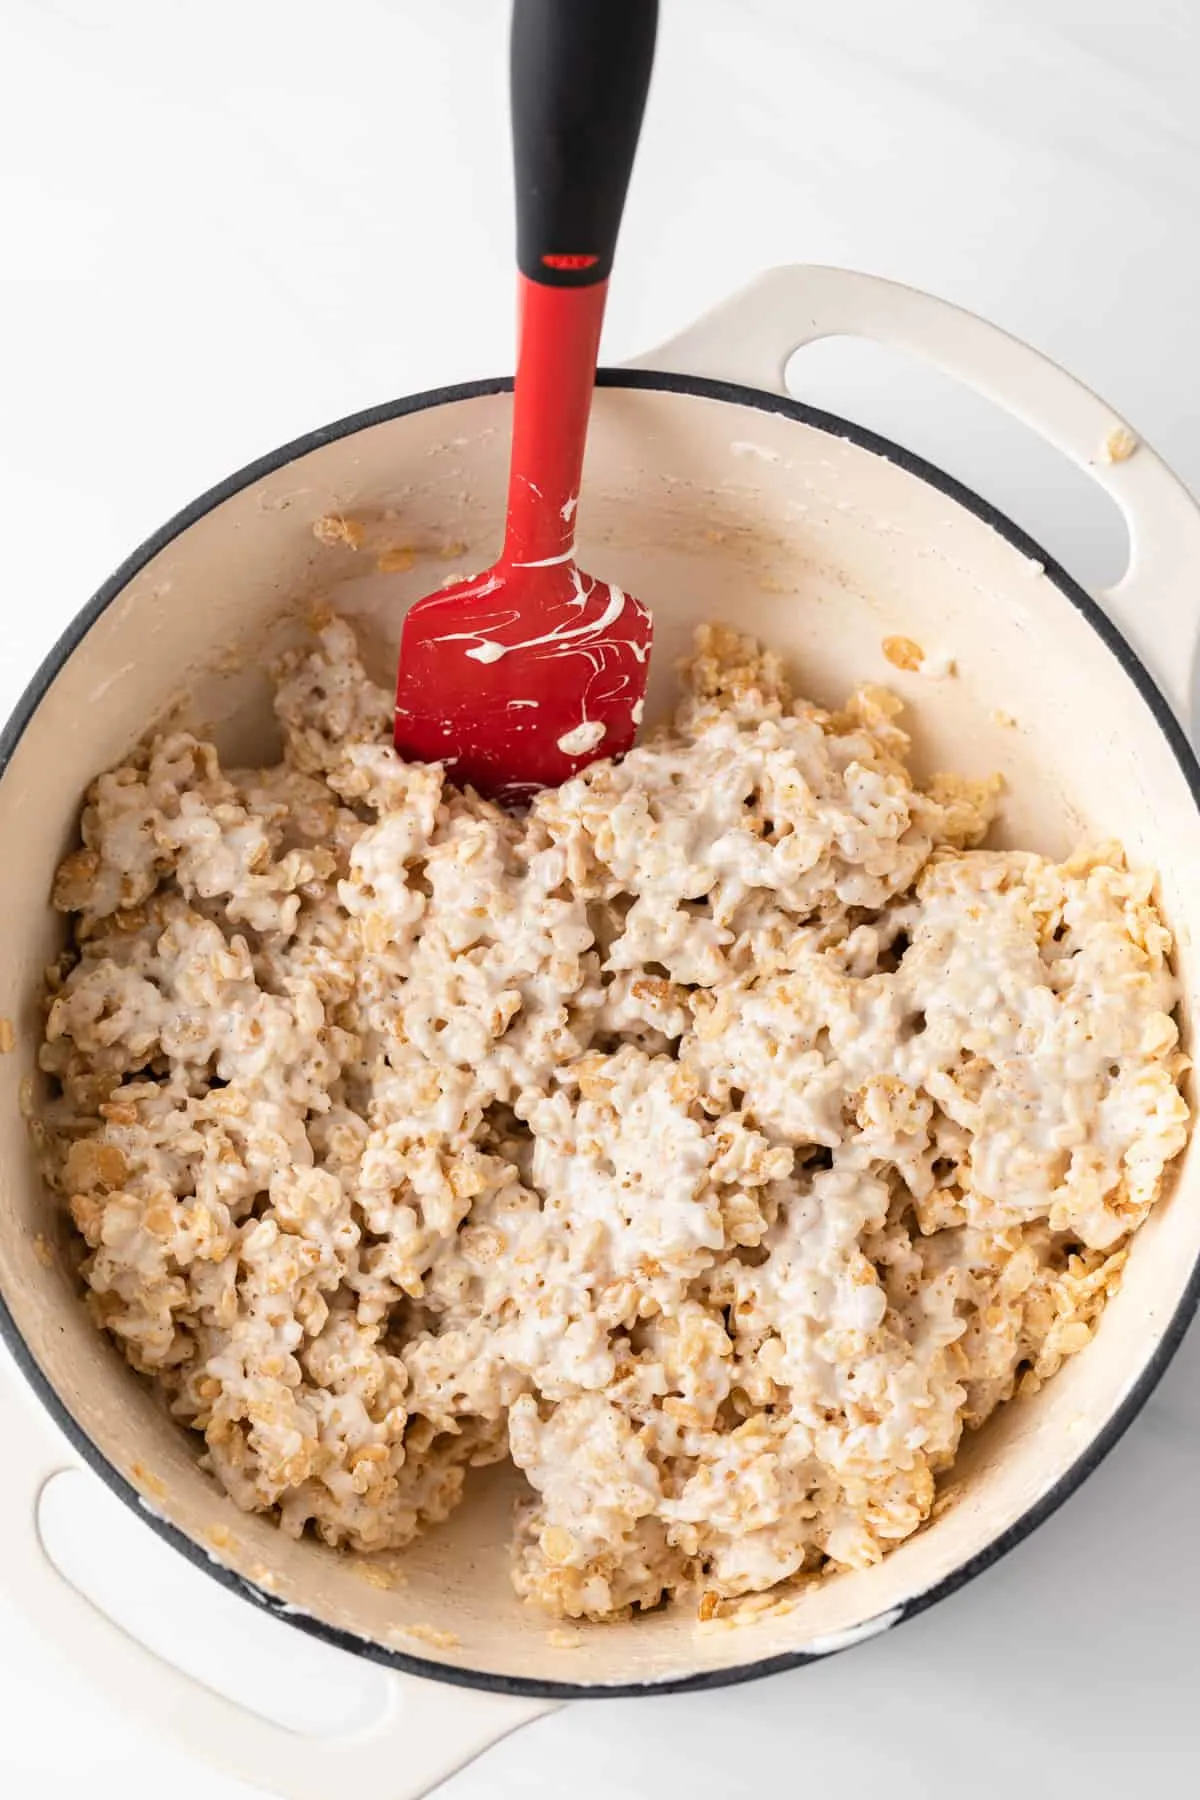
- Add in the rice cereal.
- Gently stir until all of the cereal is coated. Don’t be to rough or the cereal with break into fine bits.
4. Press into pan
You’ll press the rice cereal mix into a pan to achieve the signature rice krispie treats shape.
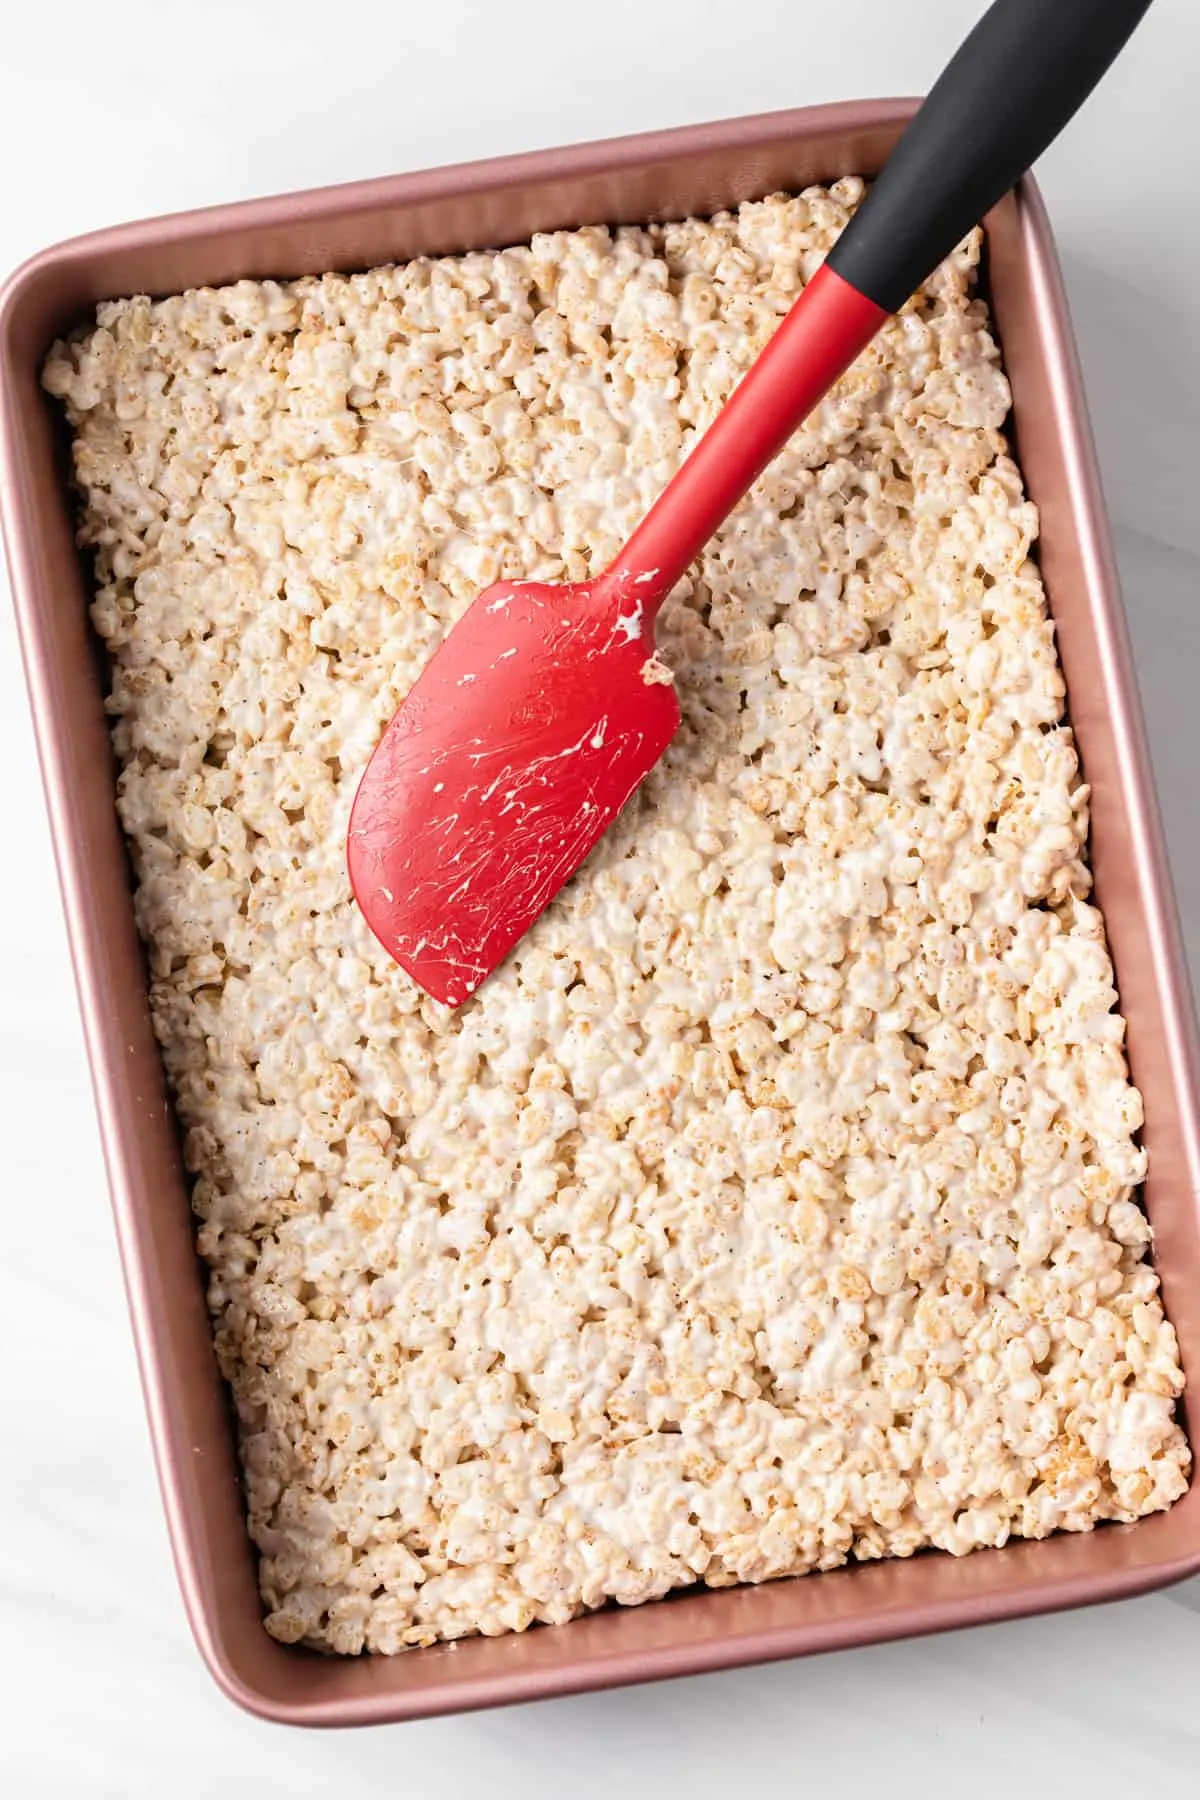
- Using a buttered spatula or wax paper, gently press the mix into the prepared pan.
- Don’t pack it down too firmly. Lightly press it into the baking dish.
- Allow the treats to cool completely at room temperature – about an hour.
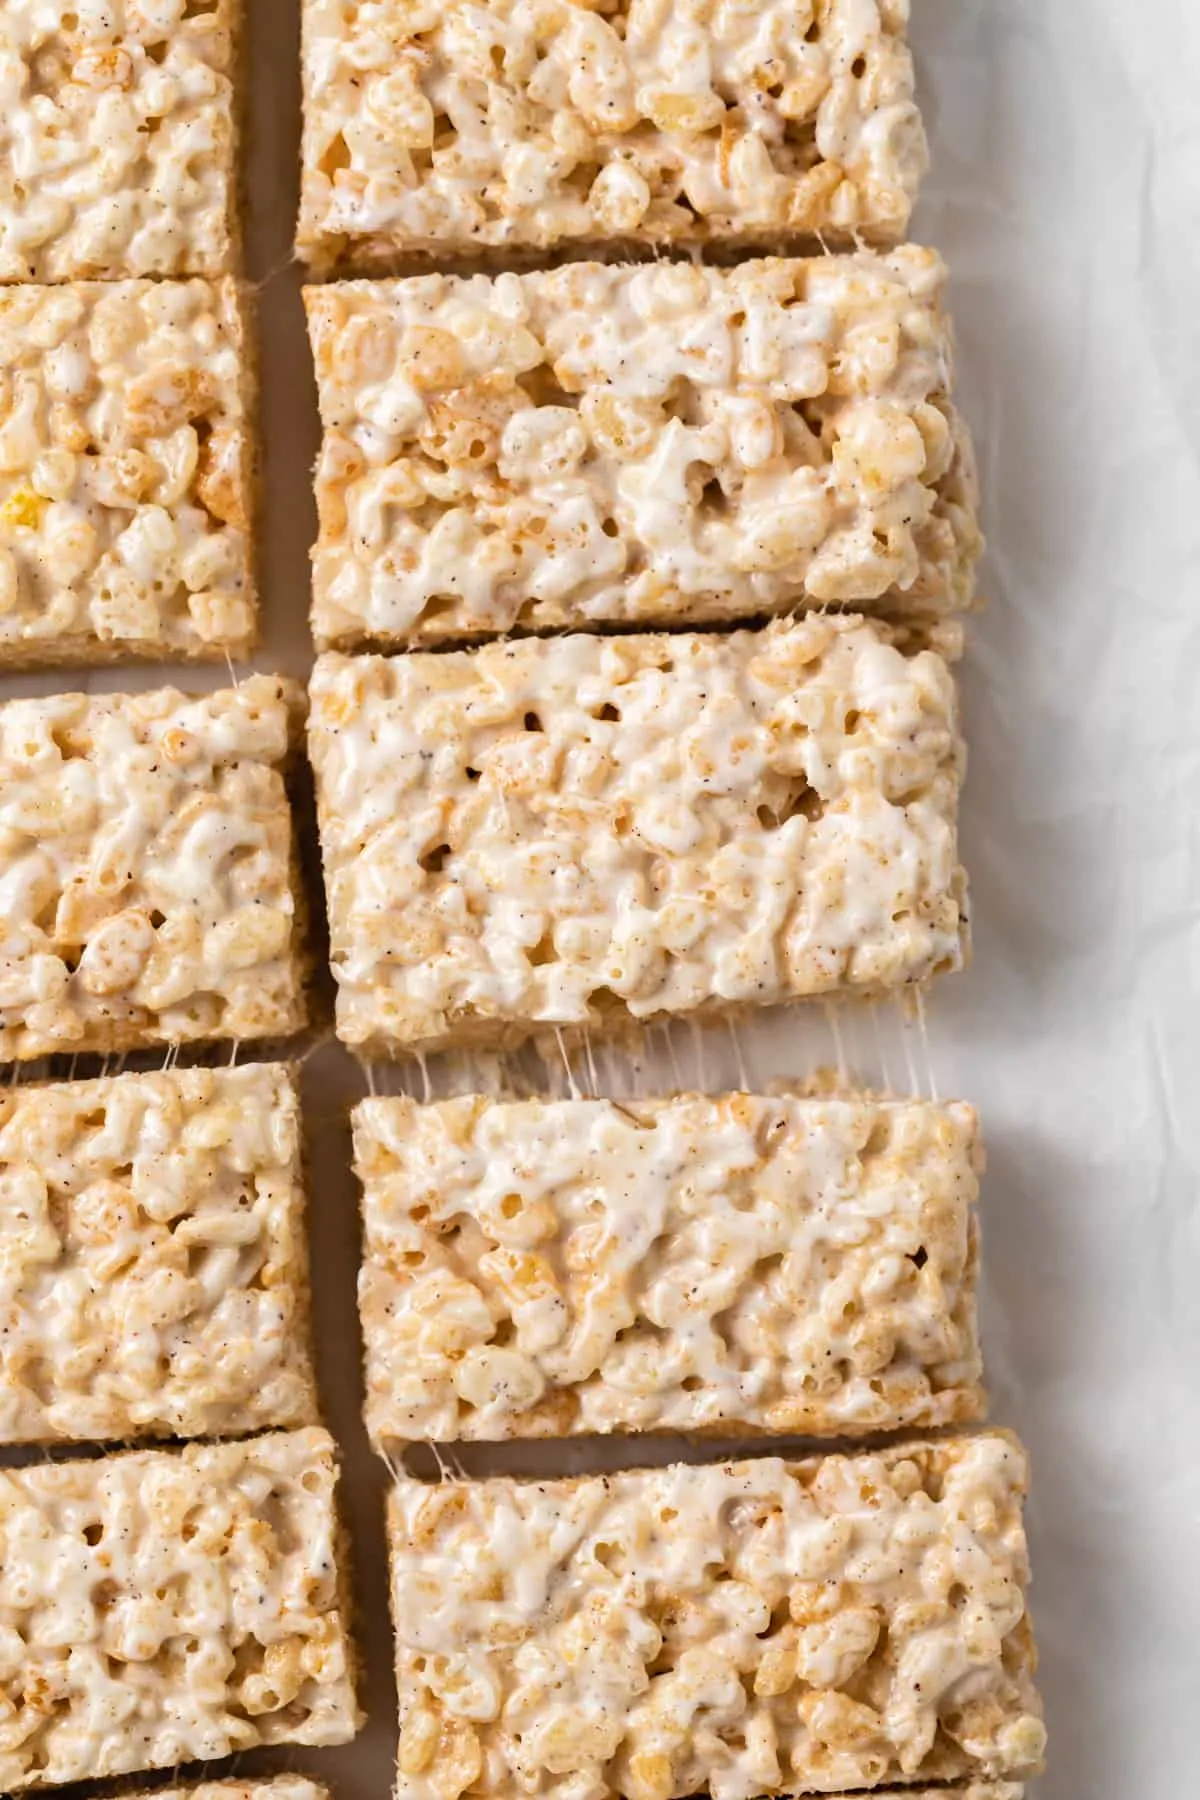
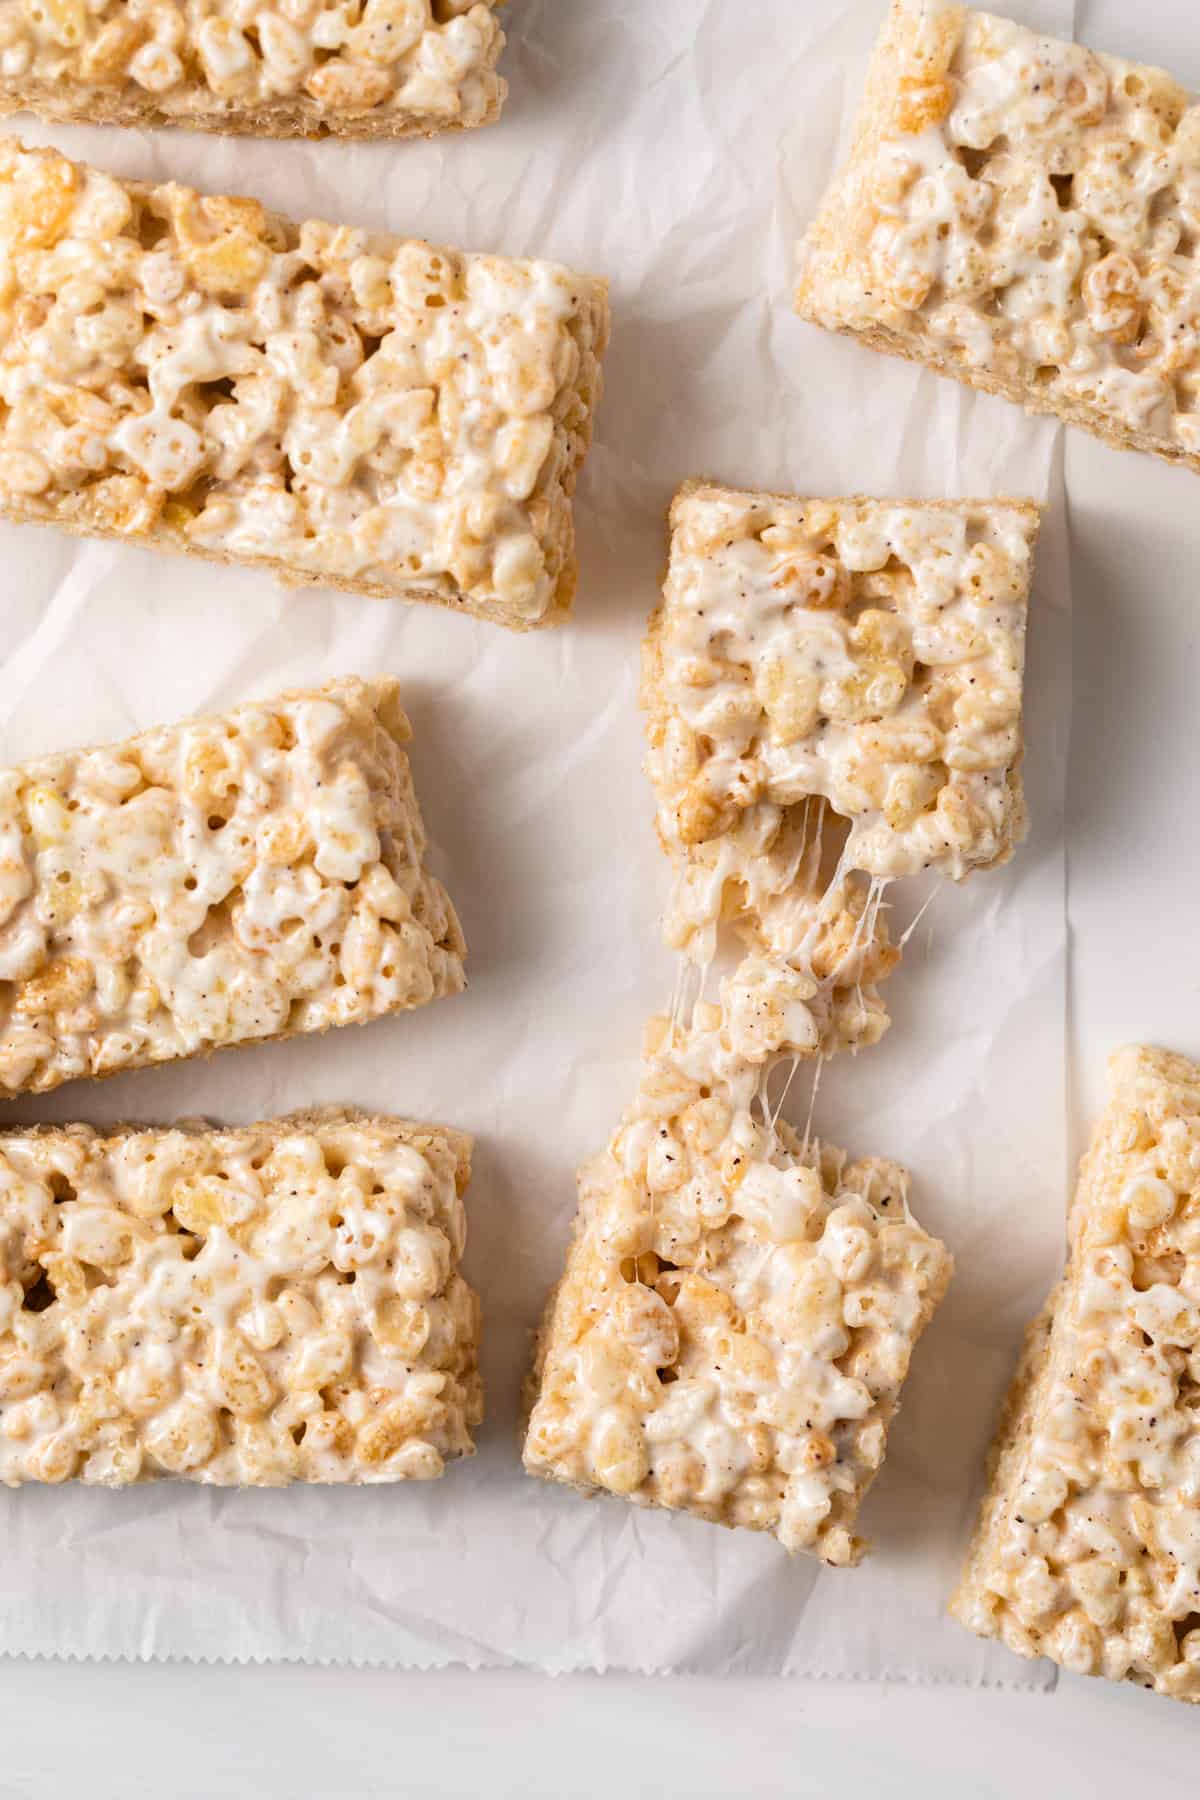
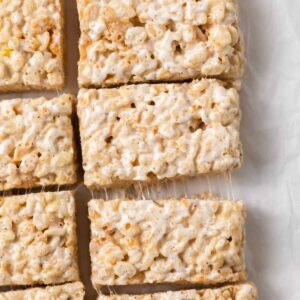
- To cut, invert them onto a cutting board and slice into 2-inch squares. These are best served the same day.
Jen’s Best tips
- If you don’t have mini marshmallows, then use regular-sized ones. Weigh them to equal 396 grams. Then, cut into quarters using kitchen shears.
- While most rice cereal is gluten-free, make sure to check the label if you have a gluten allergy.
- Like thicker squares? Press the treats into a 9-inch square pan instead of a 9×13-inch pan.

Storing & Freezing
To store: Rice krispie cereal treats are best the day you make them. However, they will keep for no more than 3 days wrapped tightly in plastic wrap.
If you need to stack them, place sheets of wax paper between the layers.
Store them at room temperature. Do NOT refrigerate these because it will make them hard.
To Freeze: They can also be frozen for up to 2 months. Layer with wax paper and wrap tightly in plastic wrap.
Then, place in a freezer-safe zip-top bag. When you are ready to serve, thaw at room temperature.
More no-bake recipes to try
Rice Krispie Treats
Ingredients
- ½ cup (113 g) unsalted butter
- 6 cups (180 g) crispy rice cereal
- 9 cups (396 g) mini marshmallows
- ⅛ teaspoon salt
Instructions
- Lightly grease a 9×13-inch pan with cooking spray. Set aside.
- In large saucepan melt butter over medium heat. Cook, stirring constantly until the butter turns light golden brown. It will foam before it starts to brown.
- Reduce the heat to low and stir in the marshmallows. Cook, stirring constantly with a silicone spatula until mostly melted. A few unmelted marshmallows are perfectly okay. Stir in the salt.
- Add the rice cereal and gently stir until all of the cereal is coated with the marshmallow mixture. Remove from heat.
- Using a buttered spatula or wax paper gently press the mixture into the prepared pan. Don’t pack it down too firmly, just lightly press it in.
- Allow the bars to cool completely at room temperature, about 1 hour. Invert them onto a cutting board and cut into 2-inch squares. Best if served the same day.
Notes
- Butter: Unsalted butter is best so you can control the amount of salt added. I don’t like my treats to taste salty so I only add a pinch of salt.
- Cereal: Use any brand of crispy rice cereal just make sure it’s fresh. Stale cereal won’t taste as good! Also, be gentle when mixing it in. If you are too rough, the cereal can break down into a powder.
- Marshmallows: If you don’t have mini marshmallows, use the regular-sized ones. Weigh them to equal 396 grams then cut them into quarters using clean kitchen shears. Also, make sure they are fresh! Stale marshmallows offer subpar results.
- Don’t fully melt the marshmallows. Only heat them just until they are almost fully melted. This will keep the treats extra gooey and they won’t become hard.
- Most rice cereal is gluten-free but double-check the packing if you have a gluten allergy. There’s always a risk of cross-contamination if the company also processes gluten products.
- You can make thicker treats by pressing them into a 9-inch square pan instead of a 9×13.
- While rice krispie treats are best enjoyed the day they are made, they will keep for up to 3 days wrapped tightly in plastic wrap and stored at room temperature. Place sheets of wax paper in between layers if you need to stack them. DO NOT REFRIGERATE! This will make them hard.
- You can also freeze them for up to 2 months. Layer with wax paper and wrap tightly in plastic wrap. Place wrapped treats in a freezer-safe zip-top bag. Thaw at room temperature when ready to serve.
Nutrition
The nutrition information provided is for convenience and as a courtesy only. It is not guaranteed to be accurate because nutrition information can vary for a variety of reasons. For precise nutritional data use your preferred nutrition calculator and input the exact ingredients and brands you used in the recipe.
I made Rice Krispie squares for my grandson’s 5th birthday.
They turned out very delicious just like the picture perfect.
Thank you for sharing.
I m not a baker, but due to pandemic was forced to be one.!!!
Ha ha.???