
How to Make a Basic Vanilla Cake
This post may contain affiliate links. Read the full disclosure here.
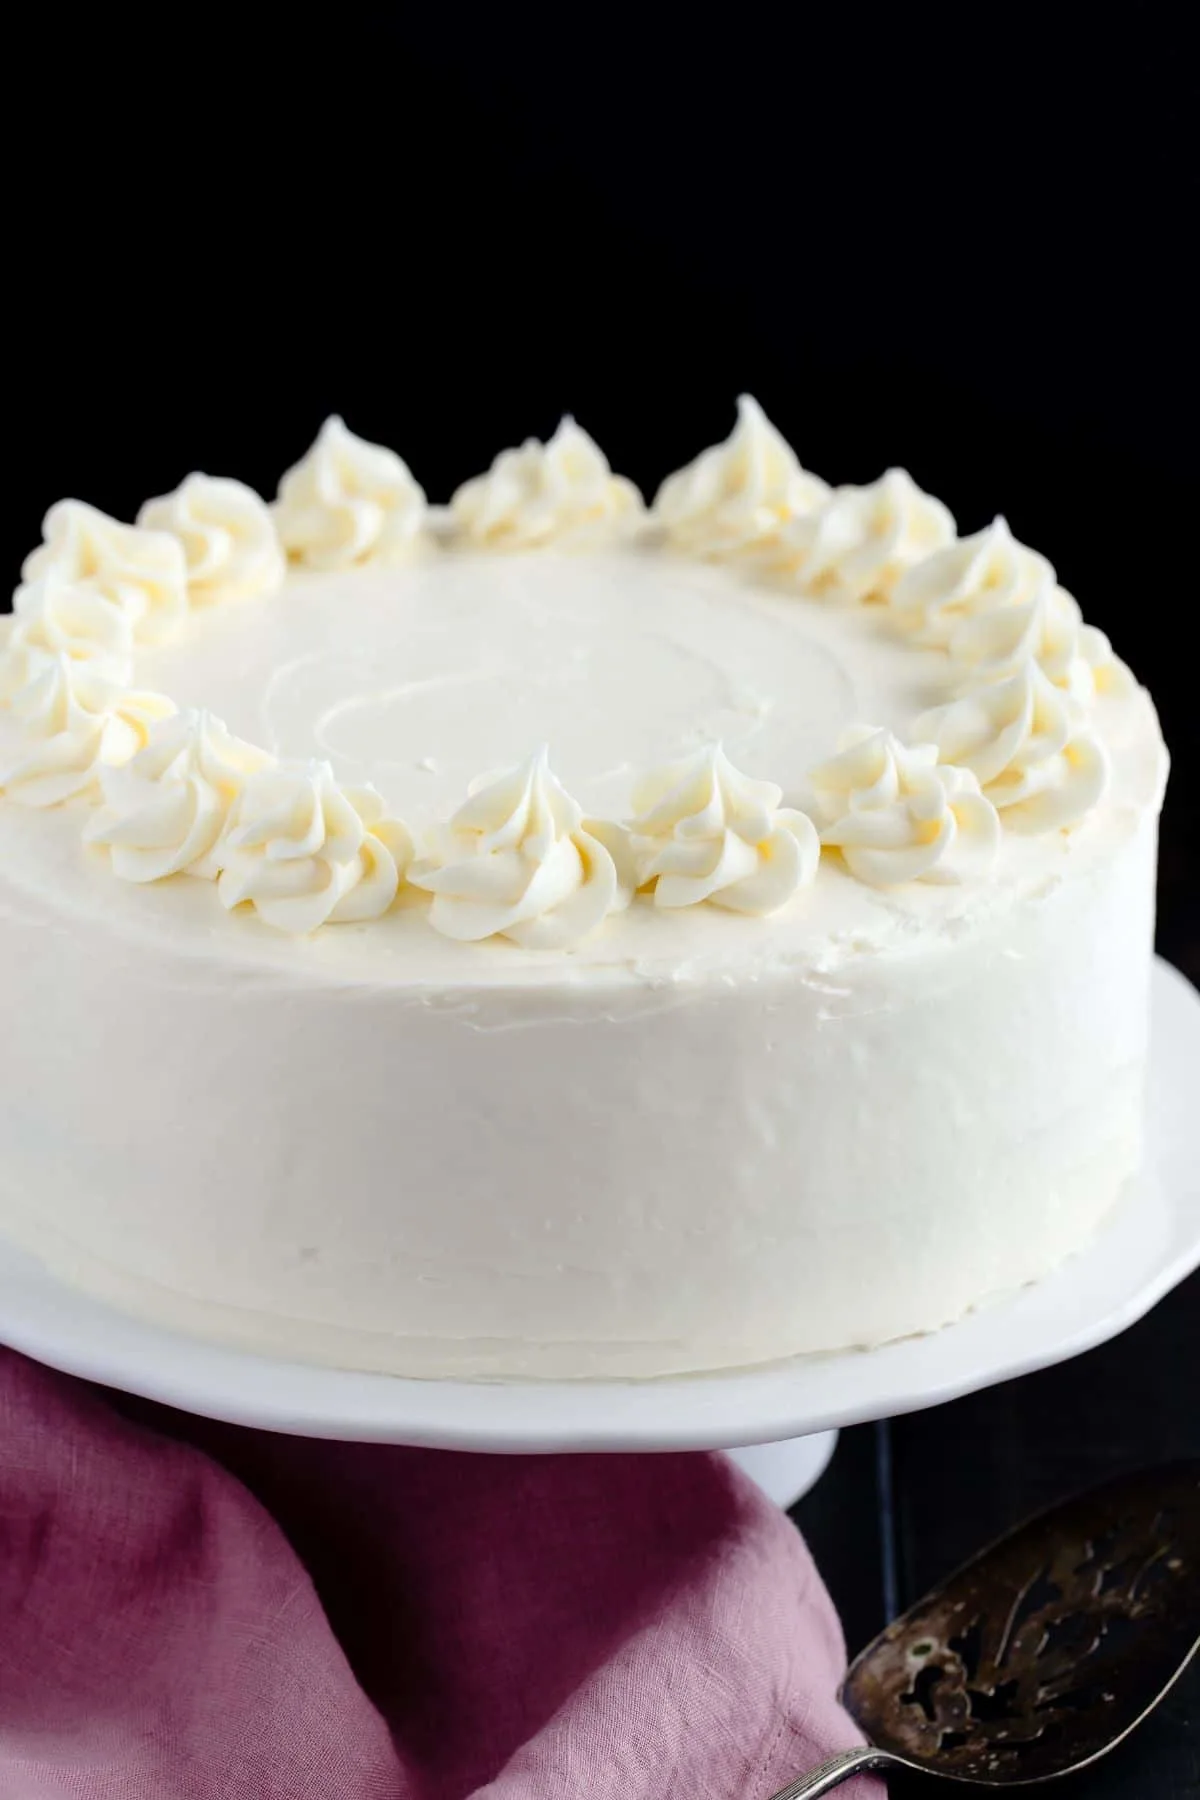
This made from scratch Basic Vanilla Cake recipe is one that must be added to your repertoire. It’s light, tender, and full of vanilla flavor. The buttery, moist texture makes it a great cake for all occasions.

I’ve been on the hunt for a great vanilla cake recipe that I can use over and over again. I tried many and never found one that was wonderful enough to claim a spot on my blog until now.
If you like this version, you may also want to try my vanilla cupcakes and moist white cake recipe. It uses only egg whites instead of whole eggs. Or my mug cake version, madeleines, and cake pops for single and bite-sized servings! Or my chocolate cake if you’d love a chocolate version.
This is the same recipe I used in my “how to make the perfect cake” post. Make sure you follow all the tips I give you in that post to ensure great results every time.
The recipe starts by creaming the butter and sugar together and then adding the eggs. Once that is mixed together well, the flour is added followed by the milk.
The process is easy to remember which makes this simple vanilla cake easy to make. And I’m certain you are going to agree that this is the best vanilla cake recipe!
Why this basic vanilla cake recipe works
- This easy vanilla cake recipe uses the 1-2-3-4 method which is from the 19th century. It’s an easy method to remember the ratio of ingredients. 1 cup of butter, 2 cups of sugar, 3 cups of flour, and 4 eggs.
- I adjusted these quantities slightly to achieve the texture I was looking for. I used half a cup less sugar and a fourth cup less flour. This gave me a lighter cake that isn’t overly sweet.
- Cake flour is used for a fine crumb and delicate cake texture.
Vanilla cake ingredients
As mentioned above, this cake uses standard pantry ingredients. But choosing quality ingredients is key to a great tasting cake with the best texture. Let’s go over those ingredients in detail.
- Butter: Unsalted butter that is softened to room temperature will cream perfectly with the sugar.
- Sugar: Granulated white sugar is what works best.
- Eggs: I use 4 whole eggs in my cake recipes.
- Vanilla: Look for high-quality vanilla to use. I prefer Nielsen-Massey Madagascar Bourbon Pure Vanilla or you can make your own vanilla.
- Flour: Bob’s Red Mill Super Fine Cake Flour is the best and will ensure the cake has the best texture.
- Leavening: Baking powder is used to give the cake rise.
- Salt: Salt helps to balance the sweetness.
- Milk: Whole milk works best but you can also use buttermilk.
How do you make a cake from scratch?
Making a cake at home is incredibly easy! This recipe uses the creaming method to emulsify the ingredients. This also incorporates air to give the cake a light and fluffy texture.
The Batter – It’s important to set the cold ingredients out for about 1 hour before you begin. The butter, eggs, and milk must be at room temperature in order for them to blend together properly.
The Frosting – The frosting is my very favorite basic vanilla buttercream. I have a dedicated post for the frosting. Be sure to pop over and read all my tips for silky smooth frosting that isn’t overly sweet tasting.

Step 1: Gather the ingredients and preheat the oven
It is essential to use butter, eggs, and milk that are at room temperature. Room temperature ingredients will combine more easily, giving you a properly emulsified batter.
Set the butter, eggs, and milk out on the counter 1 hour before you plan to make the cake. Measure out all the other ingredients and have them ready to use.
Prepare your stand mixer with the paddle attachment or handheld mixer with beaters. Lightly grease and flour two 9-inch round cake pans and line the bottoms with parchment paper. Preheat the oven about 30 minutes before you begin making the batter.
Step 2: Cream the butter and sugar together
The butter must be room temperature in order for it to cream properly with the sugars. This is why it is so important to set it out 1 hour ahead of time.
Use a stand mixer fitted with the paddle attachment to beat the butter and sugar together. You’re looking for a light and fluffy texture.
It should appear lighter in color and double the sized in volume once it has been creamed properly. This can take 5 to 10 minutes.

Step 3: Add the eggs and vanilla
Make sure the eggs are at room temperature or they’ll cause the batter to curdle.
Add one egg at a time and beat the batter well after each addition. Then beat in the vanilla extract.

Step 4: Add the dry ingredients
In a small bowl, combine the flour, baking powder, and salt. Use a whisk to stir everything together well.
Sift the flour mixture into the butter mixer. This will remove any lumps from the cake flour so it incorporates into the batter.
With the mixer on low speed gradually pour in the milk. Continue to beat the batter just until all the flour is incorporated. Take extra care to not overmix.

Step 5: Bake the cake
Divide the cake batter evenly between the two pans. Bake the cake for 20-30 minutes. Just until a toothpick inserted into the center comes out with only a few moist crumbs attached.
I suggest starting to check for doneness at around 15 minutes since ovens can vary in temperature.


Cool the cake layers in the pan for 10 minutes then invert them onto a wire rack to cool completely. Once cooled, make the frosting and frost the cake.

Vanilla Cake FAQ’s
Can I bake this cake in 3 8-inch round pans instead of 2 9-inch pans?
Yes, you certainly can. The recipe yields enough batter to fill 2 9-inch pans, 3 8-inch pans, or 24 muffin cups.
The bake time will vary slightly. Start checking the cakes about 5-7 minutes sooner than the time listed in the recipe.
How do I adjust the recipe for it to work at high elevation?
I have zero experience baking at high altitudes so I don’t feel comfortable giving advice for this. However, a reader who lives 5,000 feet above sea level made the following changes:
- 3 cups sifted cake flour
- 4 large eggs
- 1-¼ cups whole milk
- 2 teaspoons baking powder
- 1 teaspoon salt
All the other ingredients listed in the recipe stayed at the same amounts. Baked in 2 8-inch round cake pans at 375°F for 25 minutes.
She said the cake was delicious and has already been requested to be made again.
How do I make a cake more moist?
First, make sure you’ve followed all my tips on how to make the perfect cake. Second, keep a close eye on it during baking. Check it with a wooden toothpick.
- If the toothpick comes out with wet batter on it, it needs more baking time.
- If the toothpick comes out with a few dry crumbs, it is perfectly baked and needs to be removed from the oven.
- If the toothpick comes out completely clean, it has baked too long and will result in a dry cake.
Start checking the cake about 5-7 minutes before the suggested bake time.
If you like this basic vanilla cake recipe, try these others:
- Birthday Cake
- Marble Cake
- Lemon Raspberry Cake
- Lemon Blueberry Bundt Cake
- Effortless Angel’s Food Cake
Basic Vanilla Cake Recipe
Ingredients
For the cake
- 1 cup (226 g) unsalted butter, softened
- 1 ½ cups (300 g) granulated sugar
- 4 large eggs, room temperature
- 1 tablespoon vanilla extract
- 2 ¾ cups (330 g) cake flour
- 2 ¾ teaspoons baking powder
- ½ teaspoon salt
- 1 cup (240 ml) whole milk, room temperature
For the frosting
- 1 ½ cups (339 g) unsalted butter, softened
- 5 ½ cups (660 g) confectioners' sugar, sifted
- 1 tablespoon vanilla extract
- ¼ teaspoon salt
- 6 tablespoons heavy cream, room temperature
Instructions
Make the cake
- Preheat the oven to 350°F. Lightly grease the sides and bottom of 2 9-inch round cake pans. Line the bottoms with parchment paper cut to fit and generously grease the parchment paper as well. Dust the pans with flour then tap out any excess; set aside.
- In a large bowl, beat the butter and sugar together until light and fluffy, about 5 minutes. Add the eggs, one at a time, mixing well after each addition. Beat in the vanilla.
- Combine the flour, baking powder, and salt in a medium bowl. Stir with a whisk and add it to the butter mixture followed by the milk. Beat on medium-low speed just until combined.
- Divide the batter evenly between the prepared pans. Bake for 20-30 minutes or until a toothpick inserted into the center comes out with few moist crumbs attached. Take care to not over-bake. Check the cake at 15 minutes to see how it is doing and judge the timing from there.
- Cool for 10 minutes. Remove from pans and cool completely on a wire rack.
Make the frosting
- In the bowl of a stand mixer fitted with the paddle attachment or a large mixing bowl with a handheld electric mixer, beat the butter on medium-high speed until creamy and pale in color, about 5 minutes.
- Add half the confectioners’ sugar and beat on low speed just until the sugar has fully moistened, then turn the speed up to medium-high and beat until well incorporated, about 3-5 minutes.
- Add the remaining confectioners’ sugar and beat on low speed just until the sugar has fully moistened, then turn the speed up to medium-high and beat until well incorporated, about 3-5 minutes.
- Add the vanilla and salt. Turn the mixer on low speed and slowly add 3 tablespoons of the heavy cream. Turn the mixer up to medium-high and beat until the cream is well incorporated, about 3-5 minutes. (After 2 minutes stop and scrape down the sides and bottom of the bowl then continue mixing.)
- Check the consistency of the frosting and add more cream, ½ tablespoon at a time, if needed. The frosting should be soft and spreadable but not so loose that it doesn’t hold its shape.
Assemble the cake
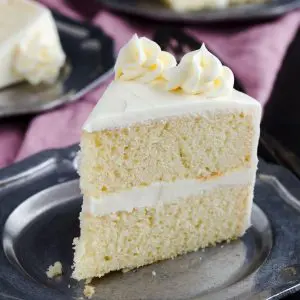
- Place one layer on a serving platter. Spread about ⅓ of the frosting over the top.
- Gently place the second layer on top of the frosting. Spread remaining frosting over the top and sides of the cake.
Notes
- Cake flour: Cake flour is finer and will produce a tender soft tender crumb. The recipe was formulated to use this flour. The results will not be as intended if all-purpose flour is used. You can use my homemade cake flour instead.
- Room temperature ingredients: Make sure to use room temperature ingredients. Cold eggs will be difficult to thoroughly mix in and will cause the cake to be dense.
- Properly measure: Measure the flour by lightly spooning it into the measuring cup then level the cup with the back of a knife. Or use the weight measurements.
- Don’t overbake: Start checking the cake 5-7 minutes sooner than the bake time listed. Insert a toothpick into the center of the cake to test for doneness.
- If the toothpick comes out with wet batter on it, it needs more baking time.
- If the toothpick comes out with a few moist crumbs on it, it’s perfectly baked and needs to be removed from the oven.
- If the toothpick comes out completely clean, I’m sorry to say, you’ve overbaked the cake and it will be dry.
- Bake the cake in 3 8-inch round pans for 15-25 minutes, 2 12-cup muffin pans for 15-18 minutes, or a 9×13-inch pan for 30-35 minutes. If you wish to make changes other than these, please consult this guide for how to convert pan sizes.
- You can change the flavor of the cake by adding your favorite extract or essence.
- This cake can be transformed into a Moist White Cake by using egg whites instead of whole eggs.
- Wrap baked and cooled cake layers tightly in plastic wrap and store them in the refrigerator. Assemble and frost the cake within 2 days.
- Or layers can be triple wrapped in plastic wrap and frozen for up to 2 weeks. Leave wrapped and set on the counter to thaw slightly before use.
- The frosting will keep for up to 2 weeks stored in the refrigerator in an airtight container. You must let the buttercream come to room temperature by setting it out on the counter for a couple of hours, then beat it with an electric mixer if needed.
- Once the cake has been assembled, cover it and keep it stored in the refrigerator for up to three days. Bring it to room temperature just before serving.
- The frosted cake can be frozen for up to 2 months. Thaw it overnight in the refrigerator and let it come to room temperature just before serving.
Nutrition
The nutrition information provided is for convenience and as a courtesy only. It is not guaranteed to be accurate because nutrition information can vary for a variety of reasons. For precise nutritional data use your preferred nutrition calculator and input the exact ingredients and brands you used in the recipe.
Adapted from Bigger Bolder Baking.
I’ve made this twice. Both times came tastey but super cornbready and dense. Any tips?
I have an entire post on how to make the perfect cake. I suggest reading through all those tips and make sure you are using room temperature ingredients that are measured correctly.
I’ve made this twice. Both times came tastey but super cornbready and dense. Any tips?
I’m so happy you enjoyed it!
I baked this cake and it’s definitely made its way onto my top 3 recipes!! I used a browned butter glaze instead of the buttercream. Everything about it was perfect, thank you!
I’m so happy you enjoyed it!
I baked this cake and it’s definitely made its way onto my top 3 recipes!! I used a browned butter glaze instead of the buttercream. Everything about it was perfect, thank you!
I’m looking forward to making this for my Mom’s 78th birthday tomorrow. A stupid question for you…if I want to double the recipe why do you suggest using the measurements in grams instead of just doubling it in cups?
Thanks for your help!
Weighing the ingredients ensures you are using the accurate amount since cups can vary in weight depending on how you filled them.
So I made this recipe for two round 9” and it came out delightful! I have them in the freezer and wanted to see if you had a recommendation for measurements to add one additional 9” and 3 6” because I plan to do a two tier cake. I was going to split half in the 9” but I am not sure the other half will equally fill 3 6” pans? Thank you so much!
Here’s a great resource for converting pan sizes. According to this, you could fill 2 of the 6-inch pans with the remaining half of the batter. You could still divide it among three pans but the cakes will not be as tall.
Thank you!!
So I made this recipe for two round 9” and it came out delightful! I have them in the freezer and wanted to see if you had a recommendation for measurements to add one additional 9” and 3 6” because I plan to do a two tier cake. I was going to split half in the 9” but I am not sure the other half will equally fill 3 6” pans? Thank you so much!
I am making a 3d egg shaped cake. I’m using the silicone Easter pans, turning them into a Hatchimal. It’ll stand up on its end. Will this cake stand up well or is it too light and fluffy?
This cake is fairly sturdy. If you’re planning on stacking layers and carving out the egg shape, it should work fine.
I made this cake for my sons birthday this last weekend. I only added 1 cup of sugar because I find things too sweet, and it turned out pretty good. The texture is a little like sponge cake, but the flavor is really good. My boys really like it. I might have baked it a tad too long. I used 10 inch baking pans and the cake is flatter than the picture. I was also at the end of the baking powder so maybe it was played out. Next time I’ll for sure use 9 inch pans. I loved reading all of the questions and comments. Thanks for a great recipe!
Yes, with a larger pan, the cakes will no be as tall.