
Peppermint Fudge Cake
This post may contain affiliate links. Read the full disclosure here.
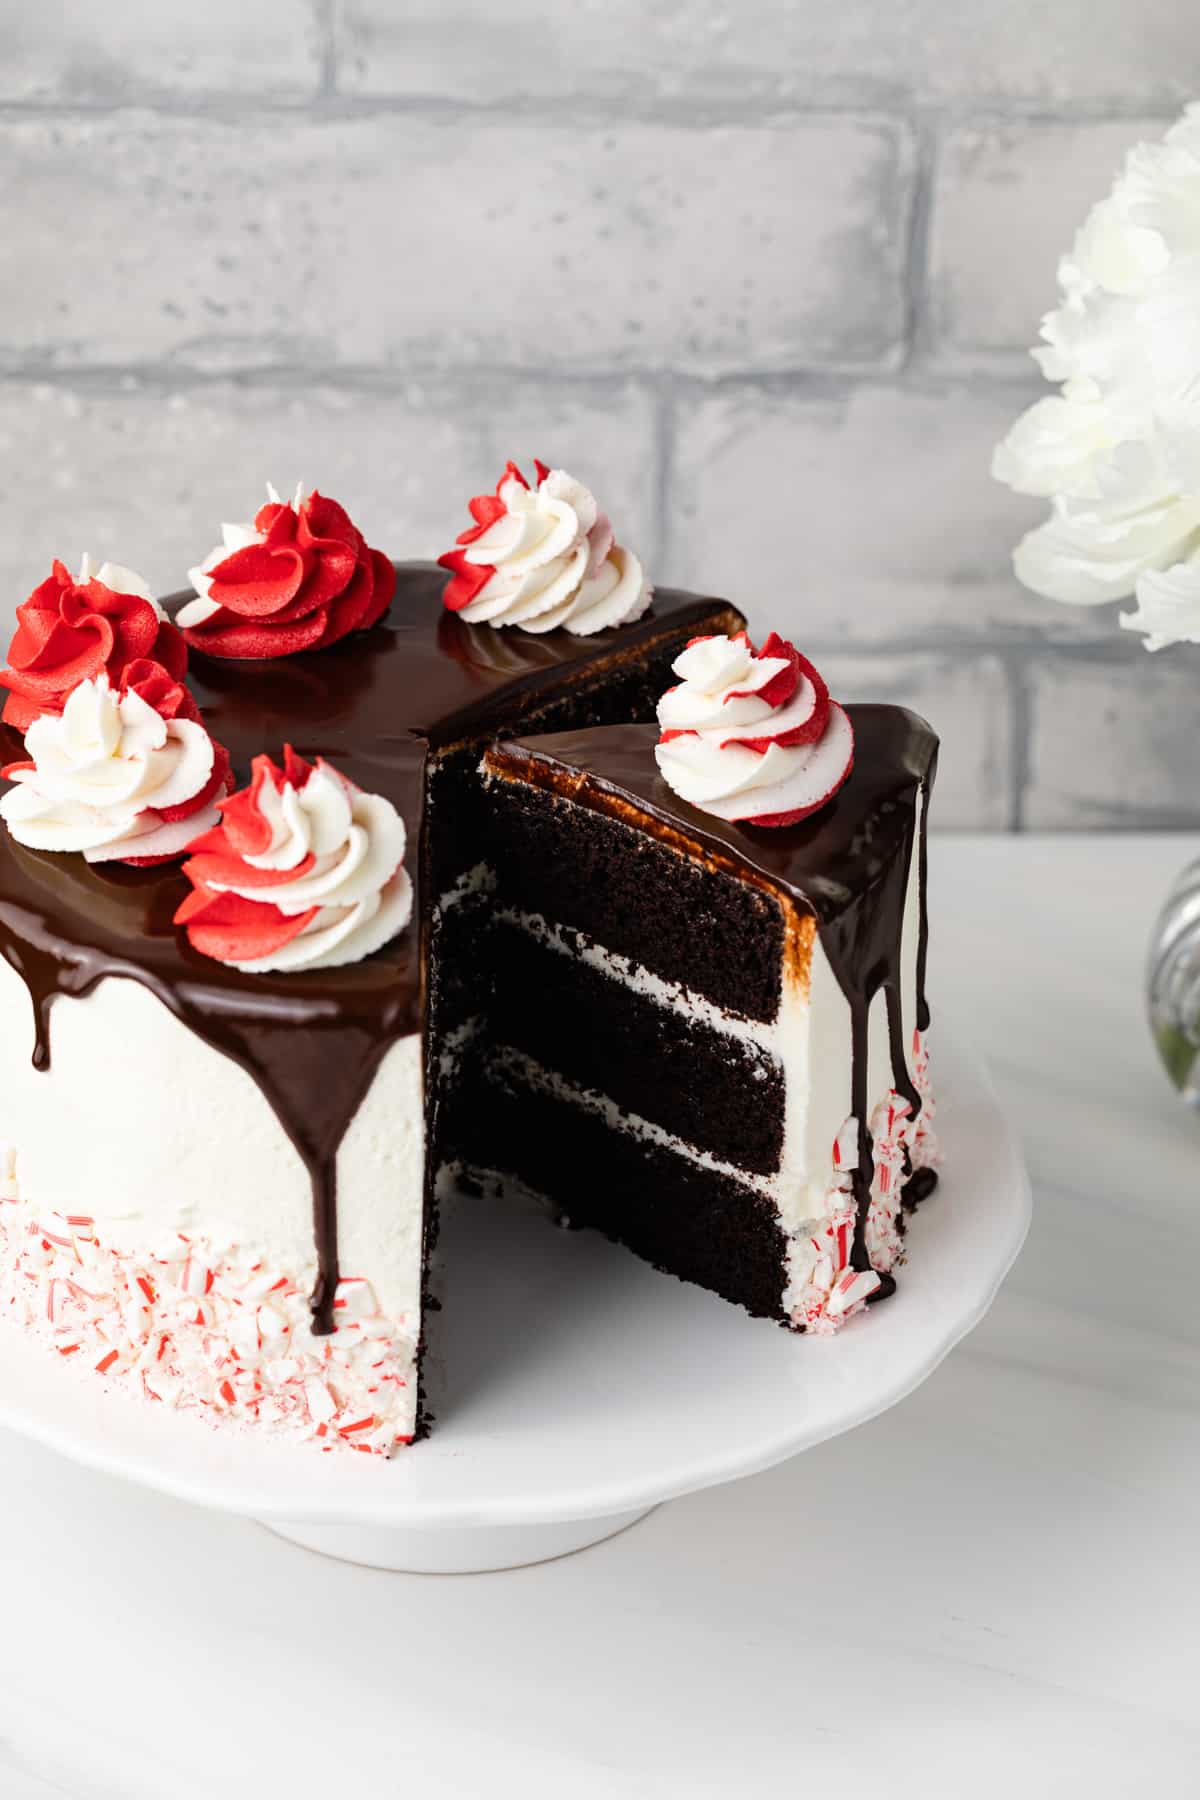
A triple layer cake with luscious buttercream frosting and chocolate ganache, this Peppermint Fudge Cake is the ultimate Christmas dessert. It’s rich, decadent, and guaranteed to steal the show!
A Decadent Holiday Cake
Isn’t this Peppermint Fudge Cake stunning? It screams holiday just like my yule log cake and peppermint meringue cookies!
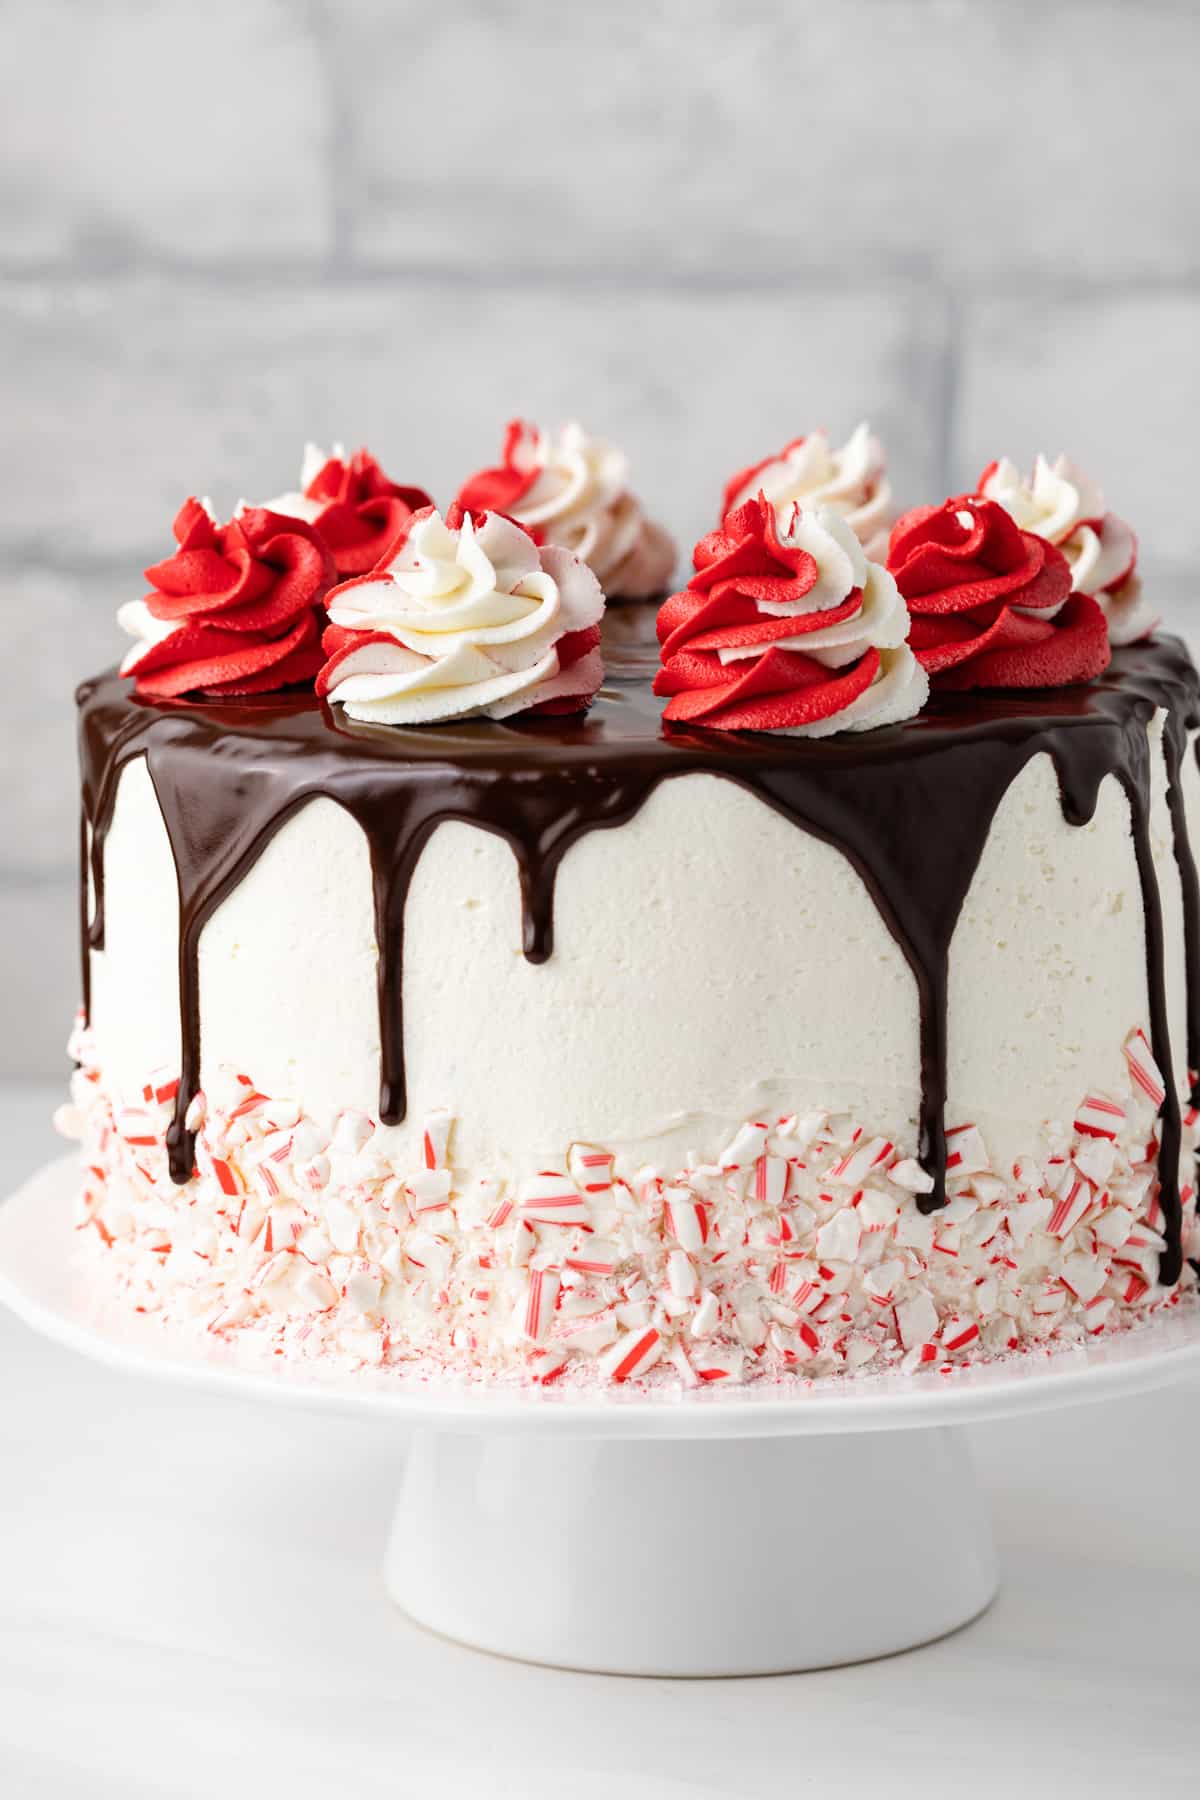
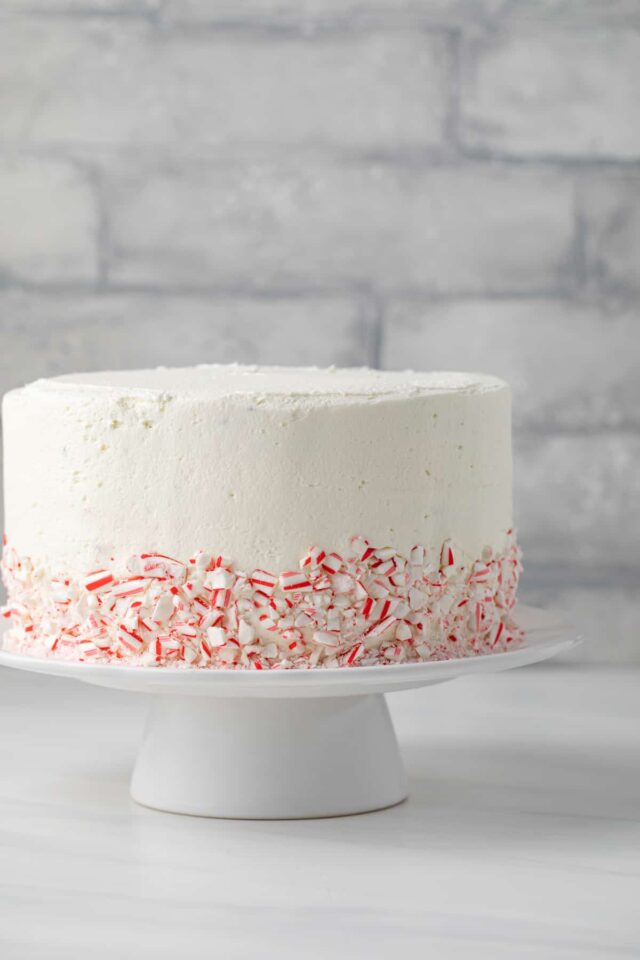
The cake is coated in a thin layer of peppermint frosting as well and decorated with crushed candy cane all around the sides.
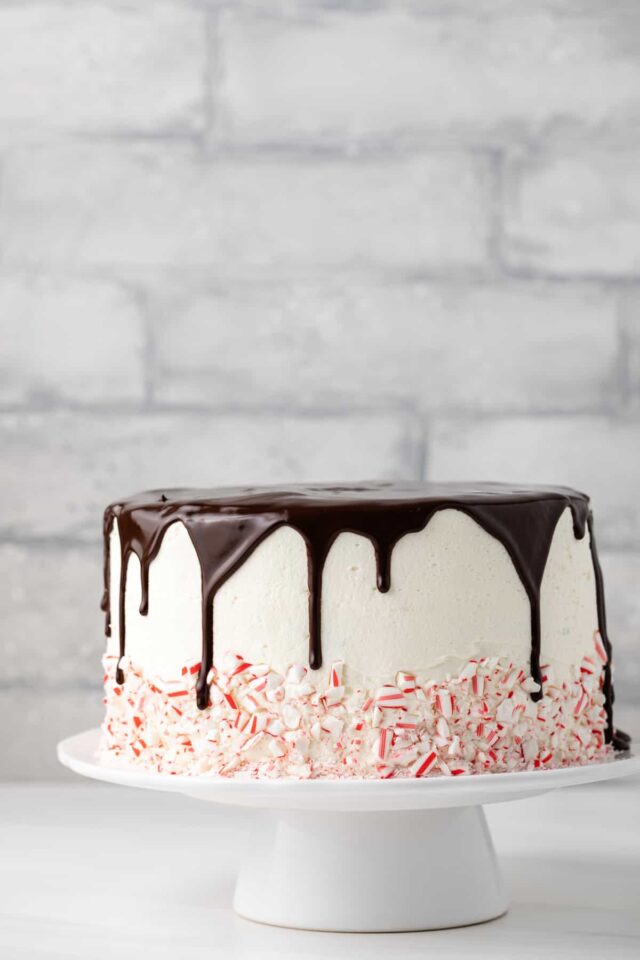
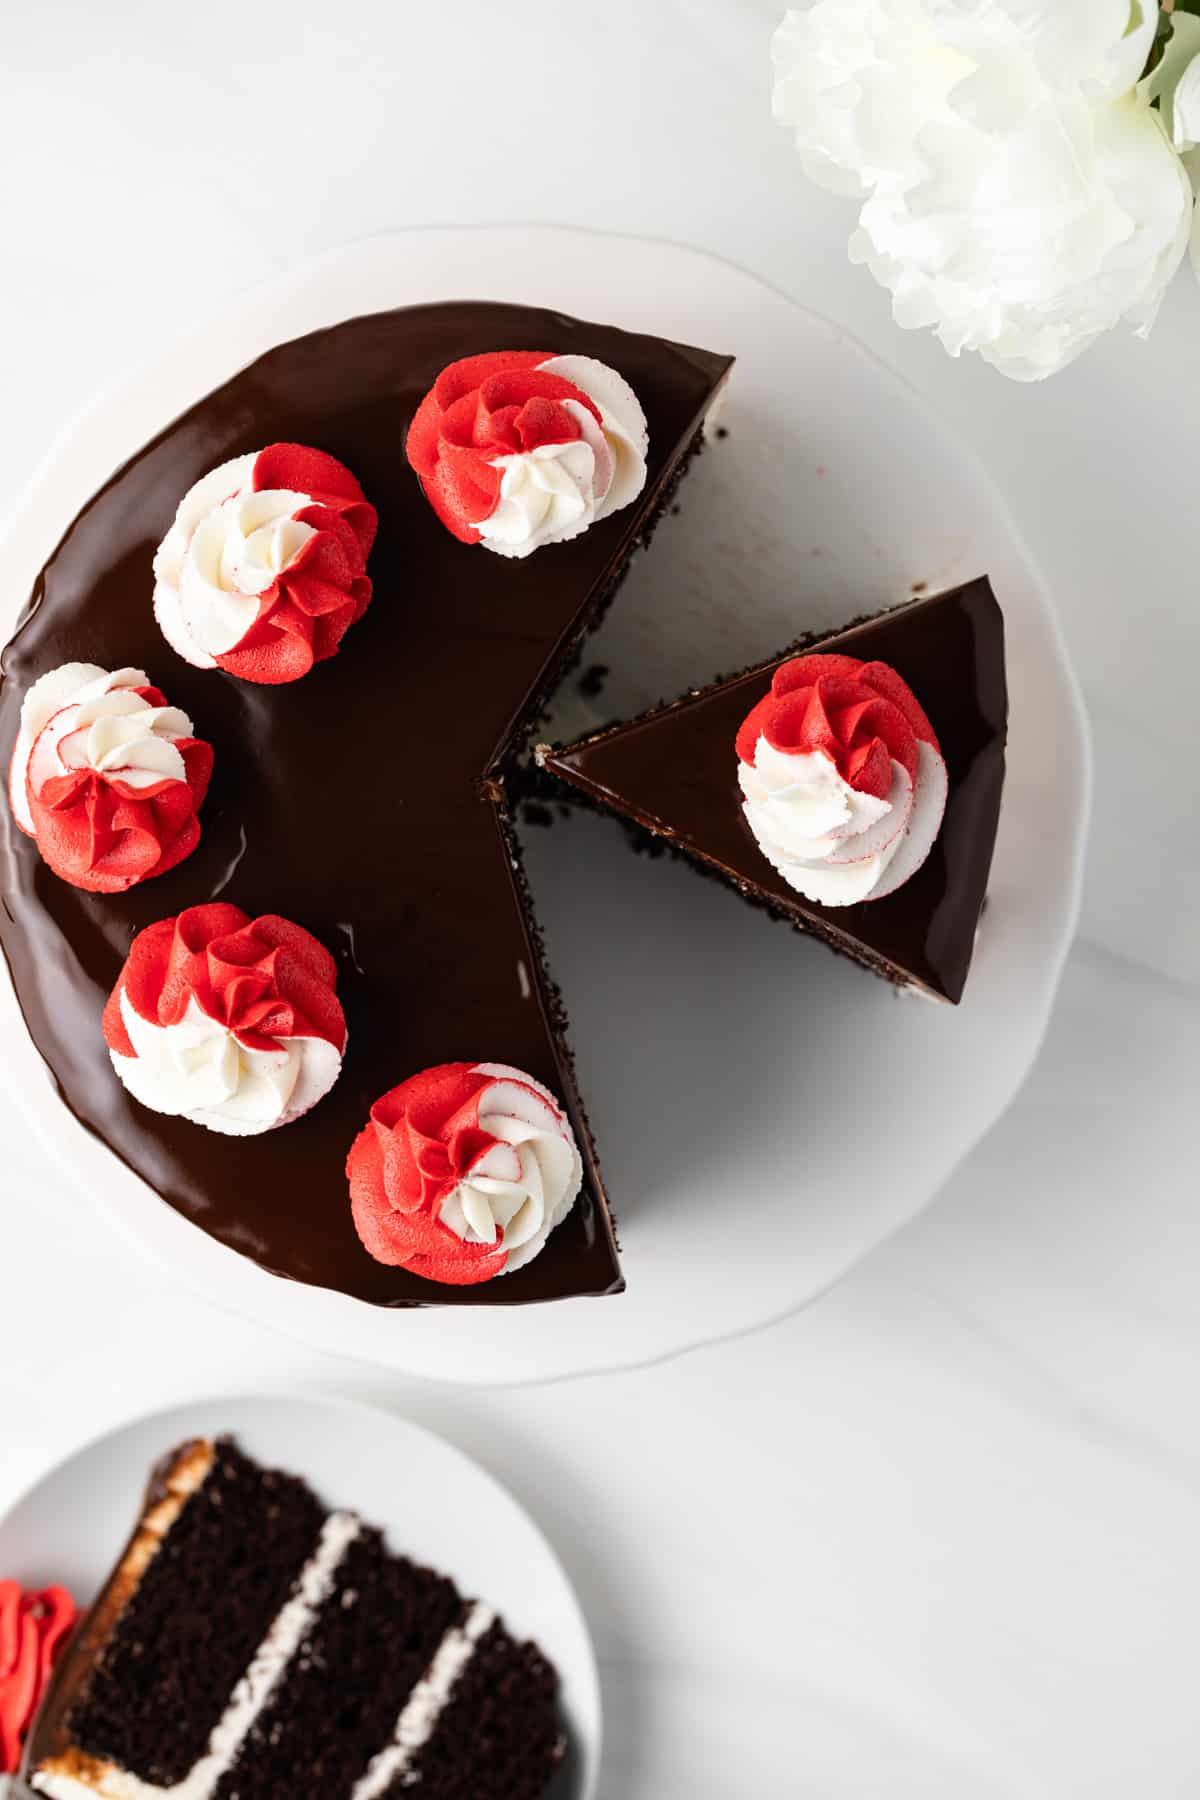
A decadent chocolate ganache is layered over the top of the cake and allowed to drip halfway down the sides. Then, for a finishing touch, red and white swirled peppermint frosting is piped on top of the cake.
With all of the layers, this chocolate peppermint cake does require some work – this isn’t a last-minute recipe – but it’s worth every second!
The peppermint flavor and red frosting make it perfect for the holidays and no matter where or when you serve this cake, it will steal the show. Be prepared to impress!
Ingredient Notes
- Dutch-processed cocoa powder – It’s essential that you use Dutch-processed cocoa powder in this cake. Its rich dark flavor works best with this recipe.
- Unsweetened chocolate – I don’t recommend substituting bittersweet or semisweet chocolate here. The cake is already sweet enough without it.
- Buttermilk – Buttermilk helps create a soft crumb in the cake. It should be at room temperature.
- If you don’t have any, see my buttermilk substitute.
- Coffee – Coffee enhances the chocolate flavor without making it taste like coffee.
- If you want, you can substitute extra buttermilk instead.
- Peppermint extract – Gives the frosting the lovely mint flavor but a little goes a long way.
- Candy canes – Crushed candy canes decorate the bottom half of the cake.
- I’ve also seen candy cane sprinkles that will work.
- Red food coloring – A small portion of the frosting is dyed red to create a candy cane effect for the swirls on top of the cake.
- Light corn syrup – This is optional but adds a glossy shine to the ganache.
* The full ingredient list can be found down below in the recipe card.
How to Make Peppermint Fudge Cake
Making this chocolate peppermint cake is a process and does require a couple of hours to pull it all together but it’s worth every second!
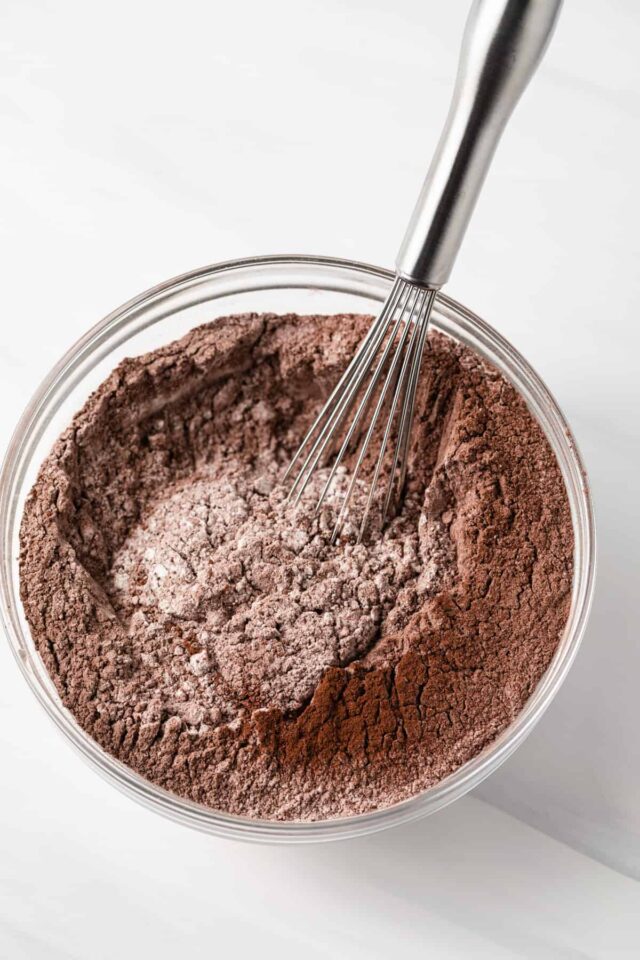
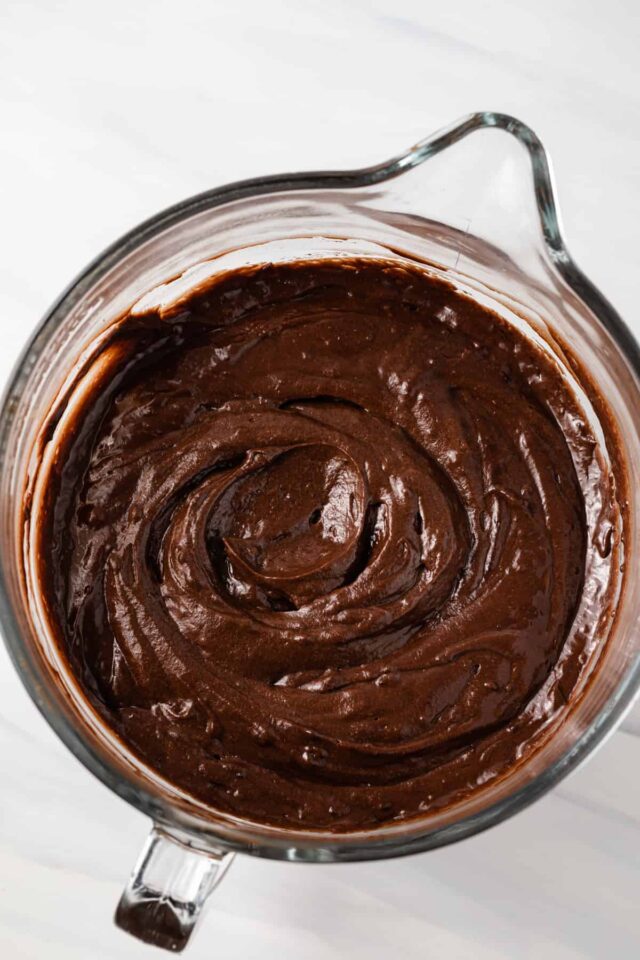
Make the cake batter. Whisk together the dry ingredients and step aside.
Carefully melt the chocolate in a heatproof bowl over a pot of barely simmering water. Remove from heat and set aside to cool.
Beat the sugar and butter together until light and fluffy, then add the eggs one at a time, followed by the vanilla extract. Add in the melted chocolate.
Add half the flour mixture, followed by the buttermilk and coffee, then the remaining flour mixture.
Bake. Divide the batter evenly between the prepared pans. Bake for 30 to 40 minutes. Take care not to overbake.

Cool. Cool for 10 minutes in the pans then invert on a wire rack to cool completely.
Make the Frosting & Assemble
Make the peppermint buttercream frosting. Beat the butter until pale and creamy. Add half of the confectioners’ sugar at a time, beating until just fully moistened.
Add in the peppermint extract then slowly add in the heavy cream, until well incorporated. Place a cup of the frosting in a bowl and set it aside.
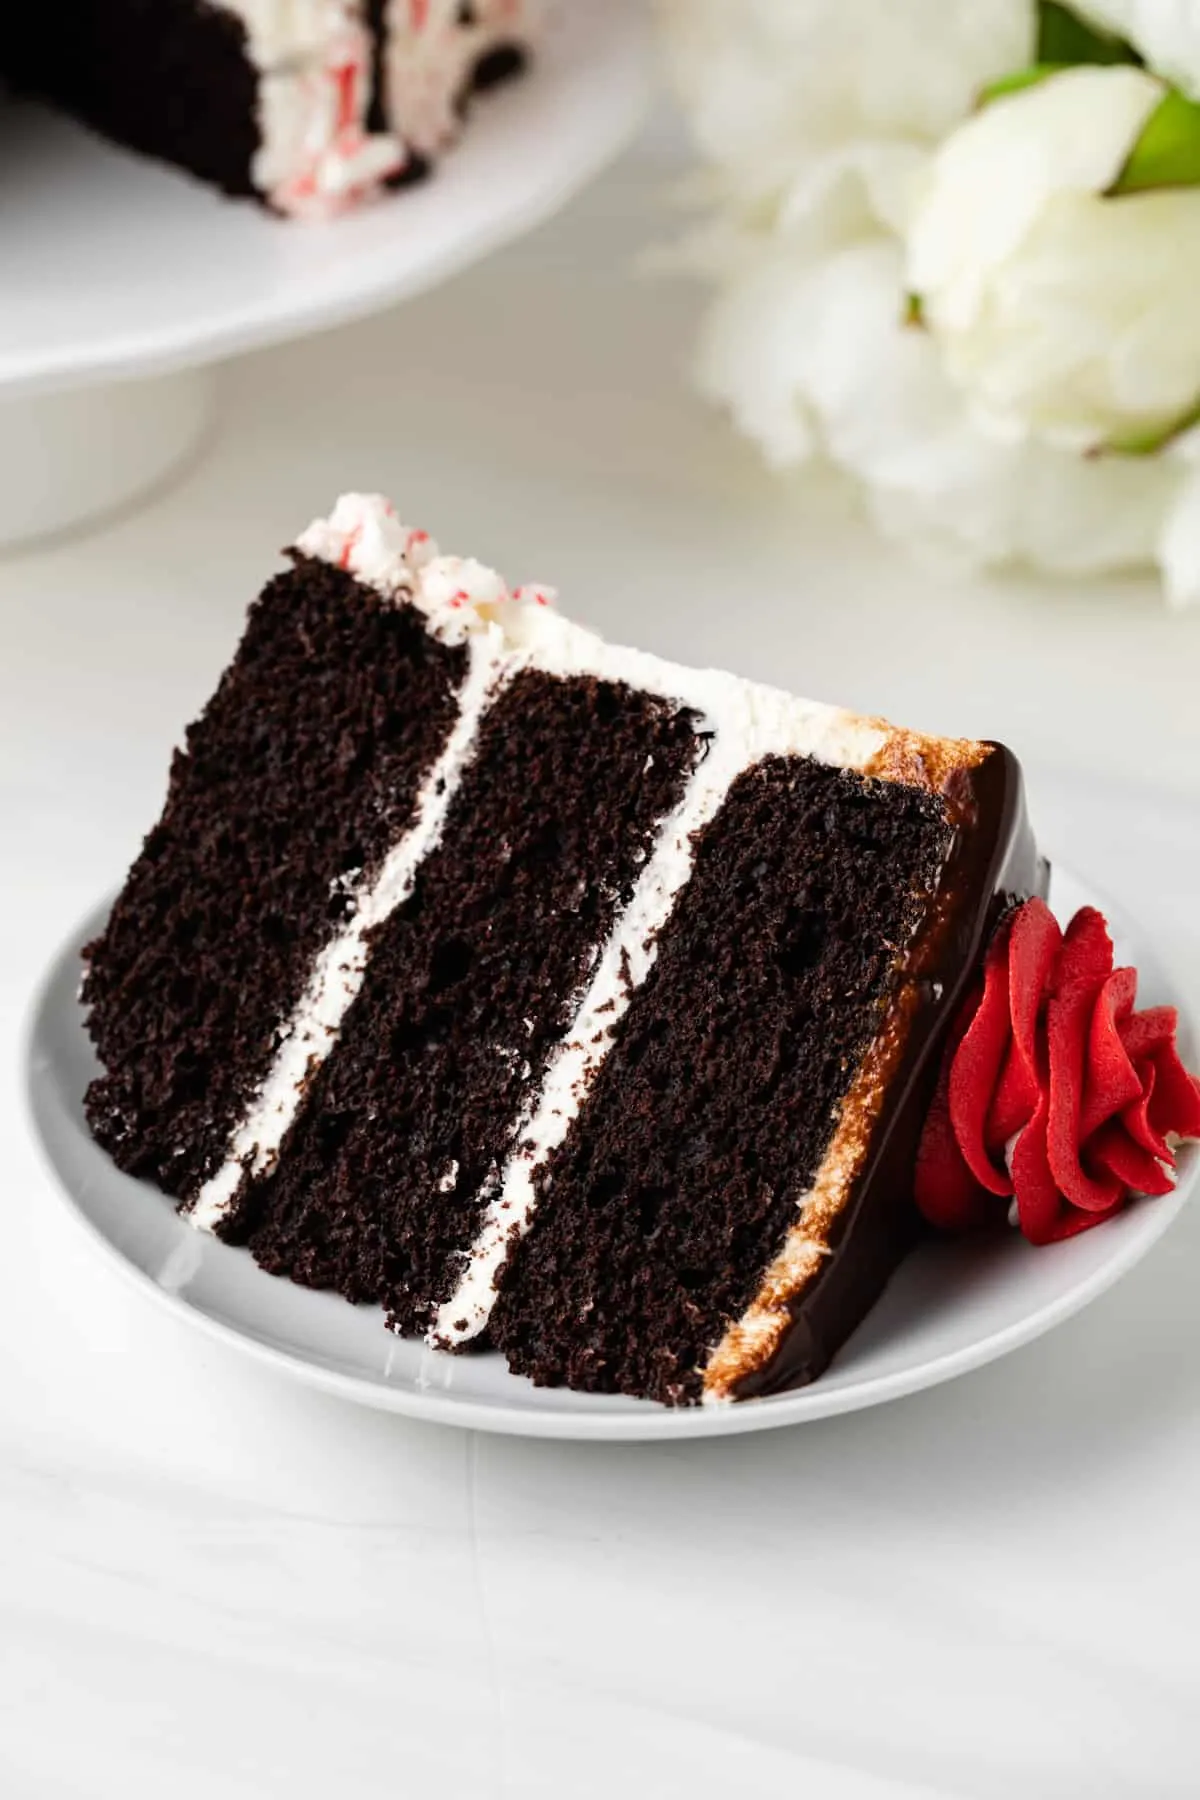
Assemble the cake. Place one layer of cake on a serving platter. Spread a generous amount of frosting on the top.
Repeat with the second layer and another generous amount of frosting. Add the third layer and cover the top and sides of the cake with frosting.
Chill the cake. Press crushed candy canes into the sides of the cake at the bottom. Freeze for 20 minutes.
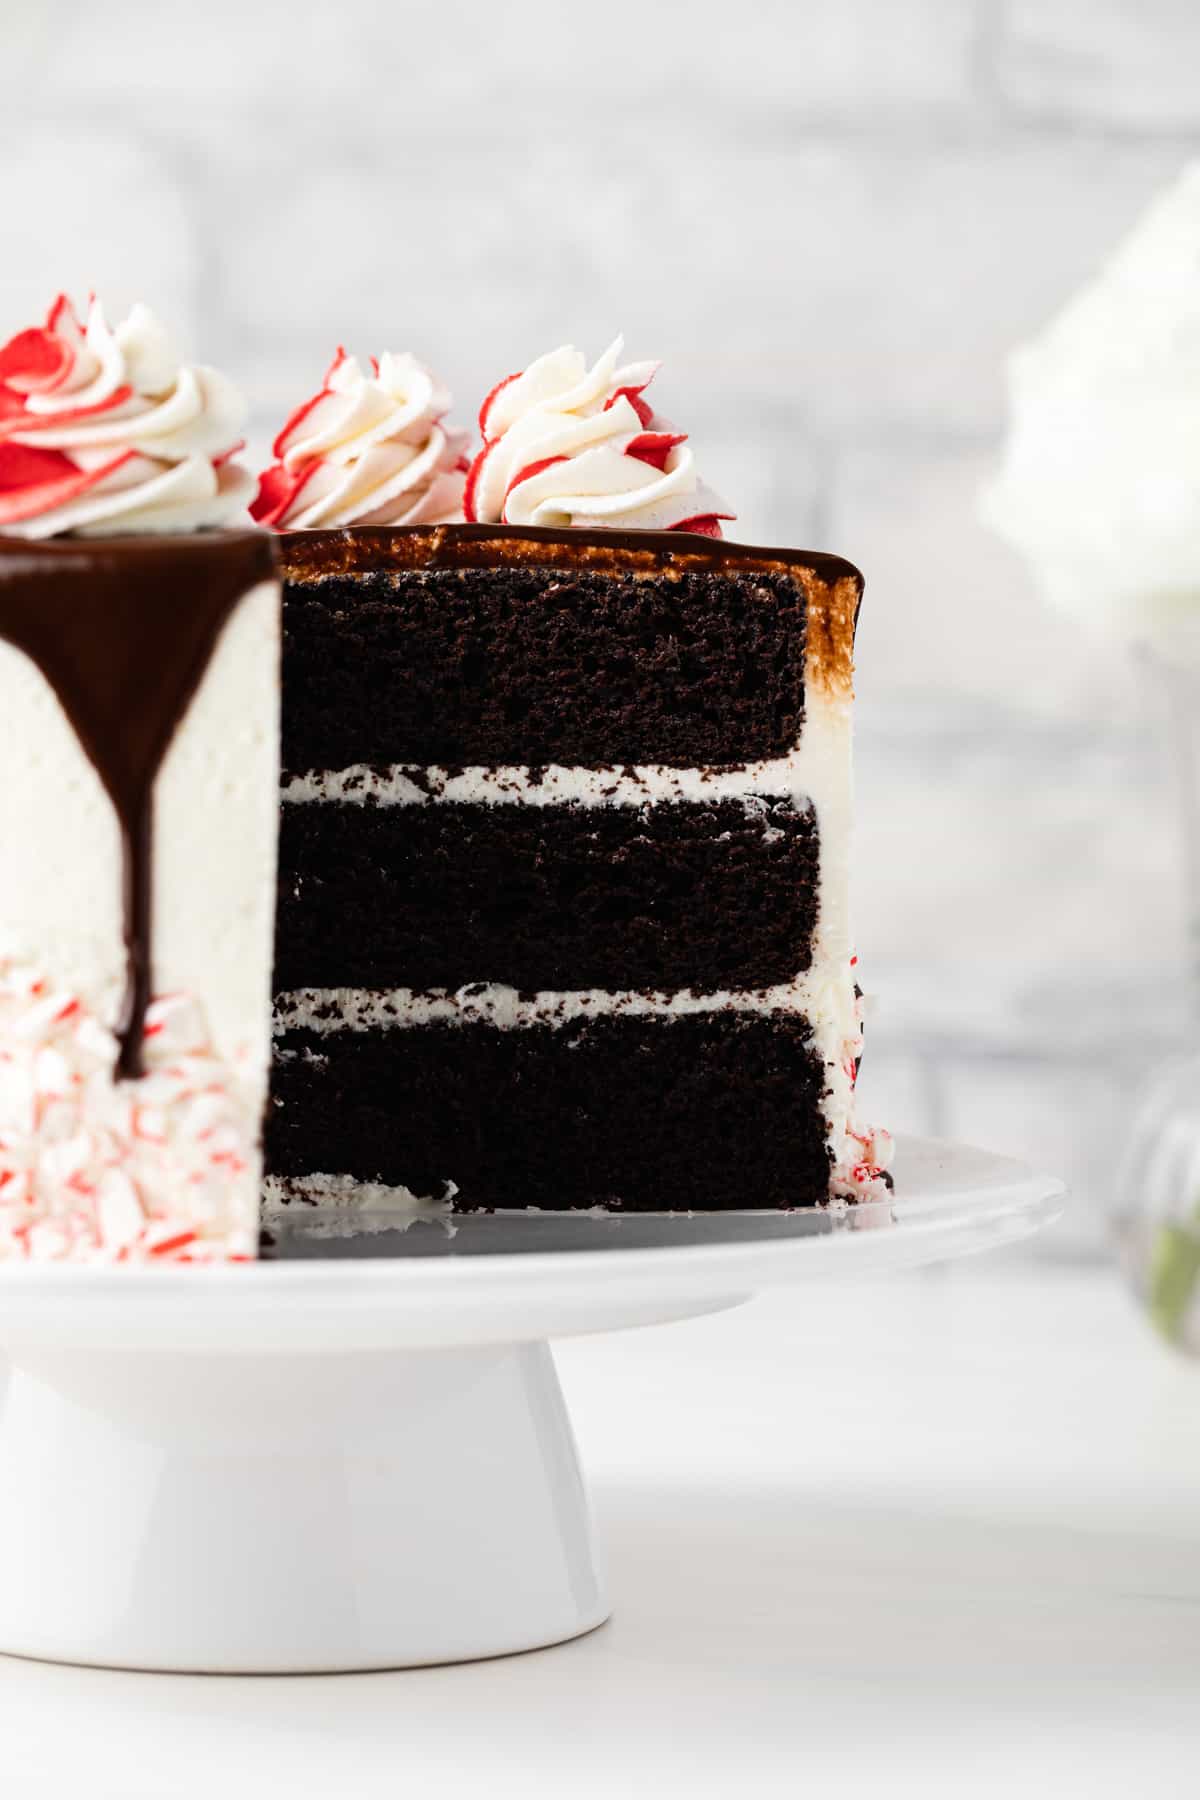
Pour chocolate ganache over the top center of the chilled cake. Use a spatula to spread the ganache to the edge so it drips over the sides of the cake. Return to the freezer for 10 minutes.
Pipe red and white frosting swirls on top of the cake. Keep the cake refrigerated and remove it 30 minutes prior to serving.
Tips for Success
Here are a few things to keep in mind that may help make this recipe a little easier – or at least ensure that you end up with the perfect cake on the first try!
- Be sure to use quality chocolate. This will greatly impact the flavor of the cake. Ghirardelli is one of the brands of chocolate I use most and chose to use it for today’s peppermint fudge cake.
- Level the cake batter in the cake pans. Use an offset spatula to spread the batter all the way to the edges of the pan and smooth out the surface.
- Add more heavy cream if necessary. Check the consistency of the frosting and add more cream, ½ tablespoon at a time, if needed. The frosting should be soft and spreadable but not so loose that it doesn’t hold its shape.
- Chill the cake layers. Cold cake layers are easiest to work with. Wrap cooled layers in plastic wrap then freeze. Thaw on the countertops for 30 minutes then continue frosting.
- Follow the recipe as written. Normally I encourage some variation in the recipes I share but with this one, I recommend making it only as written in the recipe. The cake needs a certain texture for the layers and any adjustments to the recipe can affect that.
- Bake the layers evenly. For perfectly baked cake layers, I always suggest using bake-even strips. They are cloth strips that you soak in water and wrap around the cake pans. They promote even heating around the pans allowing the layers to bake up moist and level.
Can I Make This In Advance?
Yes, you can make parts of this cake in advance.
The cake layers can be tightly wrapped in plastic and stored in the fridge or freezer for up to 2 days. The frosting can also be refrigerated overnight. You may need to re-whip it after it comes to room temperature.
The frosted cake can also be frozen for up to 2 months. Thaw overnight in the fridge then allow it to come to room temperature before serving.
*If you want to serve it at Christmas, I suggest making the cake layers and frostings 2 days ahead. Then assemble on Christmas Eve.
How to Store
- How to store leftover chocolate peppermint cake. You can store leftover cake in the fridge for up to 3 days. It’s important to keep the cake refrigerated until serving and not to leave leftovers out on the counter.
- Can I freeze this? Yes, you can freeze this cake for up to 2 months.
Frequently Asked Questions
Not all cake recipes will work with bundt pans and this is one that won’t. The layers are too fragile. I only recommend making this cake exactly as written in the recipe.
I’ve not tried this myself but the recipe is very similar to my favorite chocolate cupcakes. You may want to bake those instead.
While coffee is used in the cake batter, it does not taste like coffee. Coffee enhances the chocolate flavor and since there’s plenty of chocolate in the recipe, you won’t notice the coffee.
Rodelle has a quality Dutch-processed cocoa that I highly recommend.
More Cake Recipes
Peppermint Fudge Cake

Ingredients
For the chocolate cake
- 2 cups (260 g) all-purpose flour
- ⅔ cup (53 g) Dutch-processed cocoa powder, plus more for dusting the pans
- 2 teaspoons baking soda
- 1 teaspoon baking powder
- 1 teaspoon salt
- 4 ounces (113 g) unsweetened chocolate, coarsely chopped
- ¾ cup (170 g) unsalted butter, melted & cooled
- 1 ¾ cups (350 g) granulated sugar
- 2 large eggs, room temperature
- 1 tablespoon vanilla extract
- 1 ½ cups (360 ml) buttermilk, room temperature
- ½ cup (120 ml) strong brewed coffee, room temperature
For the peppermint buttercream
- 2 cups (425 g) unsalted butter, softened
- 8 cups (960 g) confectioners' sugar, sifted
- 1 ½ teaspoons peppermint extract
- 4-6 tablespoon heavy cream
- crushed candy canes
- red food coloring
For the chocolate ganache
- 4 ounces (113 g) semisweet chocolate, coarsely chopped
- 4 tablespoons unsalted butter, cut into pieces
- 2 tablespoons light corn syrup, optional
Instructions
Make the cake
- Heat the oven to 350°F. Spray 3 8-inch round pans with nonstick spray. Line the bottoms with parchment paper cut into a circle to fit the pan. Spray the parchment paper with nonstick spray and dust the pan lightly with cocoa powder. Tap out any excess and set aside.
- In a medium bowl, combine the flour, cocoa powder, baking soda, baking powder, and salt. Stir with a whisk and set aside.
- Add the chocolate to a small heatproof bowl and set it over a pot of barely simmering water. Stir continuously until melted and smooth. Remove from heat. Set aside to cool.
- Using a stand mixer fitted with a paddle attachment or a handheld electric mixer beat the butter and sugar together on medium-low speed until light and fluffy.
- Beat in the eggs, one at a time, mixing well after each addition. Scrape down the sides of the bowl as needed. Beat in the vanilla. Add the melted chocolate and mix until well incorporated.
- With the mixer set to low speed. gradually add half the flour mixture, followed by the buttermilk and coffee, and then the remaining flour mixture. Beat just until combined. The batter will be thick.
- Divide the batter evenly between the 3 prepared pans. Use an offset spatula to spread the batter all the way to the edges of the pan and smooth out the surface. Bake for 30 to 40 minutes, or until a toothpick inserted into the center comes out with only a few dry crumbs. Take extra care not to overbake or the cake layers may crumble.
- Cool the cake in the pans for 10 minutes, then invert the cakes onto a wire rack to cool completely.
Make the frosting
- In the bowl of a stand mixer fitted with the paddle attachment or a large mixing bowl with a handheld electric mixer, beat the butter on medium-high speed until creamy and pale in color, about 5 minutes.
- Add half the confectioners’ sugar and beat on low speed just until the sugar has fully moistened, then turn the speed up to medium-high and beat until well incorporated, about 3-5 minutes.
- Add the remaining confectioners’ sugar and beat on low speed just until the sugar has fully moistened, then turn the speed up to medium-high and beat until well incorporated, about 3-5 minutes.
- Add the peppermint extract. Turn the mixer on low speed and slowly add 3 tablespoons of the heavy cream. Turn the mixer up to medium-high and beat until the cream is well incorporated, about 3-5 minutes. (After 2 minutes stop and scrape down the sides and bottom of the bowl then continue mixing.)
- Check the consistency of the frosting and add more cream, ½ tablespoon at a time, if needed. The frosting should be soft and spreadable but not so loose that it doesn’t hold its shape.
- Place 1 cup of frosting in a small bowl and cover with plastic wrap, set aside.
Assemble to cake
- Place one cake layer onto a serving platter. Add a generous amount of frosting and spread it to the edge with a spatula. Repeat with a second cake layer, topping it with a generous amount of frosting. Add the third cake layer and cover the top and sides of the cake with frosting. Press crushed candy canes into the sides of the cake near the bottom and coming up less than halfway. Set the cake in the freezer for 20 minutes.
Make the ganache
- Place the chocolate, butter, and corn syrup in a medium heatproof bowl set over a pot of barely simmering water. Stir until melted and smooth. Remove from heat and let cool for 5 minutes.
- Pour ganache on the top center of the chilled cake. Use an offset spatula to carefully spread the ganache to the edge, gently nudging it over the lip so that it drips over the sides of the cake. Set the cake back into the freezer for 10 minutes.
Make the swirled frosting
- Divide the remaining frosting in half and color one half with red food coloring. Transfer each frosting to its own piping bag. Insert a star piping tip into a larger piping bag. Cut the ends off each piping bag holding the frosting and insert them side by side in a large bag containing the tip. Pipe swirls on top of the cake. Keep the cake refrigerated and remove 30 minutes prior to serving.
Notes
- Dutch-processed cocoa: It is extremely important that you use Dutch-processed cocoa. Regular cocoa will not work with this recipe.
- Unsweetened chocolate: I don’t recommend using anything other than unsweetened chocolate. Bittersweet or semisweet will be too sweet for this recipe.
- Coffee: Coffee enhances the chocolate flavor. It doesn’t make the cake taste like coffee. However, if you’d rather not use it, you may use an additional half cup of buttermilk in its place.
- Frosting: I used my favorite vanilla buttercream and replaced the vanilla with peppermint extract. I have a ton of tips in that post to help with achieving a luscious texture.
- Corn syrup: Corn syrup adds a lovely shine to the ganache and is completely optional.
- Cake layers: Because of the texture of this cake, cold cake layers are the easiest to work with. Once the layers have cooled, wrap them tightly in a few layers of plastic wrap and pop them into the freezer for a few hours or up to 2 days. When you are ready to assemble the cake, set the wrapped layers on the countertop for 30 minutes to thaw slightly. Continue with frosting and layering the cake.
- Different pans: I’ve had readers try to bake this cake in bundt pans and mini bundt pans. Not all cake recipes will work with bundt pans and this is one that won’t. The layers are too fragile. I only recommend making this cake exactly as written in the recipe.
- Bake-even strips: For perfectly baked cake layers, I always suggest using bake-even strips. They are cloth strips that you soak in water and wrap around the cake pans. They promote even heating around the pans allowing the layers to bake up moist and level.
- Wrap baked and cooled cake layers tightly in plastic wrap and store them in the refrigerator. Assemble and frost the cake within 2 days.
- The frosting can be prepared, covered, and refrigerated overnight. Bring to room temperature and re-whip in needed.
- The frosted cake can be frozen for up to 2 months. Thaw it overnight in the refrigerator and let it come to room temperature just before serving.
Nutrition
The nutrition information provided is for convenience and as a courtesy only. It is not guaranteed to be accurate because nutrition information can vary for a variety of reasons. For precise nutritional data use your preferred nutrition calculator and input the exact ingredients and brands you used in the recipe.
Hi Jen, could I make this as cupcakes?
Since the cake is very similar to my chocolate cupcake recipe, I’m pretty sure that would be fine.
Thanks Jen. Haven’t tried it yet but I’ll let you know how it goes.
OMG this cake was awesome! I wanted a new Christmas dessert and came across this one on Pinterest. I sorta screwed up the batter and added too much cocoa and the cake still turned out great. I also did a basic ganache recipie I already had that was just a simple equal parts cream and semi-sweet chocolate. This was probably the best chocolate cake I’ve ever had. Such a beautiful Christmas dessert. Thanks Jen, this will definitely be a family staple!
Hi Erika! Thanks for sharing your feedback. I’m thrilled you enjoyed the cake for Christmas!
OMG this cake was awesome! I wanted a new Christmas dessert and came across this one on Pinterest. I sorta screwed up the batter and added too much cocoa and the cake still turned out great. I also did a basic ganache recipie I already had that was just a simple equal parts cream and semi-sweet chocolate. This was probably the best chocolate cake I’ve ever had. Such a beautiful Christmas dessert. Thanks Jen, this will definitely be a family staple!
I had this exact same problem today. I let them cool for about 10-15 minutes and it completely cracked and fell apart. They are extremely fragile. I’m letting them cool for about an hour or more in the pan because they seem less fragile the more cool they are. My cakes were the right consistency and everything, so I’m not sure why it happened! All I know is that it cakes are too warm, they will fall apart when taking them out of their pan! Sorry for your trouble- I feel your pain!
Has anyone actually tried this cake recipe? I made the recipe twice, the same day, and it was a total flop both times! The batter was way too light, and had too much liquid. I followed the recipe exactly as written. Super careful with the measurements, the baking times, etc. The cakes completely fell apart once cooled for 10 minutes in the pan and then turned out in a wire rack— or halfway fell out onto the rack and halfway crumbled out. Just awful. Such a lot of work for a flop.
Hi Kati! I’m sorry you didn’t have success with the recipe. I use this same recipe for all my chocolate cakes and it has never crumbled. The batter is thick and silky which bakes up into a fudgy cake. It’s not a light and delicate cake by no means. Instead, it’s more like a soft brownie. Are you using a toothpick to check for doneness? Make certain they are completely done before removing them from the oven. You can also line the bottoms of the pan with parchment paper so the cakes come out smoothly which can reduce the chance of them falling apart while turning them out. Another thing I like to do with cake is turn the layers out onto plastic wrap, wrap them up while they are warm, and pop them in the freezer for 30 minutes to an hour. Cold cake layers are so much easier to work with! And wrapping them up while they are warm will keep the layers moist.
Hmm not sure why mine didn’t work— twice!!!
The only thing I can think of is that I baked them in mini bundt pans… and baked for ~20 minutes. I checked with a toothpick. I let them cool in the pans for 10 minutes before dumping them out of the bundt pans onto a cooking rack. I didn’t get beyond that because they totally crumpled…
Thoughts?
I had this exact same problem today. I let them cool for about 10-15 minutes and it completely cracked and fell apart. They are extremely fragile. I’m letting them cool for about an hour or more in the pan because they seem less fragile the more cool they are. My cakes were the right consistency and everything, so I’m not sure why it happened! All I know is that it cakes are too warm, they will fall apart when taking them out of their pan! Sorry for your trouble- I feel your pain!
What if you didn’t want to use coffee, is there anything you’d substitute it with or can you leave it out?
Use 2 cups of buttermilk and omit the coffee. But, I highly recommend using coffee since it enhances the chocolate flavor. If you’re worried about the caffeine, just use decaf.
hi jen I just want to wish you a merry Christmas and a happy new year,I enjoy what you do and I thank you for it.
Thank you so much, Jean! I hope you had a wonderful holiday.
Jen, what type of dark cocoa do you suggest?
I usually use the Italian cocoa from Wm Somona
Would Dutch cocoa be a better choice?
Thanks, Judykay
Doesn’t this sound terrific and would have been perfect during the holidays! Although I’m sure everyone would love it now even still. Better wait a bit before making it so we can all shed the few pounds we put on during the holidays. Nice recipe.
It would definitely still be enjoyed! Thanks for taking the time to stop by, Vicki!
My eyes just popped out of my head! What a GORGEOUS cake! I love naked cakes! 😉 This does scream holiday. It just doesn’t get better than this for a holiday dessert – pinned!