
Ciabatta Bread
This post may contain affiliate links. Read the full disclosure here.
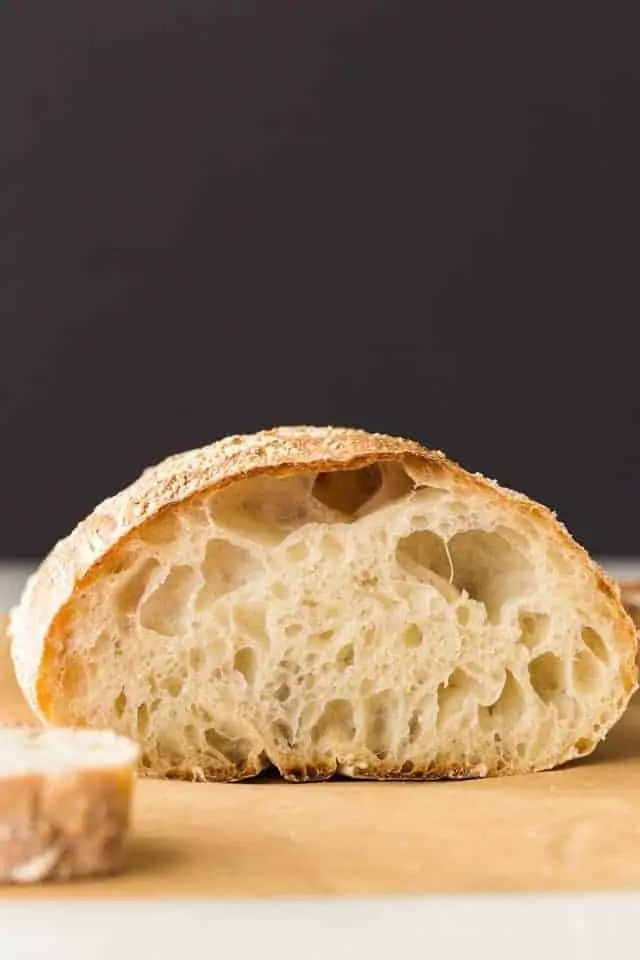
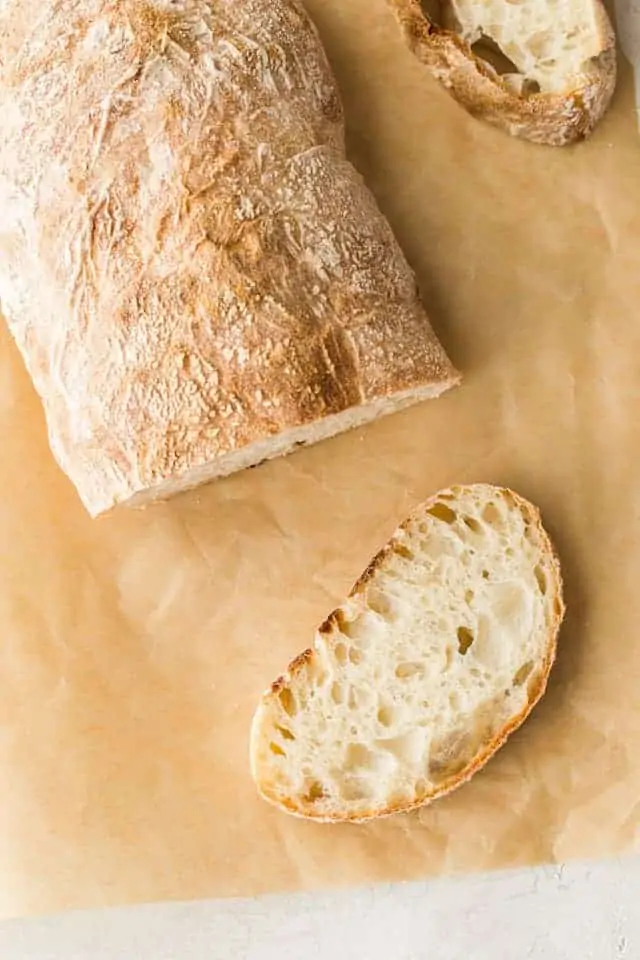
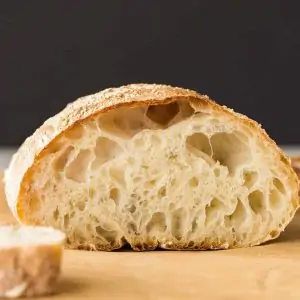
This simple Ciabatta Bread recipe will give you a rustic Italian loaf that is perfect for dipping into soups or sauces. The high hydration in this bread results in a wonderfully chewy center and tons of irregular holes.
Homemade ciabatta bread
This is probably the easiest ciabatta bread recipe you’ll come across. It is an 80% hydration bread which means it’s very wet and sticky.
Because of this, you’ll need a stand mixer to make the dough. Otherwise, it will be near impossible to mix the dough.
The mixer will do all the mixing and kneading for you. This is why I say it’s the easiest recipe.
No-knead recipes are the best! I make focaccia, baguettes, pizza dough, and slow cooker bread all the time because they require little effort. And now I’ll be making ciabatta bread just as often, if not more.
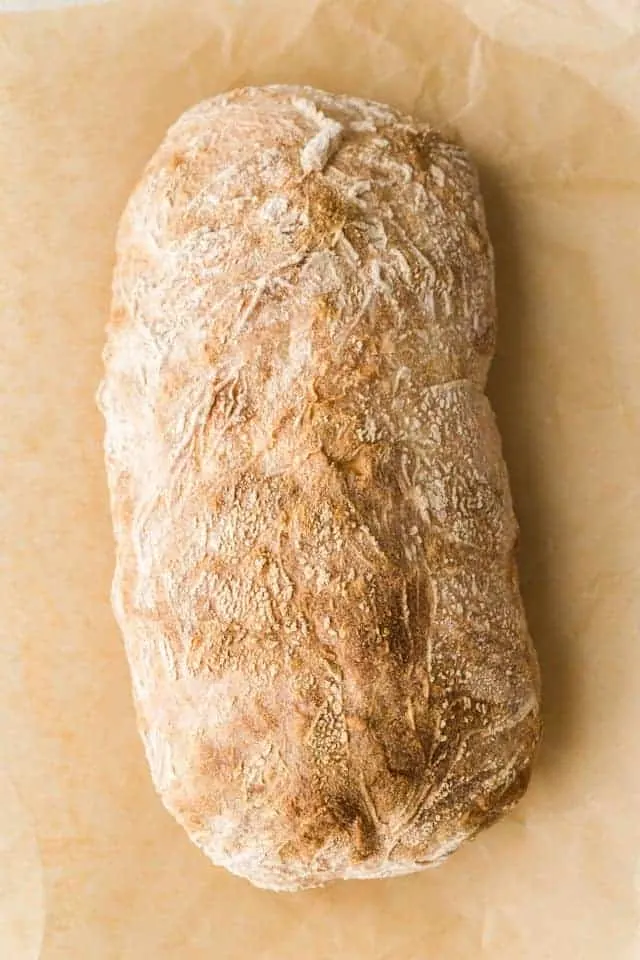
Ciabatta means slipper in Italian. Can you see how the bread gets its name? It’s shaped just like a slipper!
Are there eggs in ciabatta bread?
There are no eggs in ciabatta bread. It’s made with flour, water, yeast, and salt.
What do you use ciabatta bread for?
You slice ciabatta bread at an angle and drizzle it with olive oil. It can also be used for dipping in soup or soaking up a sauce.
Or you can slice it lengthwise and make an Italian Style sandwich. Whichever way you decide to enjoy this bread, I’m sure you’ll be impressed with the texture and flavor.
How do you heat up ciabatta bread?
You can heat ciabatta bread by wrapping it in aluminum foil and baking in a 350°F oven for 10-15 minutes.
Main ingredients for ciabatta bread
Bread flour – this is essential for the sturdy texture of this bread.
Yeast – you can use instant or active dry yeast. Either one will work. Just be sure to use a quality brand like Red Star®.
Water – there’s a lot of water in this bread and it’s the only liquid the recipe calls for.
Salt – salt boosts the flavor of ciabatta bread but also slows down the fermentation and enzyme activity in the dough. It helps to strengthen and support volume as well.
How to make ciabatta bread?
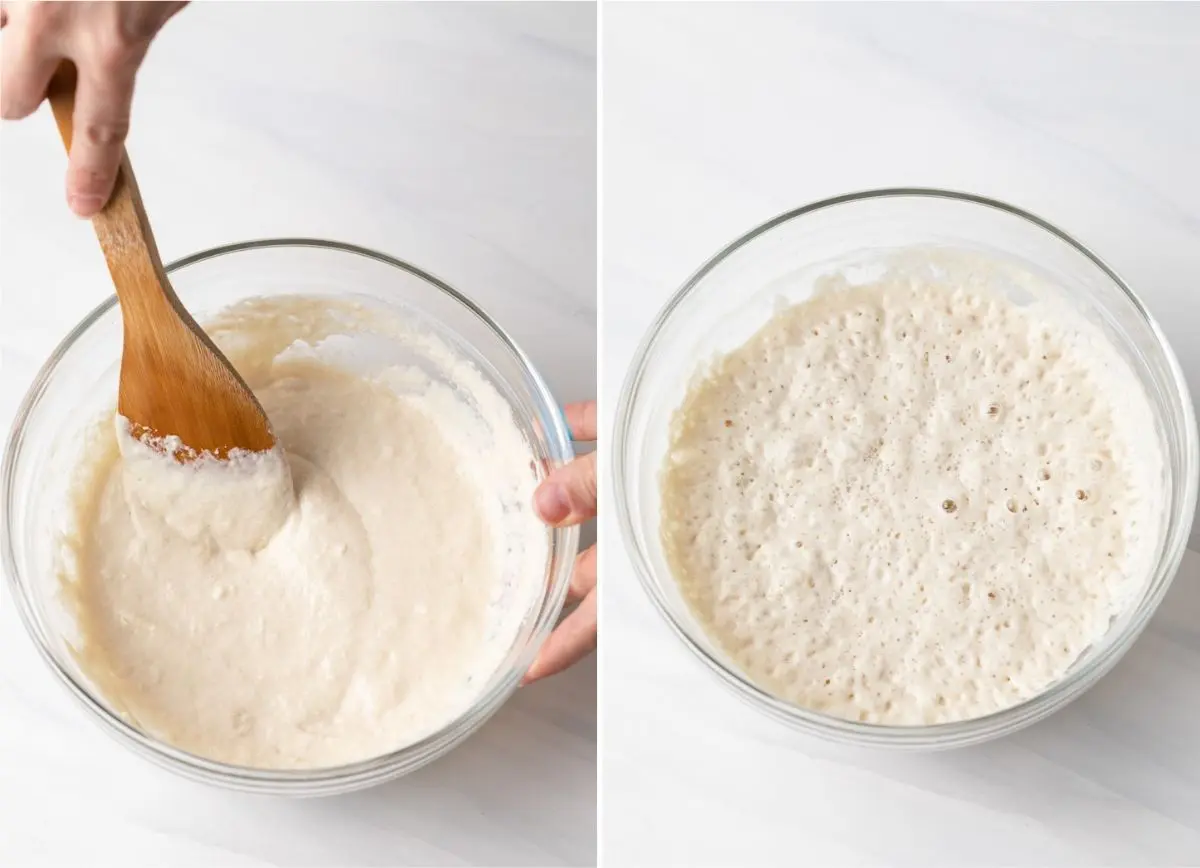
Step 1: Make the sponge
Combine flour, yeast, and water in a large bowl. Stir it with a wooden spoon until it’s well mixed and free of lumps.
Cover the bowl with plastic wrap and let sit at room temperature for at least 15 hours but up to 20 hours. The longer you let the sponge sit, the more flavor and structure the final bread will have.
Step 2: Make the dough
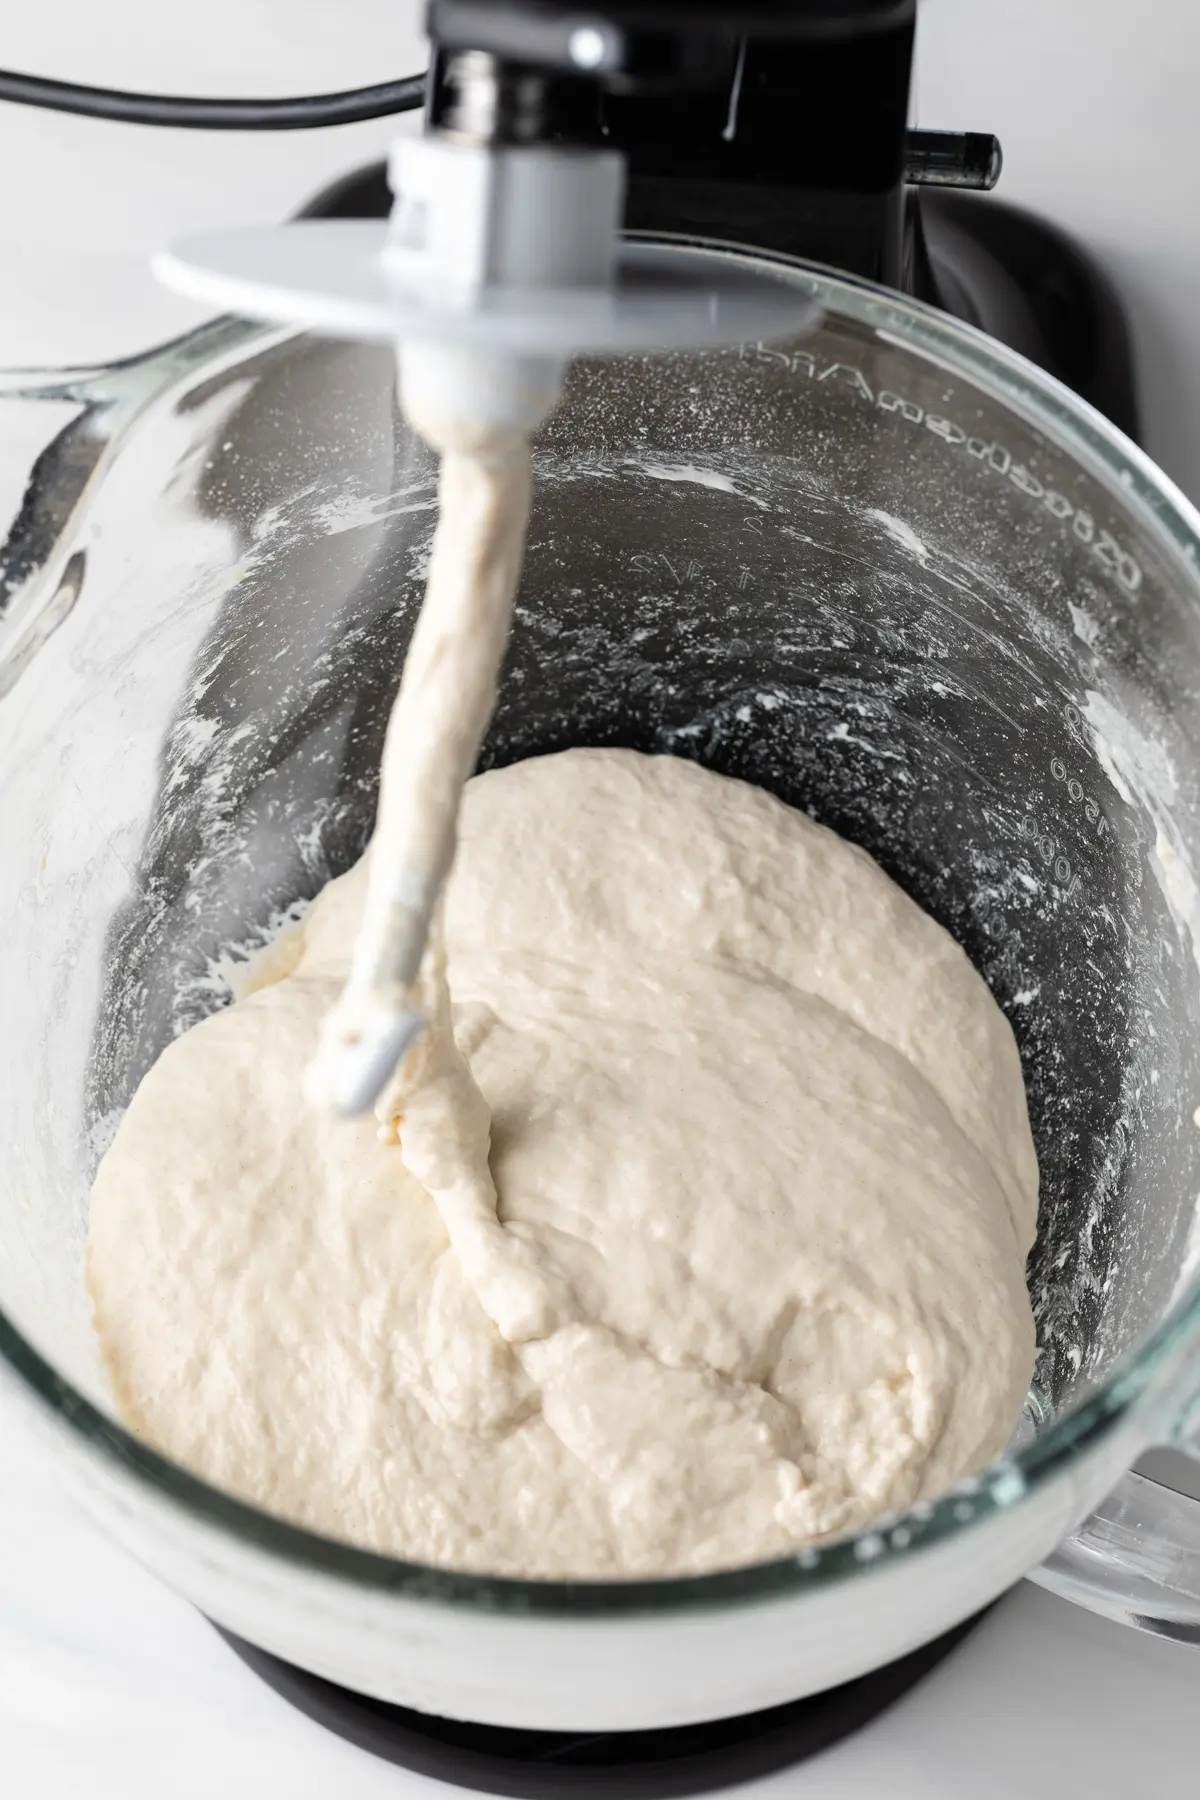
In the bowl of a stand mixer, combine the sponge with more flour, water, salt, and yeast. Mix it with the dough hook until the dough no longer sticks to the sides of the bowl.
The dough will be very soft and batter-like. This is normal for ciabatta.
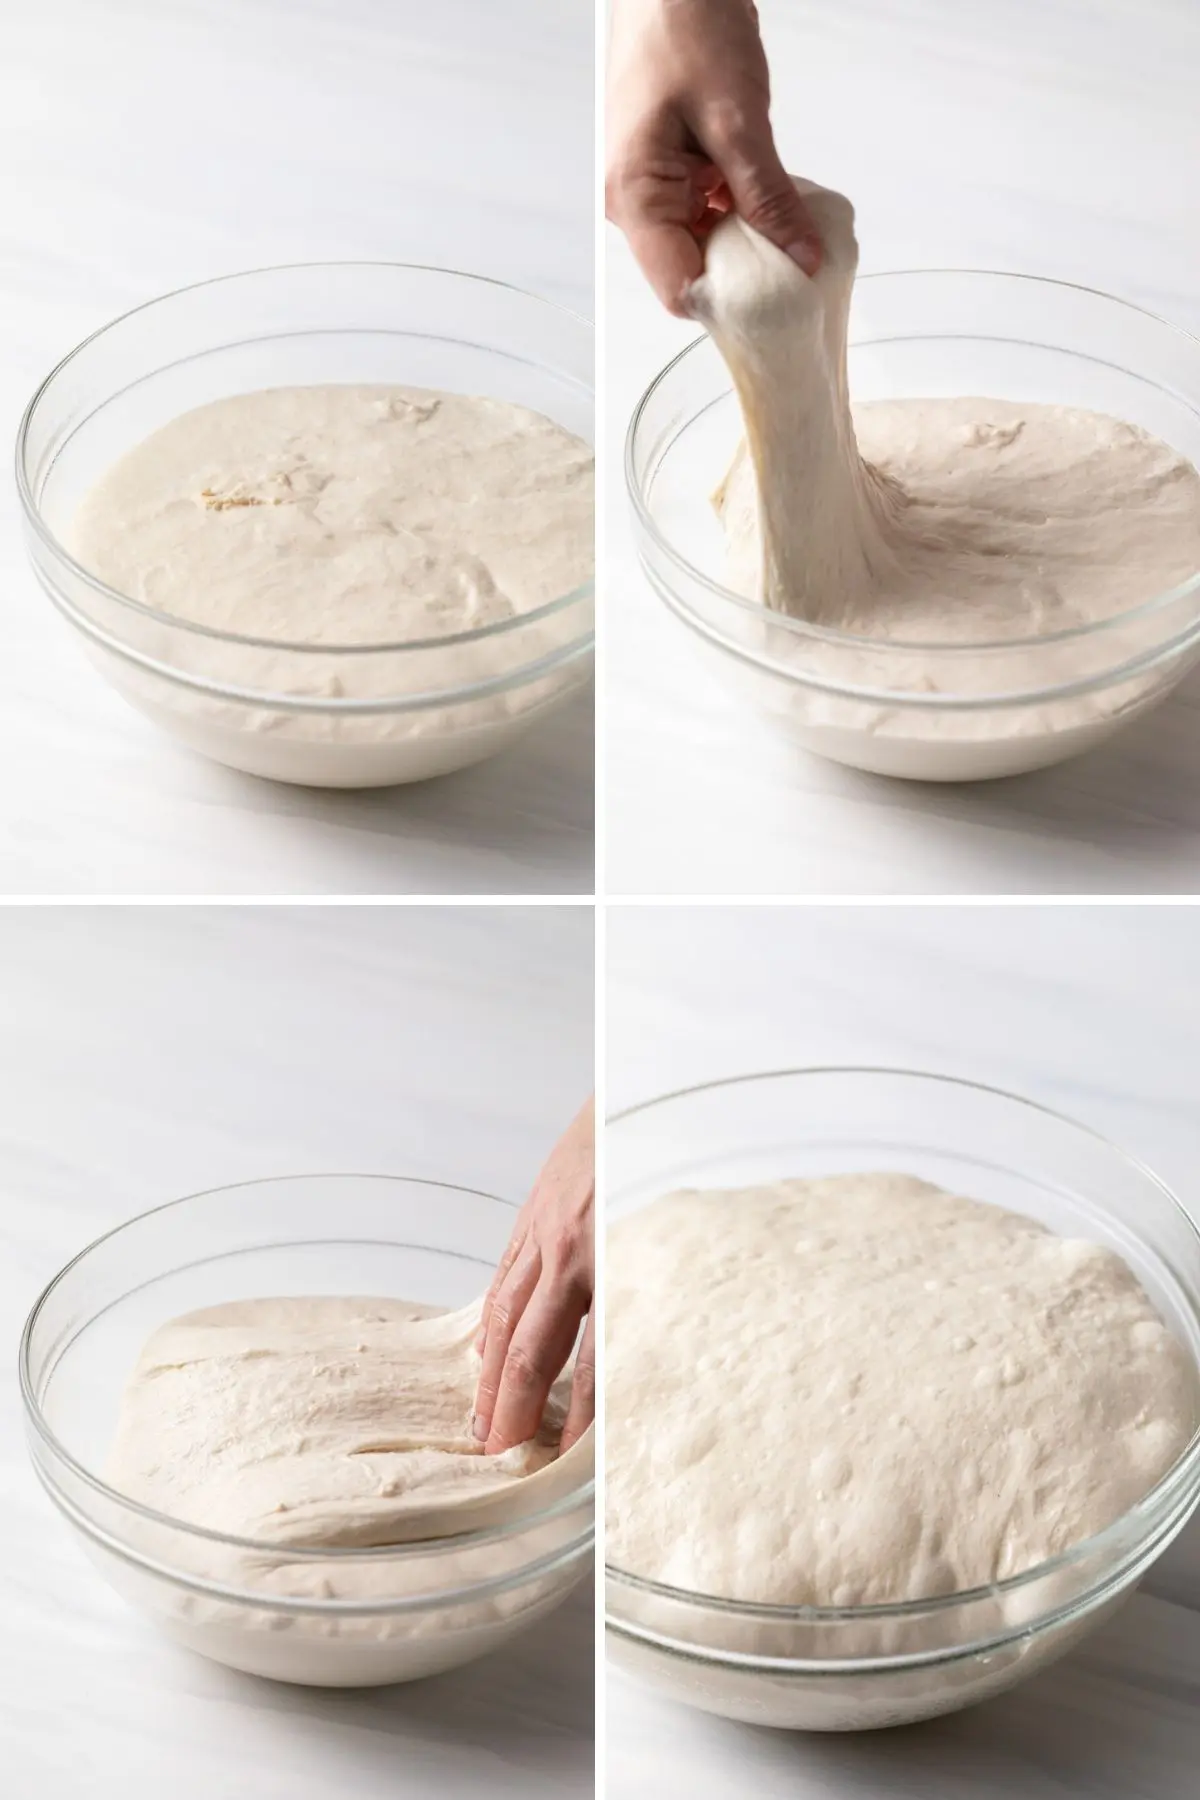
Step 3: Rise and turn the dough
Transfer the dough to a large bowl greased with olive oil. Cover and let it rise for 1 hour. Use wet hands or a greased silicone dough scraper to gently lift and fold the dough over onto itself. Flip the dough over so the top is now the bottom.
Cover the bowl and let the dough rise for 45 minutes. Repeat the folding process twice more and let rest for another 45 minutes after each.
Step 4: Shape the dough
Transfer the dough to a well-floured surface and liberally flour the top of the dough. Use two well-floured bench scrapers and carefully manipulate the dough from the sides to form a square.
Don’t add any pressure to the top of the dough or it will deflate. Cut the square in half and use the bench scrapers to gently shape each half into a loaf.
Gently slide the bench scrapers under the dough and transfer each loaf to an inverted baking sheet lined with parchment paper. Cover the loaves with a cloth and let rise at room temperature for 30 minutes.

Step 5: Bake
Invert a baking sheet onto the rack just below the center of the oven and heat to 450°F.
Spray the loaves lightly with water. Then, carefully slide the parchment with the loaves onto the heated baking sheet in the oven. Bake for 25-30 minutes.
It’s important to bake with steam to create a crisp, golden crust. Do this by placing a cast iron on the lowest rack. When transferring the loaves to the oven, add 1 cup of ice to the cast iron. The ice will melt and steam during the first few minutes of baking.

I don’t have a mixer. Can I use a food processor? Or can I mix by hand?
A stand mixer is recommended for this recipe! This dough is high in hydration, meaning it is very sticky. A stand mixer is the easiest way to mix it.
You can try mixing it with a wooden spoon and kneading it by hand but be mindful that adding more flour during kneading will affect how the bread turns out.
I don’t recommend using a food processor for mixing.
Tips for this easy ciabatta bread recipe
- Plan ahead since the sponge needs to be made a day in advance.
- The dough for this bread is very wet and sticky. It requires a lot of external flour to prevent it from sticking. If you use too much flour on the outside, you can easily brush it off before spritzing the loaf with water and baking. Just use a pastry brush* to do this.
- The dough will puff up and resemble a giant marshmallow. Be very delicate when shaping it so you don’t knock out all the air. The air is what gives the bread those gorgeous irregular holes.
More yeast bread recipes you’ll love
Some quick bread recipes you might like
- Irish Soda Bread with Raisins and Caraway Seeds
- Best Ever Banana Bread
- Cheddar Jalapeno Buttermilk Bread
Homemade Ciabatta Bread
Ingredients
For the poolish
- 1 ½ cups (200 g) bread flour
- 1 scant cup (200 ml) water, room temperature
- ¼ teaspoon instant yeast
For the dough
- 2 ⅔ cups (350 g) bread flour
- 1 cup (240 ml) water, room temperature
- 2 teaspoons salt
- ½ teaspoon instant yeast
Instructions
Make the poolish
- Combine the flour, water, and yeast in a medium bowl. Stir with a wooden spoon until fully combined and the mixture is smooth. Cover with plastic wrap and allow it to ferment at room temperature for 15 to 20 hours.
Make the dough
- Add the poolish and all ingredients for the dough to the bowl of a stand mixer fitted with the paddle attachment. Mix on low speed until all the flour is moistened, about 2 minutes. Increase the speed to medium-low and mix until dough forms into a mass and pulls away from the sides of the bowl, about 6 minutes.
- Switch to the dough hook attachment and mix on medium-low until dough becomes smooth and shiny, about 10 minutes. The dough will be soft, wet, and sticky much like batter.
- Lightly coat the inside of a large bowl with olive oil or nonstick spray. Use a silicone dough scraper to scrape the dough into the bowl. Cover with plastic wrap and let rise for 1 hour at room temperature.
- Using a greased scraper or damp fingertips, gently grab one side of the dough, lift and stretch it over the top of itself. Turn the bowl 180 degrees and stretch the same way. Rotate 90 degrees, stretch and fold. Rotate 180 degrees to stretch and fold the final side. Flip the dough over so the bottom becomes the top. Cover with plastic wrap and let rest at room temperature for 45 minutes. Repeat folding two more times, then cover with plastic wrap and let sit for an additional 45 minutes after each.
- Adjust the oven racks so that one is in the lower-third position (just below the center) and one is at the very bottom position. Place a cast-iron skillet on the lowest rack and an inverted baking sheet on the upper rack. Heat the oven to 450°F. It’s important to let the oven preheat for at least an hour to ensure it is hot enough.
- Liberally dust your work surface with flour and let the dough slide out of the bowl onto the counter. Be very gentle here so you don’t knock all the air out of the dough and try to handle the dough as little as possible. Liberally dust the top of the dough with flour. Using 2 well-floured bench scrapers, carefully manipulate the dough from the sides to form a square. Take care not to put pressure on top of the dough.
- Cut the dough in half, down the middle of the square. Gently shape each half into loaves by using the bench scrapers to manipulate the sides.
- Invert a large baking sheet and place a sheet of parchment paper across the top. Dust liberally with flour. Using both bench scrapers, slide them under both ends of the dough and transfer the dough to the prepared parchment paper. Repeat with the remaining loaf. Use your fingertips to gently poke the surface of each loaf as you shape it into a rectangle.
- Cover with a lint-free cloth to prevent the loaves from drying out. Proof in a draft-free place until puffy and the surface develops small bubbles, about 30 minutes.
- Have 1 cup of ice ready. Mist the loaves with water and carefully slide the parchment with loaves on the heated baking sheet in the oven using a jerking motion. Immediately drop the ice into the cast-iron pan on the bottom rack. Quickly close the oven door.
- Bake, until the crust is a deep golden brown, about 25-35 minutes. The internal temperature of the bread should be 210-215°F.
- Transfer to a rack to cool completely before slicing and serving
Notes
- It’s very important to measure the ingredients correctly! While I do list cup measurements, if you do not measure accurately, the dough will not form properly. For 100% success with this recipe, please use the weight measurements. This is a soft, sticky dough. It’s difficult to work with and requires patience.
- This is a 80% hydration bread. If you have difficulty working with the dough, lower the hydration to 70% by using 3 ¼ cups (422 g) flour in the dough.
- You may bake the bread on an oven stone if you prefer. Place it in the oven to preheat in step 5.
- Shaping ciabatta: This is meant to be an easy recipe with limited handling. Because of this, it can be difficult to build surface tension around the dough to hold in the gas. If you continuously have trouble with getting large irregular holes in the bread, then it’s because the gas is escaping. Make sure you are adequately stretching and folding to build up the surface tension.
- Wrap completely cooled bread in aluminum foil and it will keep for up to 2 days at room temperature. The crust will soften but can be toasted if you wish to crispen it up.
- The bread will stay fresh for up to 3 months if stored in the freezer. Wrap the cooled loaves in double layers of plastic wrap followed by double layers of aluminum foil. Reheat the frozen loaves as desired in the oven.
- I don’t recommend refrigerating the bread. Oftentimes, this will dry it out.
Nutrition
The nutrition information provided is for convenience and as a courtesy only. It is not guaranteed to be accurate because nutrition information can vary for a variety of reasons. For precise nutritional data use your preferred nutrition calculator and input the exact ingredients and brands you used in the recipe.
This recipe has been updated with a few tweaks to ensure everyone has success. I’ve added additional yeast and there’s also less handling of the dough which prevents the air from being knocked out.
Adapted from On Baking and Bread Illustrated.
In step 3 where it says fold and flip the dough and repeat twice more, do you flip the dough over every time you fold it or just after the first fold?
Yes, you fold and flip the dough for a total of 3 times.
For the poolish, one (scant) cup of water is listed as 200ml. For the dough, one cup of water is listed as 240ml. Is this a typo?
There is no typo. The poolish needs 200ml of water which is 2-3 tablespoons shy of 1 cup. The dough needs 240ml of water which is 1 full cup. Use weight measurements for accurate results.
hi! ive tried this recipe thrice and i must say it’s my holy grail! it never fails me and the bread always turns out soooo good, everyone loves it! only question is, if i wld like to raise this to a 90% or even 100% hydration bread, how will it go about? shld i increase the water in the poolish or in the mixture at the second step where everything goes into the mixer? thank you!
I’ve never attempted a hydration that high but you can use an online hydration calculator to get the exact amount of water needed for the recipe. The poolish should remain 100% hydration so I’d add the extra liquid to the dough when combining it all together.
Hello, I am on the last step and I was a little confused if you leave the loaves on the parchment paper or do you slide them from the parchement directly to the top of the inverted pan??
Slide the dough with the parchment paper onto the preheated pan.
Makes PERFECT bread! Love it. Will make again.
Made this today. What brilliant bread this turned out to be! Honestly, one of the most flavourful I’ve tried. Thank you!
I’ve never made ciabatta bread before. My dad emailed me the recipe because I had time on my hands. While I am very bad at playing waiting games, it was worth the day and a bit of time spent. I used regular flour instead of bread flour, as that’s what I had, and it was amazing. Now that I know how good it tastes, I will be making again very soon. 🙂
Half way into the recipe I was thinking it wasn’t going to work out. But I practiced some patience lol. This bread is pretty good. Adding to my recipe book !
I always try out a new recipe with half. But this turned out such a winner that I’m going to start another preferment and make it again tomorrow. Just to be different, I bake in a cast-iron skillet. This bread really profits from that treatment.
Hi Jen, I have made your bread regularly for the past few months it is really the best I make now! I know the bread flour is the way to go but the only thing I have on hand now is regular all purpose flour, will that work or will it just be a waste of all the other ingredients? THANK YOU!
Using all-purpose flour in place of bread flour will yield a slightly wetter dough. Since this recipe is already high hydration, I strongly recommend using bread flour.