
Easy Apple Crisp
This post may contain affiliate links. Read the full disclosure here.
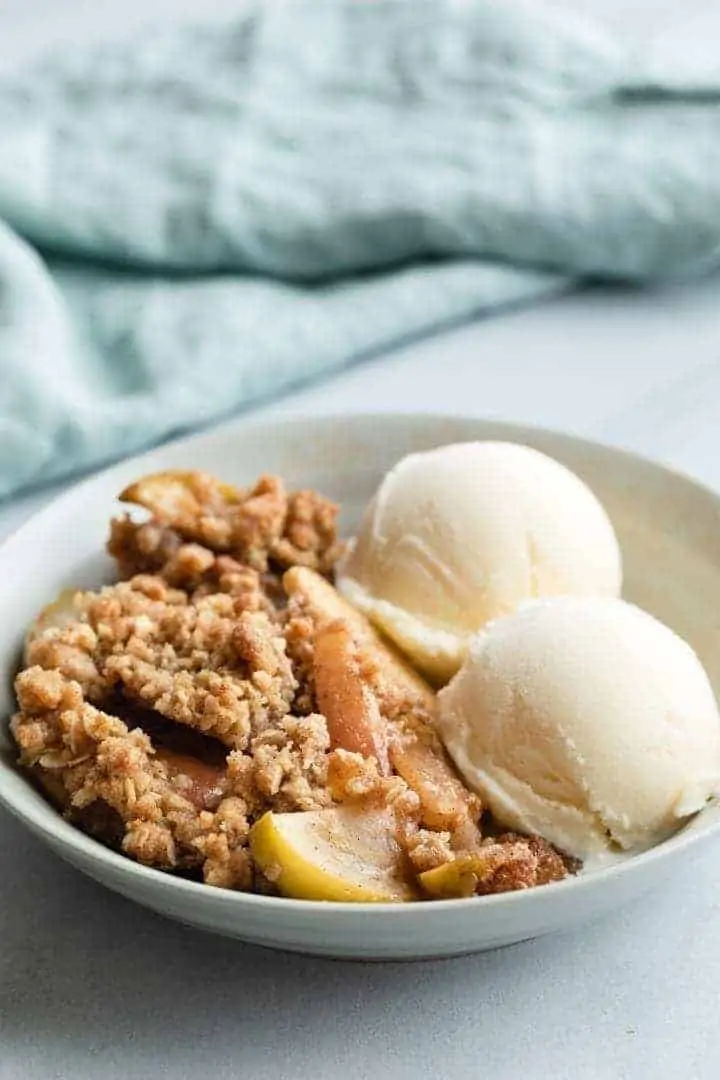
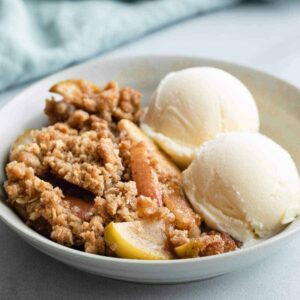
This is the best apple crisp recipe around! It’s a simple old-fashioned recipe that gets rave reviews every year during apple season. Make it with your favorite apple variety and serve it warm with a scoop of vanilla ice cream.
If you like apple cobbler, apple crumble, you are sure to fall in love with this easy apple crisp. It’s a lovely addition to my pear crisp and pear walnut crisp recipes.
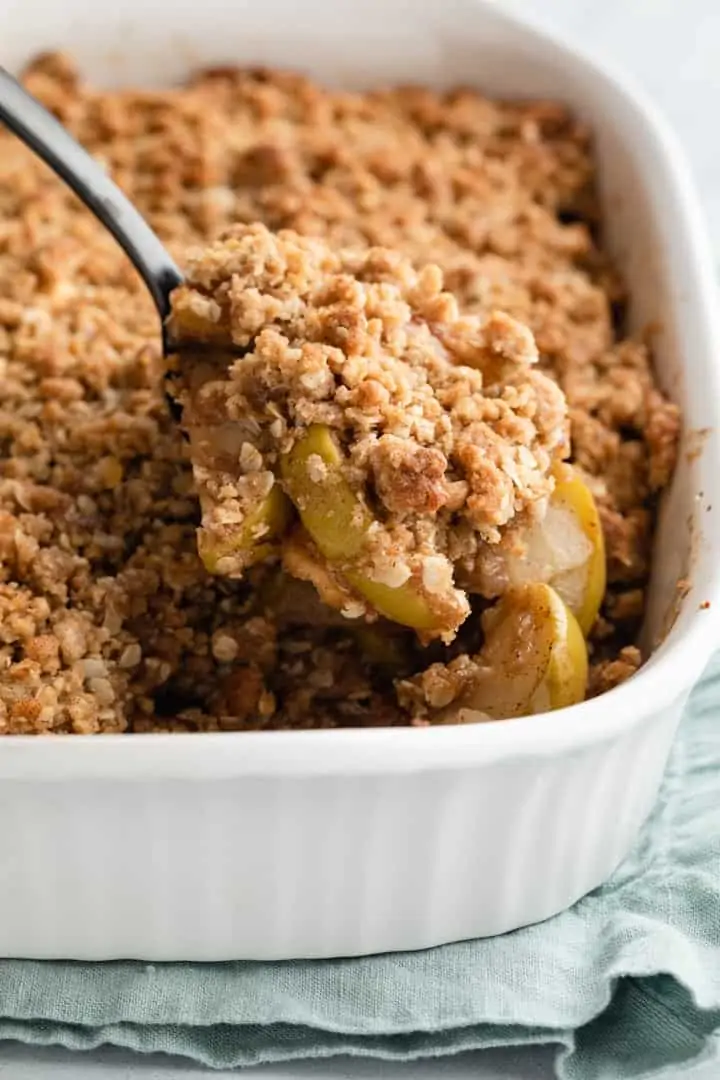
Apple crisp is different than a crumble or cobbler. The topping contains oats and bakes into a crispy, crunchy texture.
This recipe is simple and highlights the apples wonderfully without overpowering their flavor. I chose to use Granny Smith apples this time around. But, I’ve made the crisp with Pink Lady apples and also with a mix of Granny Smith and Pink Lady.
I used a little cinnamon in both the filing and the topping but refrained from using any other spices. I also added a touch of vanilla to the topping. The simplicity of this easy apple crisp recipe is what makes is so classic and delicious.
Why this recipe works
- You can choose to peel the apples if you wish but it’s not completely necessary. Simply wash, core, and slice the apples.
- The topping is crispy, crunchy, buttery, and exactly the way a crisp topping should be.
- The prep work is so minimal and takes just around 15 minutes to put together.
What is the difference between apple crisp and apple crumble?
This is a question I get asked a lot. The ingredients for crisps and crumbles are very similar. A crisp topping contains flour, oats, sugar, and butter. And a crumble topping is more of a streusel without oats.
Which apples are best to use?
Tart apples like Granny Smith or Golden Delicious work best with apple crisp. They offer a tartness that pairs wonderfully with the sweet crisp topping. You can mix a tart variety with a sweeter variety like Pink Lady or Honeycrisp. This gives a deeper flavor profile and is often preferred.
How long will it keep?
The baked crisp will keep for up to 3 days stored in the refrigerator. The topping will become soft after refrigeration so it’s best to warm it in the oven before serving.
You can also freeze the baked or unbaked crisp for up to 3 months. Thaw in the refrigerator overnight. Bake according to the recipe instructions or reheat at 375°F for 25-35 minutes.
How to reheat?
The best way to reheat apple crisp is to bake it in a 350°F oven for 15 minutes. You can also microwave a single serving in 30-second intervals until warmed through. The topping won’t crispen up when microwaved.

Ingredients
The ingredient list for this apple crisp recipe is very simple. You most likely have these items on had already.
- Apples: Use any variety of apple you desire. The sweetness of the topping pair best with tart apples. But you can combine sweet and tart apples for a deeper flavor profile.
- Sugar: White sugar is used in the filling and brown sugar is used in the topping. I like light brown sugar but dark brown sugar would be great as well.
- Lemon juice: Just a splash is used to prevent the apples from oxidizing.
- Cinnamon: A little cinnamon is used because it goes perfectly with apples.
- Flour: All-purpose flour is best for the topping.
- Oats: Be sure to use quick-cook oats. They are ground finer and offer a better texture over old-fashioned oats.
- Vanilla: Use pure vanilla extract for the best results.
- Salt: Only a dash is needed to balance the flavors.
- Butter: Unsalted sweet cream butter is recommended.
To bake this crisp you’ll need:
- 2-quart casserole dish: I love using this stoneware baking dish* for baking crisps.
- Mixing bowl: These Pyrex glass bowls* are my go-to for mixing.
- Apple slicer: An apple slicer* isn’t necessary but it does make it easier and quicker to slice the apples.
How to make apple crisp
This easy apple crisp is super simple to put together and takes just 15 minutes of prep.
The Filling – The apple filling is combined in a bowl and spread in a 2-quart baking dish. The hardest part of this process is coring and slicing the apples. Use an apple slicer to make this process easier.
The Topping – The apple crisp topping is mixed in a separate bowl then sprinkled over the filling. Use your fingertips to quickly work the melted butter into the dry ingredients. A fork or pastry blender and also be used but takes a bit more time.

Step 1: Make the filling
Before you begin making the filling, preheat the oven for at least 30 minutes to ensure it is up to temperature. Generously butter the inside of a 2-quart baking dish and set it aside.
Core and slice the apples into 14-inch thickness. It’s completely up to you if you wish to peel the apples first. I don’t have to time to fool with peeling them so I just wash them really well before using.
If you’re worried, you can soak the apples in a mix of water, lemon juice, and baking soda. This will remove the wax coating.
Toss the apples with sugar, lemon juice, and cinnamon until they are well coated. Then spread them in the bottom of the prepared baking dish.

Step 2: Make the topping
The apple crisp topping is just as easy to put together!
Stir the flour, oats, brown sugar, cinnamon, and salt together in a medium bowl. Drizzle the mixture with vanilla extract and melted butter.
Use your fingertips to work the butter into the dry ingredients until it resembles wet crumbs. You can use a fork or pastry blender but I find that it goes much faster with using my hands.
Sprinkle the topping over the apples making sure to cover the entire surface.

Step 3: Bake the crisp
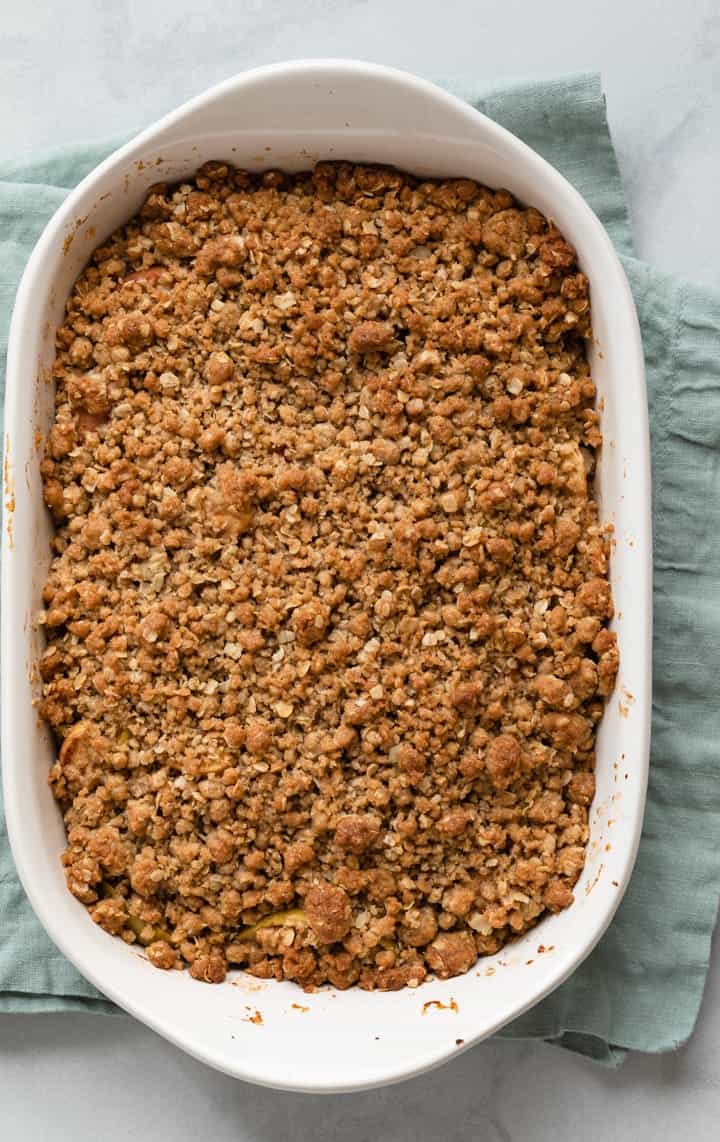
Bake the crisp for 25-35 minutes until the topping is golden and crisp. The apple filling should be soft and bubbling.
Serve the apple crisp while it’s warm with a scoop of vanilla ice cream.
This is truly the best apple crisp recipe. I think everyone needs an easy seasonal crisp recipe in their life. This one is so good, super simple, and not fussy.
Tips for success
- Make it gluten-free by subbing gluten-free flour. Oats are naturally gluten-free but you may wish to use a certified brand to ensure there is no cross-contamination.
- Try adding nuts to the topping. Use ½ cup chopped pecans, walnuts, macadamia nuts, or sliced almonds
- Serve apple crisp with a drizzle of salted caramel. It’s a fantastic addition!
If you like apples, you’ll love these delectable apple recipes:
- Apple Cake
- Baked Apples
- Apple Cranberry Pie
- Baked Apple Fritters
- Apple Cinnamon Scones
- Apple Streusel Bars
Apple Crisp
Ingredients
For the filling
- 2 pounds (895 g) apples, peeled and sliced ¼ inch thick
- 2 tablespoons lemon juice
- ¼ cup (50 g) granulated sugar
- ½ teaspoon ground cinnamon
For the topping
- 1 cup (130 g) all-purpose flour
- ⅔ cups (59 g) quick-cook oats
- 1 cup (210 g) light brown sugar
- ¼ teaspoon salt
- 1 teaspoon vanilla extract
- ½ cup (113 g) unsalted butter, melted
Instructions
Make the filling
- Preheat the oven to 375°F. Generously butter the bottom and sides of a 2-quart casserole dish; set aside.
- In a large bowl, toss the apples with lemon juice, sugar, and cinnamon, making sure to evenly coat the apples.
- Spread the coated apples evenly in the prepared pan.
Make the topping
- In a medium bowl, whisk the flour, oats, brown sugar, and salt together.
- Add the vanilla and melted butter. Use a fork, pastry blender, or your fingertips to work the butter into the flour mixture until it resembles wet crumbs.
- Sprinkle the topping evenly over the apples.
- Bake for 25-35 minutes until the topping is golden brown and filling is bubbling. Serve warm with vanilla ice cream.
Notes
- Apples: You don’t have to peel the apples if you don’t have time. Just be sure to wash them well before use.
- Oats: If you don’t have quick-cook oats, you can pulse old-fashioned oats in a food processor until they are broken up.
Nutrition
The nutrition information provided is for convenience and as a courtesy only. It is not guaranteed to be accurate because nutrition information can vary for a variety of reasons. For precise nutritional data use your preferred nutrition calculator and input the exact ingredients and brands you used in the recipe.
Would steal cut oats or old fashioned oats work? That’s all i have. ?
You can pulse old-fashioned oats in a food processor to break them up. That’s basically all quick cook oats are.
Awesome, simple, & came out magnificent! Doubled everything & served with whipped cream. Will make this again & again!
I made this for dessert for a football game get together and it was a big hit! Everyone loved it! I used fuji apples and golden delicious apples mixed together. I plan to make this again! It goes so well with icecream. Yummy!
Loved the crunchiness of the topping. I did add some chopped walnuts as well. One of the best apple crisps I have made. From a former home ec teacher.
Most recipes have the same type of crumb topping and since I’m lactose intolerant, I tried a few other things for the topping like granola & nuts as they create a nice topping that’s crunchier & it holds up a little better while in the refrigerator.