
Salted Dulce de Leche Thumbprint Cookies
This post may contain affiliate links. Read the full disclosure here.
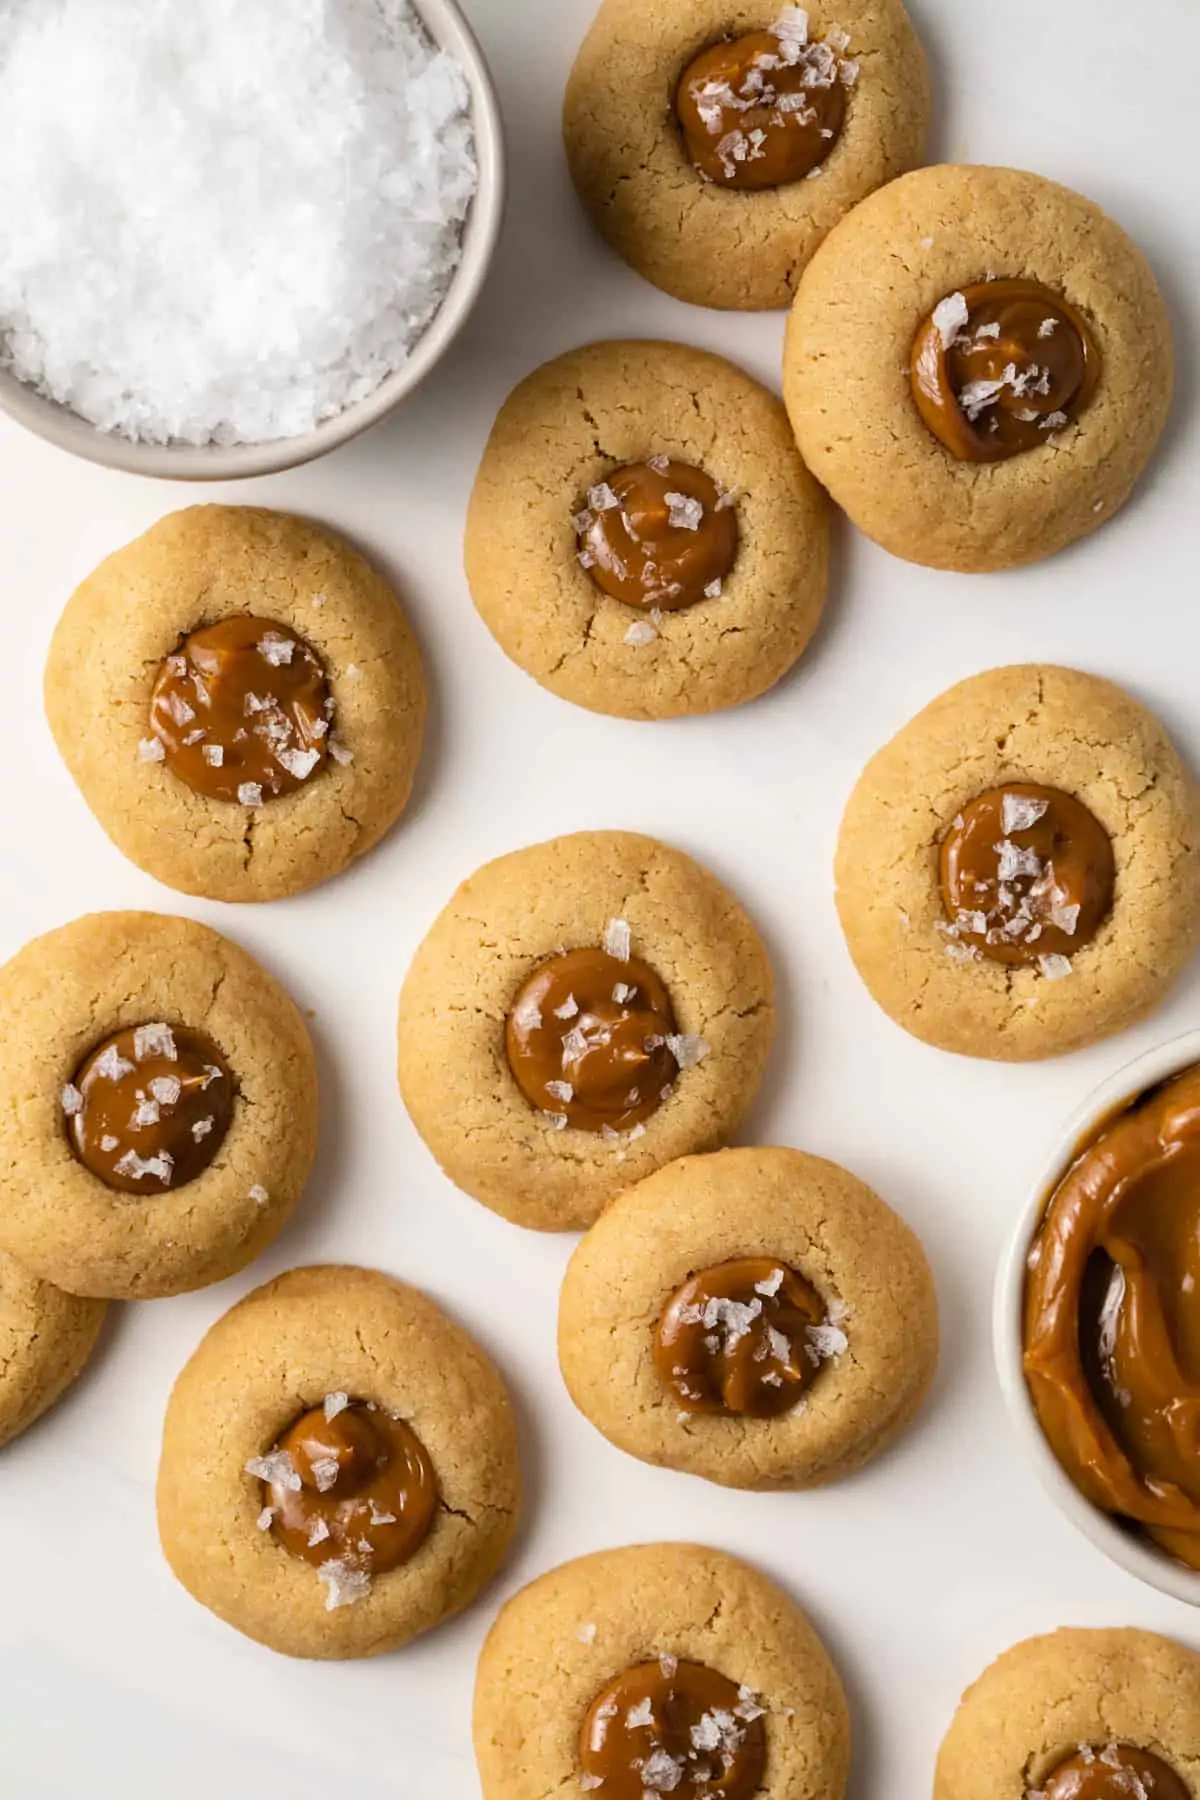
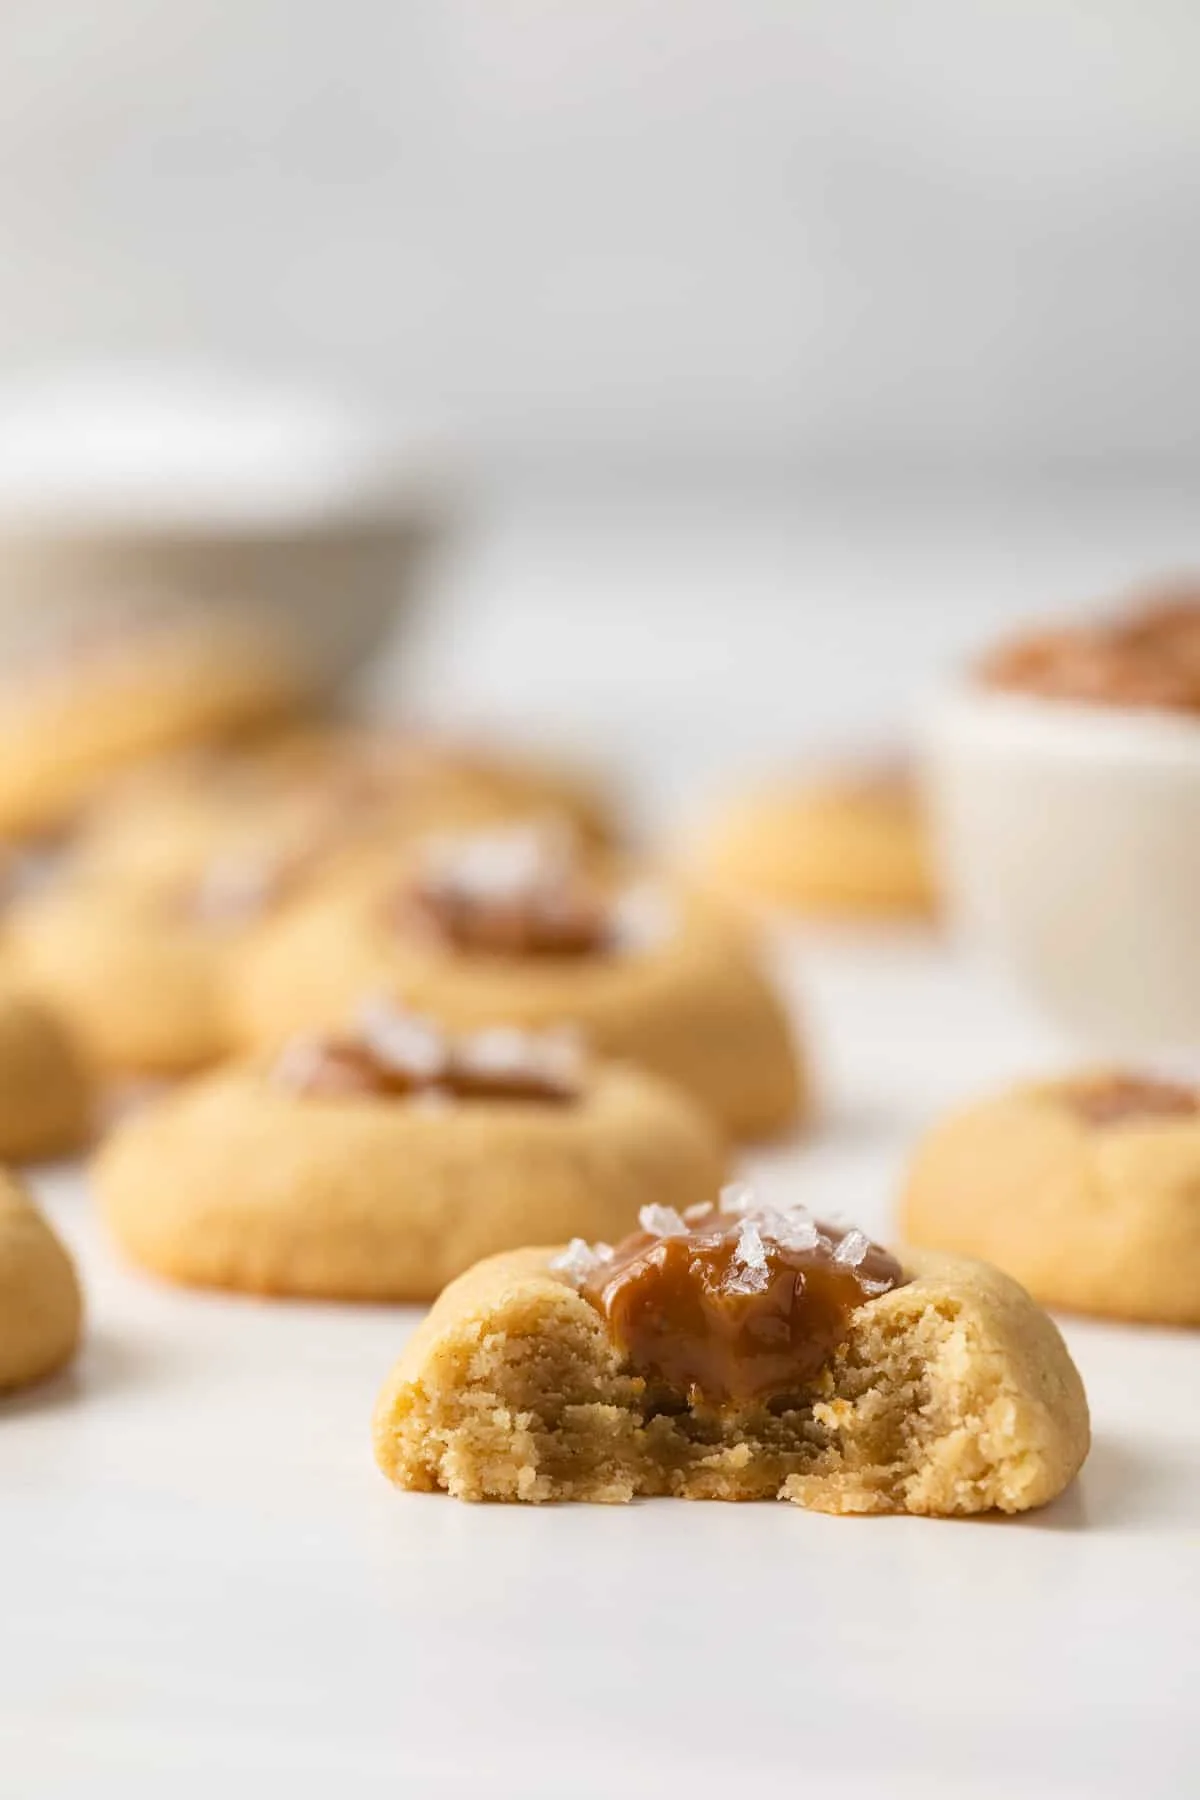
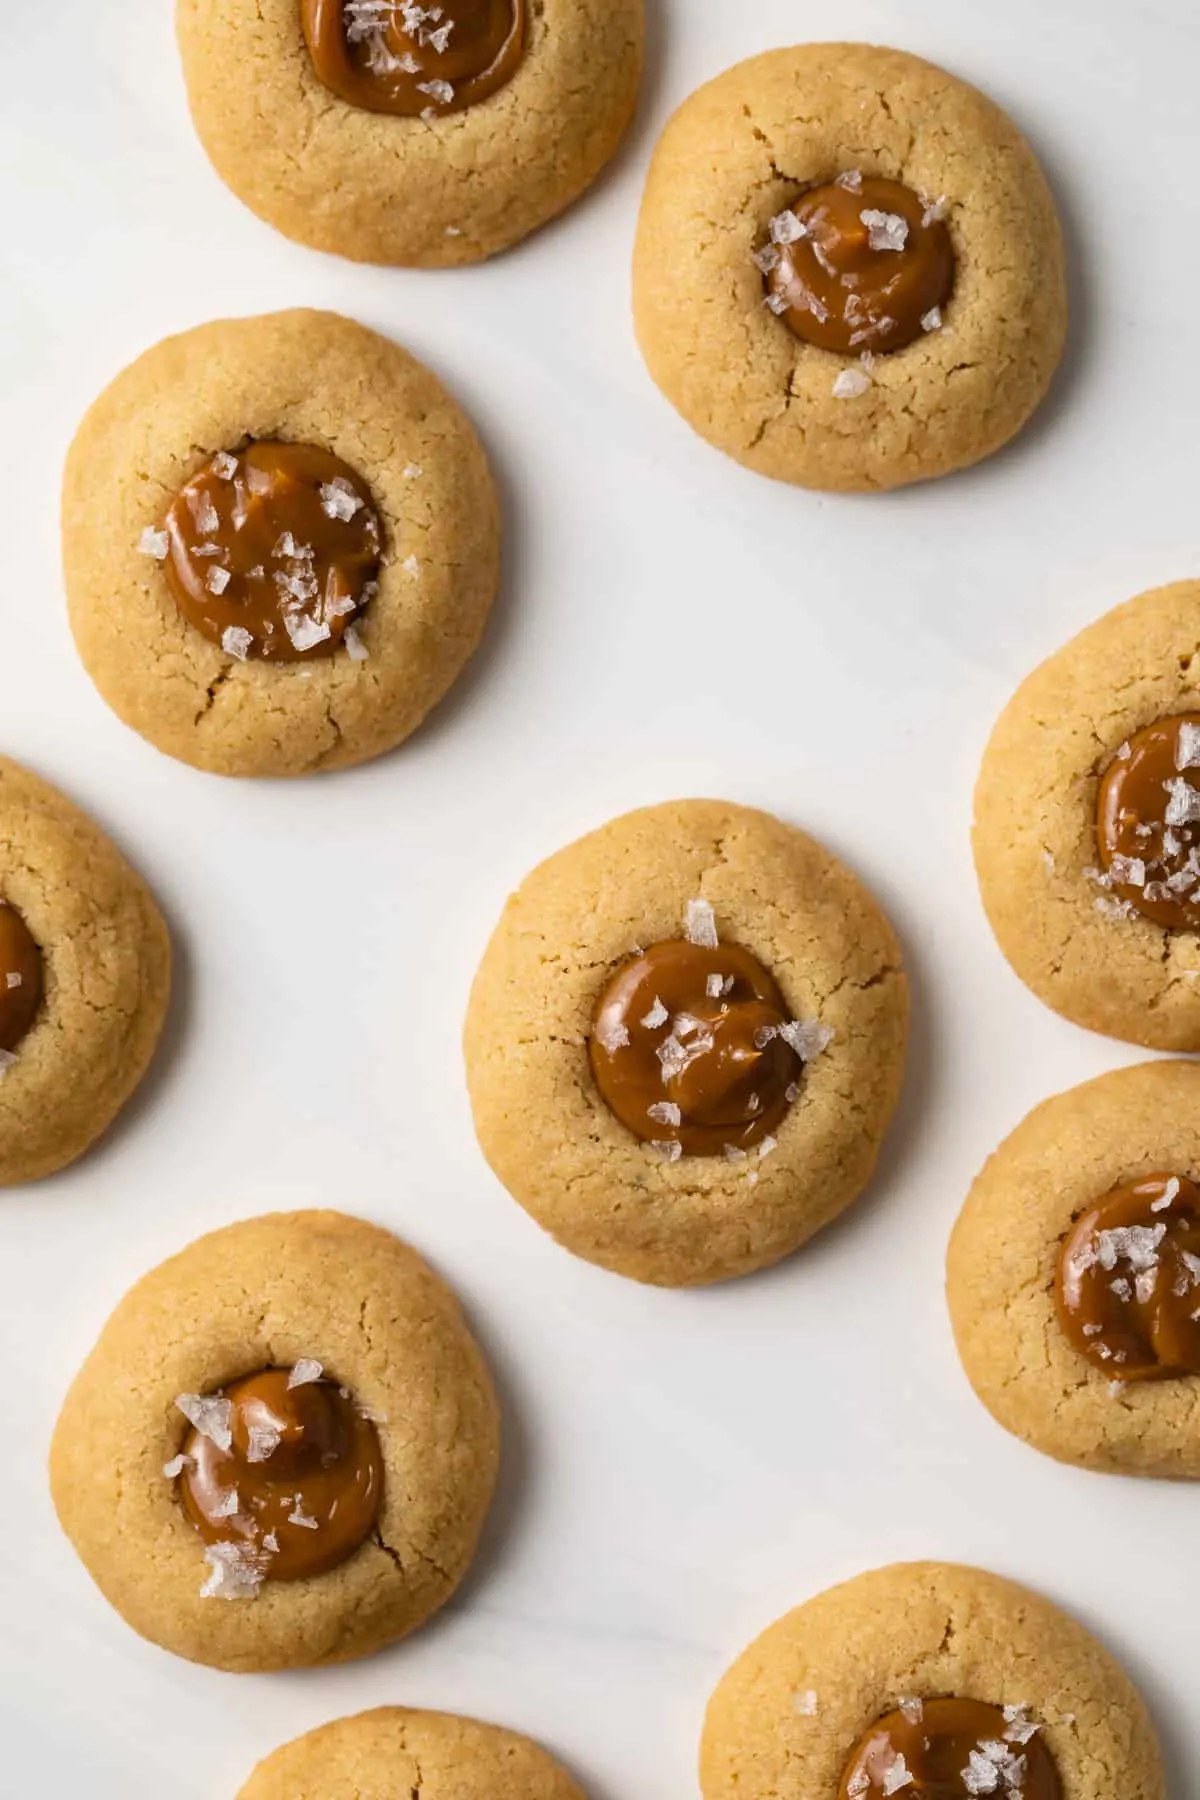
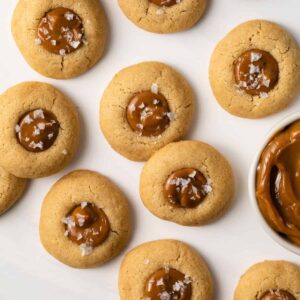
Buttery shortbread cookies topped with salted dulce de leche, these Salted Dulce de Leche Thumbprint Cookies are not only easy to make, but they’re also melt-in-your-mouth good! Perfect for holiday gifts and cookie swaps!
Easy dulce de leche cookies
As a huge fan of thumbprint cookies, I’m always on the lookout for new, creative ways to make them. These Dulce de Leche thumbprint cookies are my newest creation and I daresay may be the best.
This recipe is actually adapted from my lemon thumbprint cookies, as everyone loved the texture so much I had to make another winning flavor. There are a few simple adaptions for this recipe but the premise is the same.
One thing I do differently in this dulce de leche recipe is brown some of the butter. This rich flavor pairs beautifully with dulce de leche.
Dulce de leche is a caramel-like spread made from slowly cooking sweetened milk until it thickens and becomes dark in color. It’s also known as milk candy. It’s very traditional in many Latin American dishes and I love using it in tres leches cake.
Since the dulce de leche is added after baking, I chose to also add the indentations after baking. Adding them after when the dough is still soft is also quicker and easier, in my opinion!
Also unlike a traditional thumbprint cookie, these dulce de leche thumbprint cookies do not need to chill before baking! These are great for gift-giving too and make a welcome addition to any holiday cookie tray.
What you’ll need
These dulce de leche cookies are made with less than 10 ingredients!
Ingredients
- Unsalted butter – Part of this will be browned in the first step while the rest will simply be softened.
- Light brown sugar
- Eggs – You’ll use egg yolks only in this recipe.
- Vanilla extract
- All-purpose flour – Sift the flour for the best texture and to avoid any clumps.
- Salt
- Dulce de leche – You can either buy this at the store or make your own as I do.
- Flaked sea salt
Recommended tools
- Mixer – I often use my stand mixer with paddle attachment for cookies, but an electric hand mixer will work just fine.
- Cookie scoop – A 1 tablespoon cookie scoop is preferred for portioning the dough.
- Baking sheet – Two baking sheets are needed for baking the cookies.
- Piping bag – A piping bag makes it easier to fill the cookies.
How to make salted dulce de leche thumbprint cookies
No chilling and just a few simple steps to make these easy thumbprint cookies!


- Brown the butter. Heat ¾ cup of butter over medium heat. Swirl the pan frequently as the butter melts. Cook until the butter is a light amber color with a nutty aroma. Remove from heat and transfer to a heatproof bowl, leaving the darker brown bits. Chill in the fridge for 10 to 15 minutes.
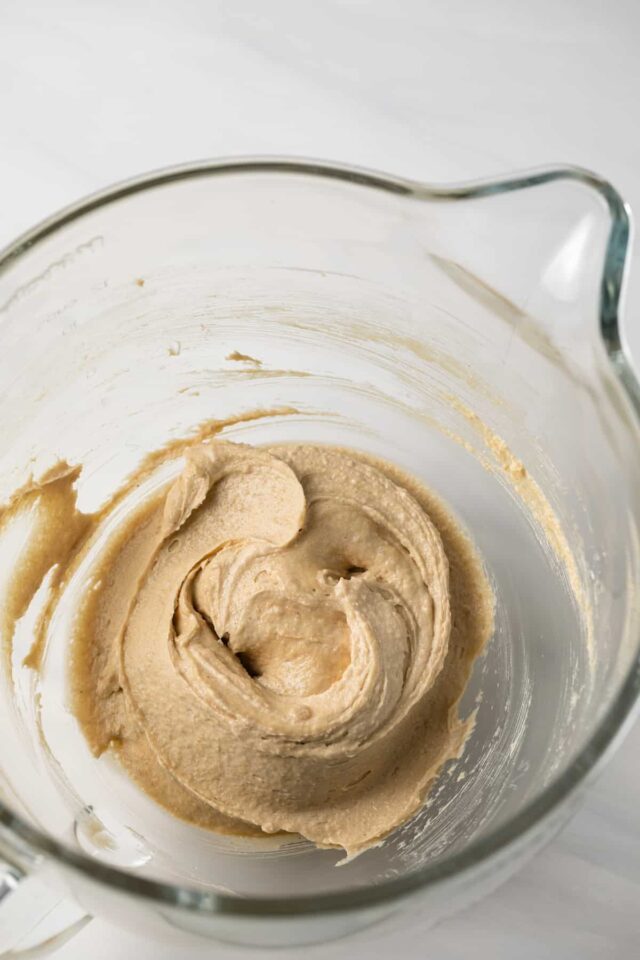
- Make the thumbprint cookie dough. Top off the brown butter with softened butter to equal 1 cup. Cream with the brown sugar until smooth and creamy. Beat in egg yolks and vanila then sift in the flour.


- Bake. Shape the dough into 1 tablespoon size balls and place on the prepared baking sheet. Bake until the bottom edges are lightly browned, about 10-12 minutes.
- Cool. As soon as the cookies are removed from the oven, use a spoon to press an indentation in the center of each cookie. Cool on a wire rack.
- Add the dulce de leche. Pipe the dulce de leche into the cavities of each cookie. Top with flaked sea salt.
Tips for Success
If this is your first time making thumbprint cookies, here are a few things to keep in mind.
- Make your own dulce de leche. Did you realize that dulce de leche is made with just 1 ingredient? Sweetened condensed milk is all you need so if you have the extra time, it’s definitely worth making for this recipe.
- Don’t overbake the cookies. The edges should be just lightly browned when you remove them from the oven. The tops should still be soft.
- Add the indentation immediately. The indentation must be added as soon as the cookies are removed from the oven, do not wait. I like to use a measuring teaspoon for this.
Serving suggestions
Enjoy these cookies at room temperature. Since they’re a little fancy and not your everyday cookie, I love to give them as gifts or add them to cookie trays during the holidays. Everyone always exclaims that they’ve never tried a thumbprint cookie like this before.
I love enjoying these with a warm cup of tea or coffee!
How to store
- How to store leftovers. You can store these dulce de leche thumbprint cookies in an airtight container at room temperature for 3 days or in the fridge for 6 days. Layer the cookies with parchment paper if needed.
- Can I freeze these? Yes, these will also freeze for up to 2 months. Thaw in the fridge overnight.
- Can I freeze thumbprint cookie dough? If you’d rather keep the dough than the finished cookie on hand, you can do that too. The dough will last for up to 2 months in the fridge. Thaw overnight in the fridge then bake.
More cookie recipes
- Salted Caramel Brownie Cookies
- Old Fashioned Oatmeal Raisin Cookies
- Cherry Almond Cookies
- Peanut Butter Cup Cookies
Salted Dulce de Leche Thumbprint Cookies
Ingredients
- 1 ¼ cups (282 g) unsalted butter, softened, divided
- ¾ cup (150 g) light brown sugar
- 2 egg yolks
- 1 teaspoon vanilla extract
- 2 ¼ cups (292 g) all-purpose flour, sifted
- ¼ teaspoon salt
- ½ cup (160 g) dulce de Leche
- Flaked sea salt
Instructions
- Heat ¾ cup (170 g) of the butter in a small saucepan over medium heat. As the butter melts, swirl the pan frequently. Cook for about 3 minutes or until the butter turns a light amber color and has a nutty aroma. Watch it closely, it can go from brown to burnt rather quickly.
- Remove from heat, transfer to a heatproof bowl, leaving the darker brown bits behind. Place the bowl in the refrigerator for 10-15 minutes, stirring occasionally until it has started to solidify.
- Preheat the oven to 350°F. Line 2 baking sheets with parchment paper, set aside.
- Add the brown butter to a 1-cup measuring cup and top it off with enough of the remaining softened butter to equal 1 cup (226 g).
- Add the butter and brown sugar to a large mixing bowl, beat with an electric mixer on medium speed until smooth and creamy, about 3 minutes
- Beat in the egg yolks and vanilla. Sift in the flour and salt then mix just until blended. Scrape down the sides and bottom of the bowl as needed.
- Shape the dough into 1 tablespoon size balls and place them 2 inches apart on the prepared baking sheet.
- Bake for 10-12 minutes or until the bottom edges are lightly browned. Remove from oven and immediately press a slight indention in the center of each cookie. A 1-teaspoon measuring spoon works best for this.
- Cool the cookies on the pan for 5 minutes before transferring them to a wire rack to cool completely.
- Using a piping bag or ziptop bag with the corner cut off, pipe dulce de leche into the cavities of each cookie. Sprinkle the tops with flaked sea salt.
Notes
- Butter: ¾ cup will be cooked until brown but this process will reduce the amount of butter. Once the browned butter cools, you need to add enough softened butter to the brown butter to equal 1 cup (226 g).
- Dulce de leche: You can use storebought or make dulce de leche at home.
- Store the cookies in an airtight container layered with parchment paper at room temperature for up to 3 days. Or in the refrigerator for up to 6 days.
- The cookies will keep for up to 2 months stored in the freezer. Thaw in the refrigerator overnight.
- The cookie dough will keep for up to 2 months in the freezer. Thaw in the refrigerator overnight.
Nutrition
The nutrition information provided is for convenience and as a courtesy only. It is not guaranteed to be accurate because nutrition information can vary for a variety of reasons. For precise nutritional data use your preferred nutrition calculator and input the exact ingredients and brands you used in the recipe.
If you want them to stand up like the picture rather than flattening out add an extra egg yolk to the recipe. It made a big difference in my cookies without changing the flavor
.
I’m a huge fan of dulce de leche, I am so glad to see a cookie recipe that is using it, thank you for sharing this, pinning to my cookies board:)
These cookies definitely are the winner! I mean, dulce de leche. Salted. I’m sold.