
Red Velvet Cupcakes
This post may contain affiliate links. Read the full disclosure here.
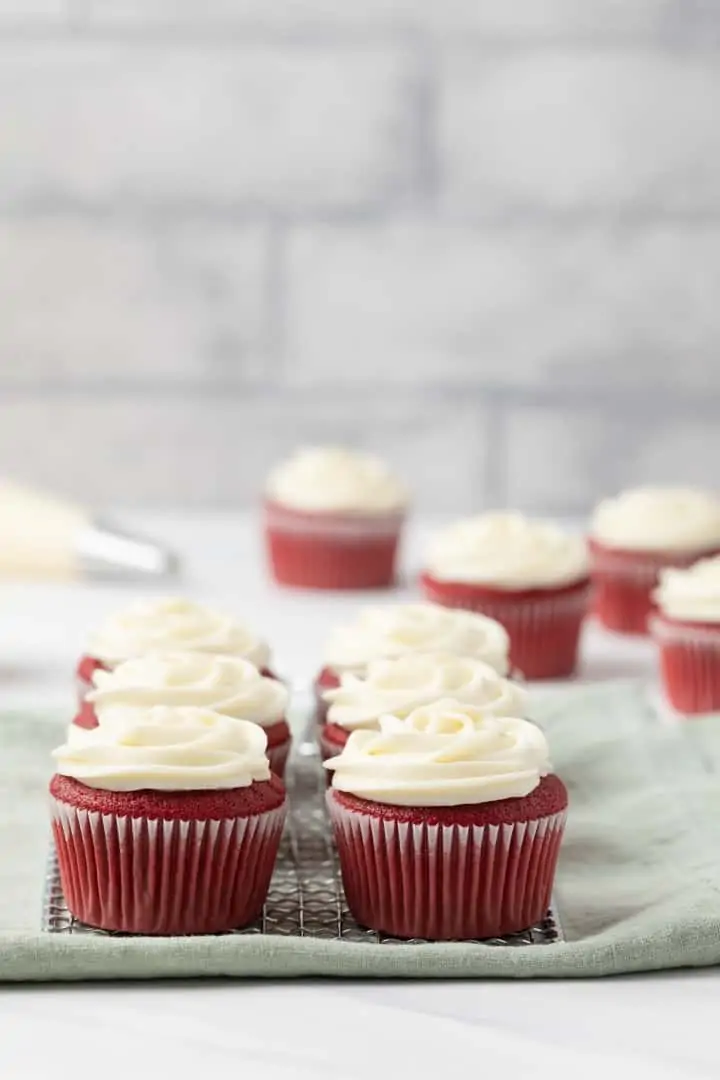
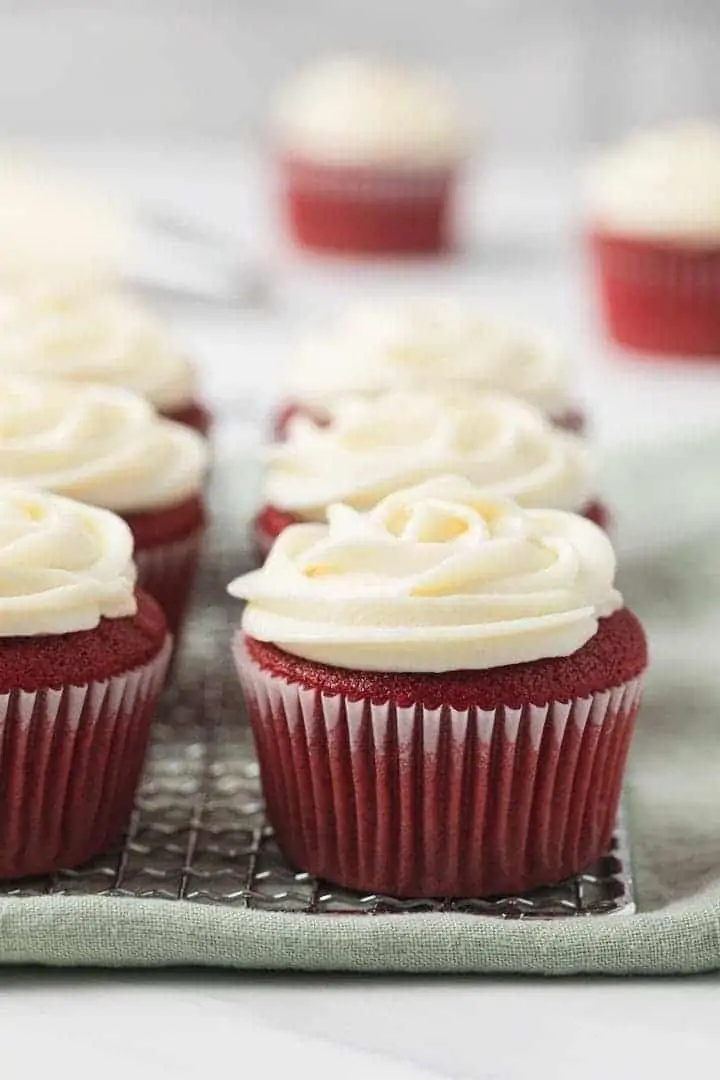
These gorgeous red velvet cupcakes have hints of both chocolate and vanilla with rich red color, making them an exquisite treat. A smooth, tangy cream cheese frosting ties the flavors together.
What better way to celebrate a special occasion than with red velvet cupcakes. They are miniature versions of my red velvet cake with a light and fluffy texture. And the flavor is unlike any other.
I’ve made many different versions of red velvet desserts over the years including this red velvet cheesecake. But, these cupcakes are my very favorite.
The recipe uses both butter and oil so the cupcakes are buttery rich, extra moist, and incredibly fluffy. These single-serve cupcakes taste exactly like a classic red velvet cake.
A lush cream cheese frosting adorns the top. But, you can change up the frosting if you’re not a fan of cream cheese. My simple Swiss meringue buttercream would be an excellent substitute.
Next, try my green velvet cupcakes for a fun twist!
Why this recipe works:
- The perfect balance of chocolate and vanilla is used along with a subtle tang that is well known in red velvet.
- Butter and oil are used to keep the cupcakes soft and fluffy without compromising the rich flavor.
- Tangy cream cheese frosting ties all the cupcake flavors together leaving you with a sensational dessert experience.

How to make red velvet cupcakes
Red velvet is a mix between chocolate and vanilla flavors with a touch of tanginess that lingers at the end. There’s chocolate, vanilla, vinegar, and buttermilk in the cupcakes. Each one plays an important part in how the cupcakes taste.
The ingredients
- Butter and oil: The combination of butter and oil ensures the cupcakes have the best texture and taste. Use vegetable or canola oil with a high-quality butter.
- Sugar: Regular granulated sugar is all you need here.
- Eggs: You need 3 large eggs that are at room temperature. Set them out 30-45 minutes before you start making the recipe.
- Vanilla extract: Use pure vanilla extract of the highest quality. Or you can use homemade vanilla extract.
- Flour: I find that cake flour is best. It’s lower in protein content and produces a soft, lighter crumb. My favorite is Bob’s Red Mill.
- Cocoa powder: You only need a couple of tablespoons of unsweet cocoa powder to add a hint of chocolate flavor.
- Leavening: Baking powder and baking soda are added to give the cupcakes rise. The baking soda will react with the cocoa powder, buttermilk, and vinegar to produce a perfect red velvet cupcake.
- Buttermilk: Use full-fat buttermilk for the best results and make sure it’s at room temperature just like the eggs.
- Vinegar: You only need 1 tablespoon of white vinegar.
- Red food coloring: I used an entire 1-ounce bottle of liquid red food coloring. You can use gel food coloring if you wish.

The instructions
Red velvet cupcakes use the creaming method for mixing. This results in a sturdy yet soft cupcake texture.
Step 1: Mix the wet ingredients
First, cream the oil, butter, and sugar together until light and fluffy. Add the eggs, one at a time, and mix well after each addition. Then, mix in the vanilla extract.
Step 2: Mix the dry ingredients
Add the flour, cocoa powder, baking powder, baking soda, and salt to a separate bowl. Use a whisk to stir it all together until everything is well combined.
Step 3: Combine the wet and dry ingredients
Add half the flour mixture to the butter/oil mixture. Mix until almost fully combined.
Add the buttermilk followed by the remaining flour mixture and mix until just combined. Mix in the vinegar and food coloring until fully combined.
Step 4: Bake the cupcakes
Line 24 muffin cups with paper liners and fill each one ⅔ full with batter. Take care and don’t overfill the cups. The batter rises quite a bit during baking and cups that are too full may overflow.
I like to use a 3-tablespoon cookie scoop to portion out my batter.
Bake the cupcakes at 350°F for 15-18 minutes. Or until a toothpick inserted into the center comes out with only a few moist crumbs attached.
Step 5: Frost the cupcakes
Cool the cupcakes in the pan for 10 minutes then transfer them to a wire rack to cool completely. Frost them with my silky cream cheese frosting. I use a Wilton 1M piping tip to pipe a rose on top of each cupcake.
If you’re not a fan of cream cheese frosting, try using my Swiss meringue buttercream instead.
Make ahead and storage tips
- The cupcakes can be made ahead 1 day in advance. Keep covered and store at room temperature.
- The frosting can also be made 1 day in advance. Keep covered and store in the refrigerator until ready to use.
- Frosted cupcakes can be stored in an airtight container for up to 3 days in the refrigerator.
- Unfrosted cupcakes can be frozen for up to 3 months. Thaw in the refrigerator overnight and frost before serving.
Tips for Success
- Make sure to properly measure the flour. Don’t just scoop the flour out of the container with the measuring cup. Instead, lightly spoon the flour into the measuring cup and level it off with the back of a knife. Or measure by weight for more accurate results.
- Sift the flour and cocoa powder to remove any clumps. Do this after they have been measured.
- The amount of food coloring is up to you! I used 1-once liquid food coloring. Feel free to use less or more.
- Buttermilk is required. It’s needed in order to react with the cocoa powder and baking soda. Full-fat buttermilk will work best but low-fat will be okay if that’s all you can access.
Red Velvet Cupcakes

Ingredients
For the cupcakes
- ½ cup (120 ml) canola oil, vegetable oil can also be used
- ¼ cup (57 g) unsalted butter, softened
- 1 ½ cups (300 g) granulated sugar
- 3 large eggs, room temperature
- 2 teaspoons vanilla extract
- 2 ¾ cups (330 g) cake flour, sifted
- 2 tablespoons unsweetened cocoa powder , sifted
- 2 teaspoons baking powder
- ½ teaspoon baking soda
- ½ teaspoon salt
- 1 cup (240 ml) buttermilk, room temperature
- 1 tablespoon white vinegar
- 1 ounce red food coloring, 1 bottle
For the frosting
- 1 cup (227 g) unsalted butter, softened
- 16 ounces (453 g) cream cheese, softened and cut into pieces
- 4 cups (480 g) confectioners sugar, sifted
- 1 tablespoon vanilla extract
- ⅛ teaspoon salt
Instructions
Make the cupcakes
- Preheat the oven to 350ºF. Line two 12-cup muffin pans with paper liners. Set aside.
- In a large bowl, beat together the oil, butter, and sugar for 10 minutes on medium speed, until light and fluffy. Add the eggs, one at a time, mixing for about 20 seconds after each addition. Beat in the vanilla.
- In a separate bowl, combine the flour, cocoa powder, baking powder, baking soda, and salt. Stir with a whisk. Gradually add the flour mixture to the butter mixture alternating with the buttermilk, begin and end with the flour mixture. Beat until well blended. Add the vinegar and food coloring. Beat until fully incorporated and no streaks remain in the batter.
- Fill the prepared muffin cups ⅔ full. (There may be enough batter leftover to make 4 extra cupcakes.) Bake for 15-18 minutes or until a wooden toothpick inserted into the center comes out with only a few dry crumbs.
- Cool the cupcakes in the pan for 10 minutes, then transfer to a wire rack to cool completely. Frost as desired.
Make the frosting
- In a large bowl, beat the butter and cream cheese together until smooth and creamy.
- Add the sugar, vanilla, and salt. Beat on low speed until just incorporated. Turn the mixer to high speed and beat until smooth.
Notes
- Make sure to properly measure the flour. Don’t just scoop the flour out of the container with the measuring cup. Instead, lightly spoon the flour into the measuring cup and level it off with the back of a knife. Or measure by weight for more accurate results.
- Sift the flour and cocoa powder to remove any clumps. Do this after they have been measured.
- Buttermilk is required. It’s needed in order to react with the cocoa powder and baking soda. Full-fat buttermilk will work best but low-fat will be okay if that’s all you can access.
- The amount of food coloring is up to you! I used 1-once liquid food coloring. Feel free to use less, more, or leave it out completely.
- The cupcakes can be made ahead 1 day in advance. Keep covered and store at room temperature.
- The frosting can also be made 1 day in advance. Keep covered and store in the refrigerator until ready to use.
- Frosted cupcakes can be stored in an airtight container for up to 3 days in the refrigerator.
- Unfrosted cupcakes can be frozen for up to 3 months. Thaw in the refrigerator overnight and frost before serving.
Nutrition
The nutrition information provided is for convenience and as a courtesy only. It is not guaranteed to be accurate because nutrition information can vary for a variety of reasons. For precise nutritional data use your preferred nutrition calculator and input the exact ingredients and brands you used in the recipe.
Hi Jen, These look so good! Can’t wait to try them. I do have a question, in the ingredients it calls for 3/4c. milk and then in the directions it says buttermilk, does it matter if it is whole milk or buttermilk? Just want to make sure so I don’t mess them up cause my son and his girlfriend saw them and want me to make some for the holiday. 🙂
Ahh, thank you for bringing that to my attention. The recipe should call for buttermilk. It is most certainly needed in order to achieve the classic red velvet taste. Plus it keeps the cupcakes tender. I hope you enjoy the recipe. I’d love to hear your thoughts once you’ve tried it!
Jen, I love red velvet cupcakes and have been looking for a great recipe! My kids love red velvet over the holidays!!! I’ve got to try this one!
Thank you, Alice!!
What a lovely, gorgeous, deep color! I am bookmarking this recipe to try out around Christmas!
Thank you so much Shashi!
OMG, Before I developed an allergy to cocoa I LIVED for red velvet cake! I LOOOVE these cupcakes, girlfriend! I want to bang my head against a wall for not being able to eat an entire dozen of them. (<–Insert pouty face here). My husband will die over these though, so you can bet I will be making them… and crying inside with jealousy as he devours every last crumb! Pinned! Cheers! <3
Boo for food allergies! I hope your husband enjoys the cupcakes. Sorry you can’t have them.
These are definitely legendary. I gotta say, these close-ups of cupcake are making me very hungry. And I just had breakfast!
Haha, YES! I am smitten with the color!!
I haven’t had red velvet cupcakes in a while! These look gorgeous Jen! Will try the recipe very soon!
It is time you have a red velvet cupcake!
The balance of flavors here is incredible 🙂
Thanks Medha!
Oooh, this is perfect. A truly classic recipe, thank you for sharing! (And I’m sharing too!!)
Thank you so much, Nagi! You are way too kind.
These really do look classy! And that frosting is just perfect!
Thanks, Amanda! You can’t go wrong with a classic recipe!
So pretty and elegant! And that cream cheese frosting on top – I’m in!!!!
Thanks, Rachelle!