
Butterfinger Cheesecake with Caramel Drizzle
This post may contain affiliate links. Read the full disclosure here.
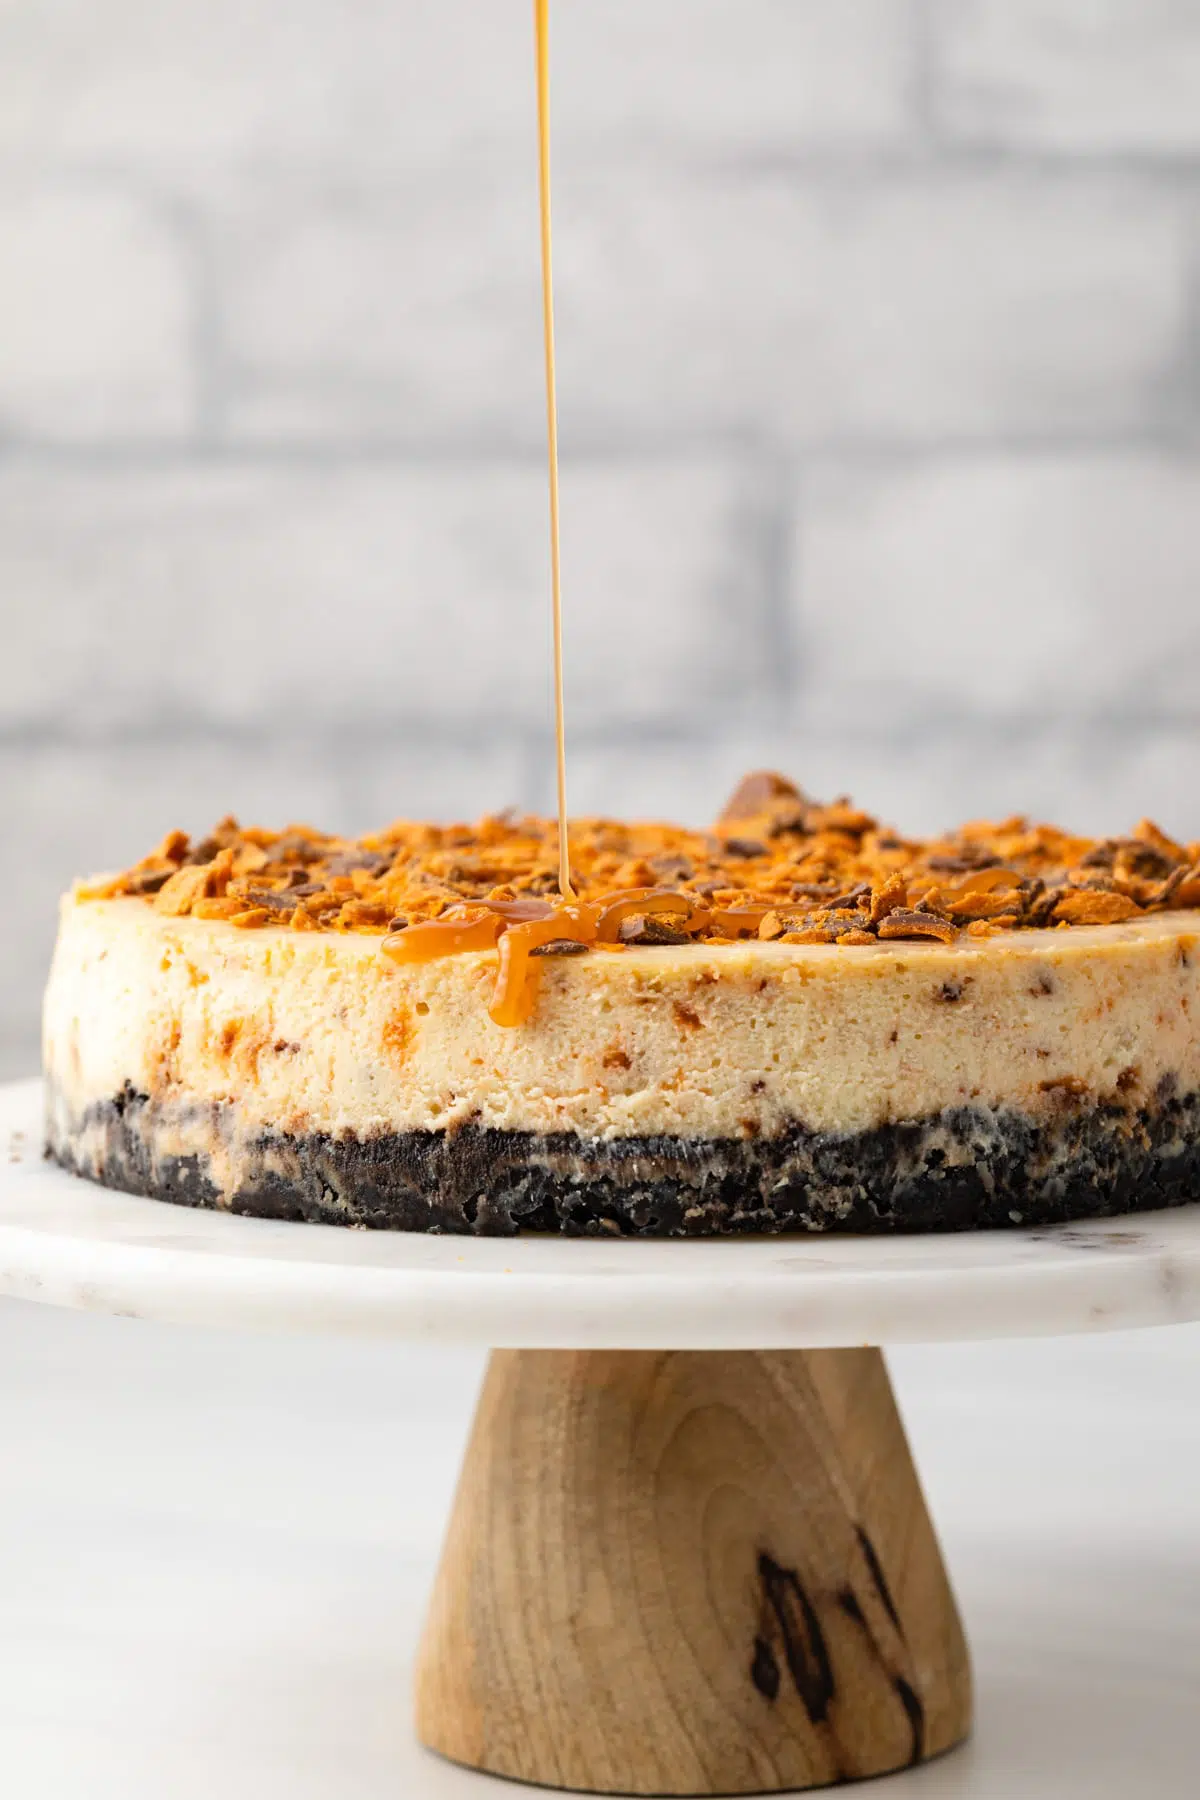
There is so much to love about this homemade Butterfinger Cheesecake recipe. First. The Butterfingers. Second. The Cheesecake. All topped with Caramel Drizzle? It’s decadent and delicious. Butterfinger candy bars and cheesecake are a match made in dessert heaven. You’ll swoon over this cheesecake recipe.

My all-time favorite cheesecake recipe gets revamped with butterfingers, chocolate cookie crust, and caramel drizzle. It’s decadent cheesecake heaven! It’s almost as good as my Nutella cheesecake.
In this recipe, loads of chopped Butterfinger candies fill the body of the cheesecake and more are added over the top. And rather than the standard graham cracker crust, this cheesecake rests on fudge-filled oreo crust. And let’s not forget the drippy caramel drizzle. This decadent cheesecake is sure to be a delight.
The cheesecake is cooked in a water bath and left to cool in the oven after 1 hour of baking. This process yields a creamy cheesecake without the dreaded cracking. Be sure to read my tips on how to make the best cheesecake for optimal results.
I got the idea to make this cheesecake from an old Taste of Home magazine. I like to cut out the recipes that catch my eye and file them away for a later date.
For this cheesecake, I used my favorite no-fail cheesecake filling and mixed in chopped Butterfinger bars. Poured the filling over a fudge-filled cookie crust. Oreos will work too if you can’t find fudge-filled sandwich cookies. And topped the whole thing off with more chopped Butterfinger bars and a generous drizzle of homemade caramel sauce.
The great thing about this cheesecake is you can swap out the butterfingers for any other candy bar you desire. Snickers bars would be a great alternative.
The Butterfinger cheesecake looks delicious and tastes even better. Be sure you have plenty of friends and family to share it with or you may be tempted to eat it all yourself.
Recipe Details
- Taste – Cheesecake with a touch of peanut butter and chocolate.
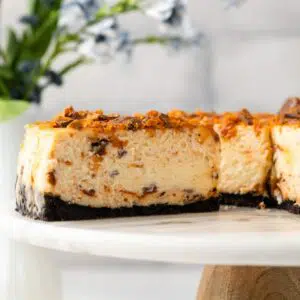
- Texture – Silky and creamy cheesecake with crunchy Butterfinger bites and a cookie crust.
- Ease – Cheesecake requires little extra effort than other desserts, but they are well worth it.
- Time – Just under two hours, plus 4-6 hours of chilling time.
What You’ll Need for Butterfinger Cheesecake
For the crust
- Fudge-filled sandwich cookie crumbs: Chocolate-filled Oreos are what I used.
- Unsalted butter
For the cheesecake
- Cream cheese: Use a block of full-fat cream cheese, not low fat, and not whipped
- Heavy cream: This should be at room temperature
- Sugar: White granulated sugar works best in this recipe.
- Vanilla extract: I always make my own with this recipe, but you can use pure vanilla extract.
- Eggs: These should be at room temperature and lightly beaten
- Butterfinger candy bars: Try not to eat them!
For the topping
- Butterfinger candy bar
- homemade caramel sauce: You can also use store-bought.
Recommended tools
Cheesecake really only requires a bowl, a mixer and a springform pan. I would not try to make a cheesecake without a springform pan, it’s sort of a necessity.

How to Make Butterfinger Cheesecake
Cheesecake isn’t difficult to make, once you get the hang of it. Be sure to read through how to make the best cheesecake before starting.
- Prep. Adjust the oven rack to the lower third position and preheat the oven to 350ºF. Wrap the outer bottom of a 9-inch springform pan tightly with aluminum foil.
- Make the crust. Combine the cookie crumbs and melted butter. Press the crumb mixture into the bottom of the pan. Bake for 10 minutes. Reduce the oven temperature to 300.

- Make the filling. In a large bowl beat the cream cheese with an electric mixer until smooth. Beat in the heavy cream and sugar until well combined. Add the vanilla, and beat on low speed until smooth. Gently stir in the eggs just until combined and fold in the chopped candy bar.
- Pour the batter over the crust in the prepared springform pan. Place the pan inside a roasting pan. Fill the roasting pan with enough hot water to reach halfway up the sides of the cheesecake pan. This is a water bath. It is a funny technique that keeps the top of the cake from cracking.
- Bake for 1 hour, OR until the edges are set and the center is slightly jiggly. Turn the oven off, and leave the cheesecake in the water bath in the oven for another hour.
- Remove the cheesecake from the water bath. Run a small knife around the outer edge of the cheesecake to loosen it from the pan and cool completely. Cover and refrigerate for at least 4 hours, preferably overnight.
- Just before serving, remove the sides of the pan. Top the cheesecake with the remaining candy bar and drizzle with homemade caramel sauce.
Tips For Success
If the crust puffs up during baking, use a clean glass or dry measuring cup to press it back down.
- Cream cheese: Use full-fat brick-style cream cheese for the very best results.
- Plan ahead: The recipe requires a lot of time. It’s best to make it a day before you plan to serve it.
- Room temperature ingredients: All of the cold ingredients should be brought to room temperature before using them in the batter.
- Don’t over mix: Keep the mixer on medium-low to low speed and use the paddle attachment. Otherwise, you could incorporate too much air into the batter which will cause the cheesecake to crack.
- The cheesecake should appear slightly underdone after baking. It will continue to set and firm up once cooled and refrigerated.

Storage & Freezing
The cheesecake will keep for up to 4 days covered and stored in the refrigerator.
Or freeze the whole cheesecake. Cool and chill as directed. Wrap tightly in two layers of plastic wrap, then again in two layers of aluminum foil. Freeze for up to 3 months. Thaw in the refrigerator overnight.
You can also freeze individual slices. Wrap each slice in plastic wrap, then place them in a freezer-safe zip-top bag for up to 3 months. Thaw in the refrigerator overnight or at room temperature for about 30-45 minutes. This is sort of a genius way to have a slice or two at a time. Pull a slice out of the freezer when making dinner, and dessert will be ready before you’ve had a chance to wash the dishes.
Butterfinger Cheesecake with Caramel Drizzle
Ingredients
For the crust
- 2 ½ cups (265 g) fudge-filled sandwich cookie crumbs, about 30 cookies
- 3 tablespoons unsalted butter, melted
For the cheesecake
- 32 ounces (904 g) cream cheese, softened
- ¾ cup (180 ml) heavy cream, room temperature
- 1 ⅓ cups (267 g) granulated sugar
- 1 tablespoon vanilla extract
- 4 large eggs, room temperature and lightly beaten
- 3 Butterfinger candy bars, coarsely chopped
For the topping
- 1 Butterfinger candy bar, coarsely chopped
- ½ cup (250 g) homemade caramel sauce
Instructions
Make the crust
- Adjust the oven rack to the lower third position and preheat the oven to 350ºF. Wrap the outer bottom of a 9-inch springform pan tightly with aluminum foil.
- Combine the cookie crumbs and melted butter. Press the crumb mixture into the bottom and about 2-inches up the sides of the pan. Bake for 10 minutes. Set aside to cool while you make the filling.
Make the filling
- Reduce the oven temperature to 300ºF.
- In a large mixing bowl beat the cream cheese with an electric mixer until smooth. Beat in the heavy cream and sugar until well combined. Add the vanilla, beat on low speed until smooth.
- Using a silicone spatula, gently stir in the eggs just until combined. Fold in the chopped candy bar.
- Pour the batter over the crust in the prepared pan. Place the pan inside a roasting pan. Fill the roasting pan with enough hot water to reach halfway up the sides of the cheesecake pan.
- Bake for 1 hour, OR until the edges are set and the center is slightly jiggly. Turn the oven off, leave the cheesecake in the water bath in the oven for another hour.
- Remove the cheesecake from the water bath. Run a small knife around the outer edge of the cheesecake to loosen it from the pan and leave it to cool completely. Cover and refrigerate for at least 4 hours, preferably overnight.
- Just before serving, Remove the sides of the pan. Top the cheesecake with the remaining candy bar and drizzle with homemade caramel sauce.
Notes
- If the crust puffs up during baking, use a clean glass or dry measuring cup to press it back down.
- Cream cheese: Use full-fat brick-style cream cheese for the very best results.
- Plan ahead: The recipe requires a lot of time. It’s best to make it a day before you plan to serve it.
- Room temperature ingredients: All of the cold ingredients should be brought to room temperature before using them in the batter.
- Don’t over mix: Keep the mixer on medium-low to low speed and use the paddle attachment. Otherwise, you could incorporate too much air into the batter which will cause the cheesecake to crack.
- The cheesecake should appear slightly underdone after baking. It will continue to set and firm up once cooled and refrigerated.
- Prevent a soggy cheesecake! Read through my helpful tips on how to prevent a cheesecake water bath from leaking.
Nutrition
The nutrition information provided is for convenience and as a courtesy only. It is not guaranteed to be accurate because nutrition information can vary for a variety of reasons. For precise nutritional data use your preferred nutrition calculator and input the exact ingredients and brands you used in the recipe.
Wow! I made this for my husband’s birthday. It was so good. The best cheesecake I’ve ever had. It was so smooth and creamy but light as well . Making the caramel sauce easy to make.
I’m thrilled to hear you loved the cheesecake. It’s one of my favorites!
How many ounces is each Butterfinger Candy Bar or how many total ounces of candy should be used for the filling?
Regular sized Butterfinger candy bars are about 1.9-ounces. In total for the filling, you need 5.7 ounces.
Could I make 1 and half batches to put into a 10 inch pan? I’d like a large, tall cheesecake. Do you know how it might affect the baking times?
I’ve never increased the size of this cheesecake before so I’m not sure how you’d need to adjust it to make it fit in a 10-inch pan. I do know if you bake a larger cheesecake, you’ll need to increase the baking time.
Hello !
Can I add dulce de leche and swirl then in the cheesecake batter instead of adding chopped butter finger candy ?
I’ve not tried this but it sounds amazing.