
Slow Cooker Bread
This post may contain affiliate links. Read the full disclosure here.
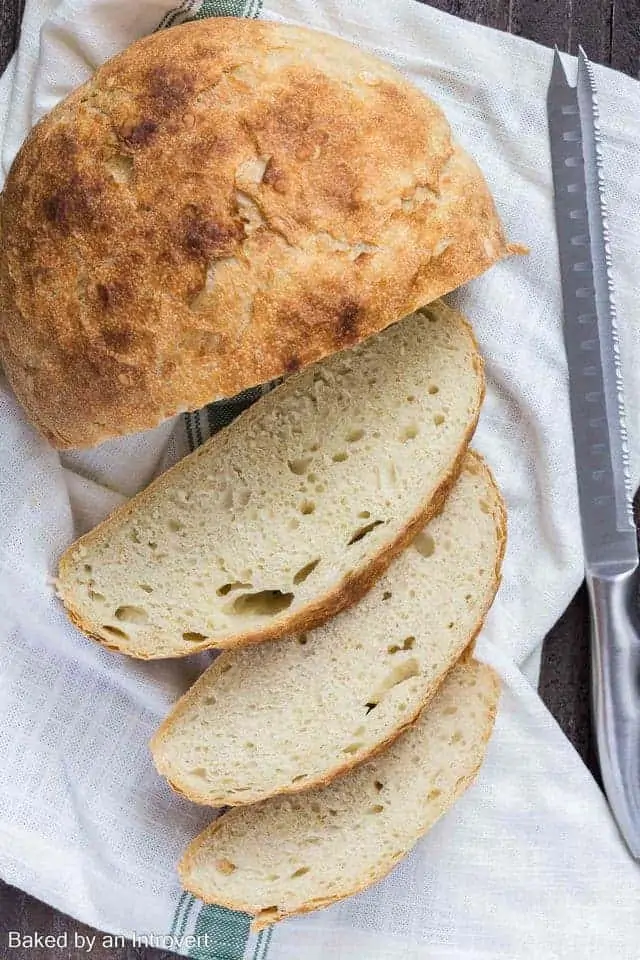
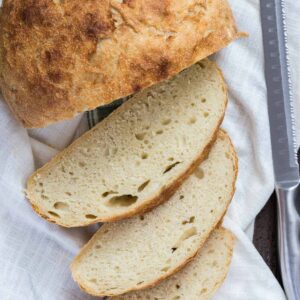
Homemade Slow Cooker Bread is always much more delicious than store-bought, and this recipe couldn’t be easier. This simple white bread is easy to make and uses ingredients you probably already have on hand.
Once you make your first loaf of bread in the slow cooker you will want to make it every week. This bread recipe can be used as a base for so many different variations!
When you want homemade bread without much hassle, get out your trusted slow cooker! Enjoy slow cooker bread as an appetizer or side to any dish. It’s especially great with soup.
Out of all the bread I’ve made, this slow cooker version just might be my favorite.

I mean, who would have thought a loaf this gorgeous could be produced in a small appliance designed to slowly cook meats, vegetables, and soups. I just can’t get over how lovely it is.
I’ve dabbled in the slow cooker method before. I made slow cooker orange sweet rolls and slow cooker monkey bread. Each was tasty but nothing like today’s bread.

I’ve also made so many other variations of bread, from rosemary olive beer bread to the best ever banana bread, the list goes on and on. But, I am loving how slow cooker bread turns out.
It has the texture of a steam bun – so soft and moist.
This bread is possibly the easiest of yeast bread. The dough is prepped the night before simply by mixing all the ingredients together. Then, it sits on the countertop with plastic wrap over the top.

When you wake up the dough will have developed gluten and doubled, almost tripled, in size. And it will smell of wonderful yeast dough. I love that smell!
When you are ready to bake the bread, just turn it out onto a lightly floured surface and fold it over on itself a couple times. Shape it into a ball and place it in the slow cooker.
It takes around two hours to bake. The effort is minimal and the reward is great!

There’s no kneading and no waiting for the dough to rise before baking. It will plump up in the slow cooker and turn into a beautiful rustic bread.
Bread in the slow cooker will not brown. The crust will remain light in color. Because of this, I like to pop it under the broiler for about 5 minutes once it’s finished baking. This will give the crust a lovely golden color.
This is why I love baking! ⇓⇓

*Always double check your slow cooker’s manufacturer instructions before attempting this recipe. Some models require the pot to be partially filled with liquid to avoid safety or durability problems. Also, never leave the slow cooker unattended.
Slow Cooker Bread
Ingredients
- 3 ½ cups (455 g) bread flour
- 2 ¼ teaspoons instant yeast, 1 envelope
- 1 ½ teaspoons salt
- 1 ½ cups (360 ml) warm water, 105-115°F
Instructions
- In a large bowl, combine the flour, yeast, and salt. Stir with a whisk. Slowly pour in the water. Stir with a wooden spoon until well blended and the dough forms into a ball. Cover the bowl with plastic wrap and let it set on the counter overnight, 8-18 hours.
- Line the bowl of the 6-quart slow cooker with parchment paper.
- Turn the dough out onto a lightly floured surface. With well-floured hands, flatten the dough into a 9-inch circle, then fold it over onto itself and shape it into a ball. Place the dough into the prepared slow cooker. Place a double layer of paper towel under the lid to prevent condensation from dripping onto the rolls. Turn the slow cooker on high and cook for 2 hours or until the bread is cooked through. The temperature should register 190°F on an instant-read thermometer.
- Remove the bread by lifting them out with the parchment paper.
- The fully cooked bread will have a light, soft crust. If you desire a golden crispy crust, place the bread under the broiler for 5 minutes. Set the bread on a wire rack to cool completely before slicing.
Notes
- Always double check your slow cooker’s manufacturer instructions before attempting this recipe. Some models require the pot to be partially filled with liquid to avoid safety or durability problems. Also, never leave the slow cooker unattended.
- All-purpose flour can be used in place of bread flour. But keep in mind there will be a slight texture difference. Bread flour contains more protein. This absorbs more moisture and creates a chewy texture that is well known in bread. All-purpose flour has less protein and will not absorb as much of the water. This will affect the overall texture.
- Active dry yeast can be used in place of instant yeast. You must activate it in the warm water with a pinch of sugar first. Let it sit for 5 minutes. If it doesn’t foam up, you will need to try again with new yeast.
Nutrition
The nutrition information provided is for convenience and as a courtesy only. It is not guaranteed to be accurate because nutrition information can vary for a variety of reasons. For precise nutritional data use your preferred nutrition calculator and input the exact ingredients and brands you used in the recipe.
Have you tried to make these into rolls, like a cloverleaf roll? And if so, what did you do differently? I live alone and this makes too much for just me, so thought of dividing in half to make 2 small loaves or 1 small loaf and rolls. Thoughts or suggestions?
I haven’t attempted to turn this bread into rolls so I’m not sure what changes would need to be made if any.
I’ve been proofing the dough for more than 12 hours now and I don’t know that it’s doubled in size…and also it seems very ‘wet’. It’s not liquid – but it feels a little wet – I can see the bubbles and if I stir the dough it remains intact as one big blob of dough. Just want to make sure that I don’t need to restart this process before attempting to bake it! thanks!
It sounds like you’re on the right path. If it’s risen and bubbly and you can visibly see the stretchy gluten development, it is ready to be shaped and cooked.
Could I add garlic cloves to this? Our Wegmans has a garlic loaf that looks like this and wondering if they would “roast/soften”? Any advice?
I’ve heard that adding fresh garlic to yeast bread will kill the yeast. I suggest using garlic powder in the dough then brush the top of the baked loaf with melted garlic butter.
I’m thinking about making this for a “cauldron” bread bowl on Halloween and dying it black. Any suggestions for adding the extra liquid? Thank you!
I’ve never made a bread bowl and am not sure how this recipe would need to be adapted to be used as such.
maybe black gel food color mixed in with the water? wilton has a black gel that i use for icing….doesnt need a lot and doesnt add liquid
My son made this for a school STEM project. I love that it is a simple recipe with only 4 ingredients! He left the dough sit overnight (about 11 hours). It definitely took us more than 2 hours to cook this, as the middle was still doughy. But this is a very kid-friendly recipe!
PS: I’m going to make another loaf on my own, and let it sit for the full 18 hours before baking it. I’ll try the suggestion that someone made about flipping the loaf over 1/2 way through baking to get it brown all over.
Thanks so much for this recipe. It looks and tastes like ciabatta. It’s gorgeous just buttered. Oh I also brushed some butter on top before browning it and it’s made it lovely and crispy. Will definitely make again. Thanks ? x
I made this today and it came out great! Lovely crunch after the grill/broiler step. Thank you:)
What’s the advantage/disadvantage of proofing it for only 8 hours vs 18 hours?
The main difference is the taste and structure of the bread. The longer it proofs, the more flavorful it will be and the more structure the bread will have. Since this is a no-knead bread, the long proof is what develops the gluten and this gives the bread structure.
I only have a 4qt slow cooker and I’m able to get a crust. The steam helps from the other bread recipes that I’ve looked at, so I don’t leave a paper towel to absorb the excess moisture. I do have to flip the loaf over to get the top to develop the crust. It’s a great recipe though.
I have just finish this bread recipe and it has turned incredibly well !! The consistency, the crust all was really good and really easy to make! I will definitely remake this recipe soon !!!