
Pumpkin Cheesecake
This post may contain affiliate links. Read the full disclosure here.
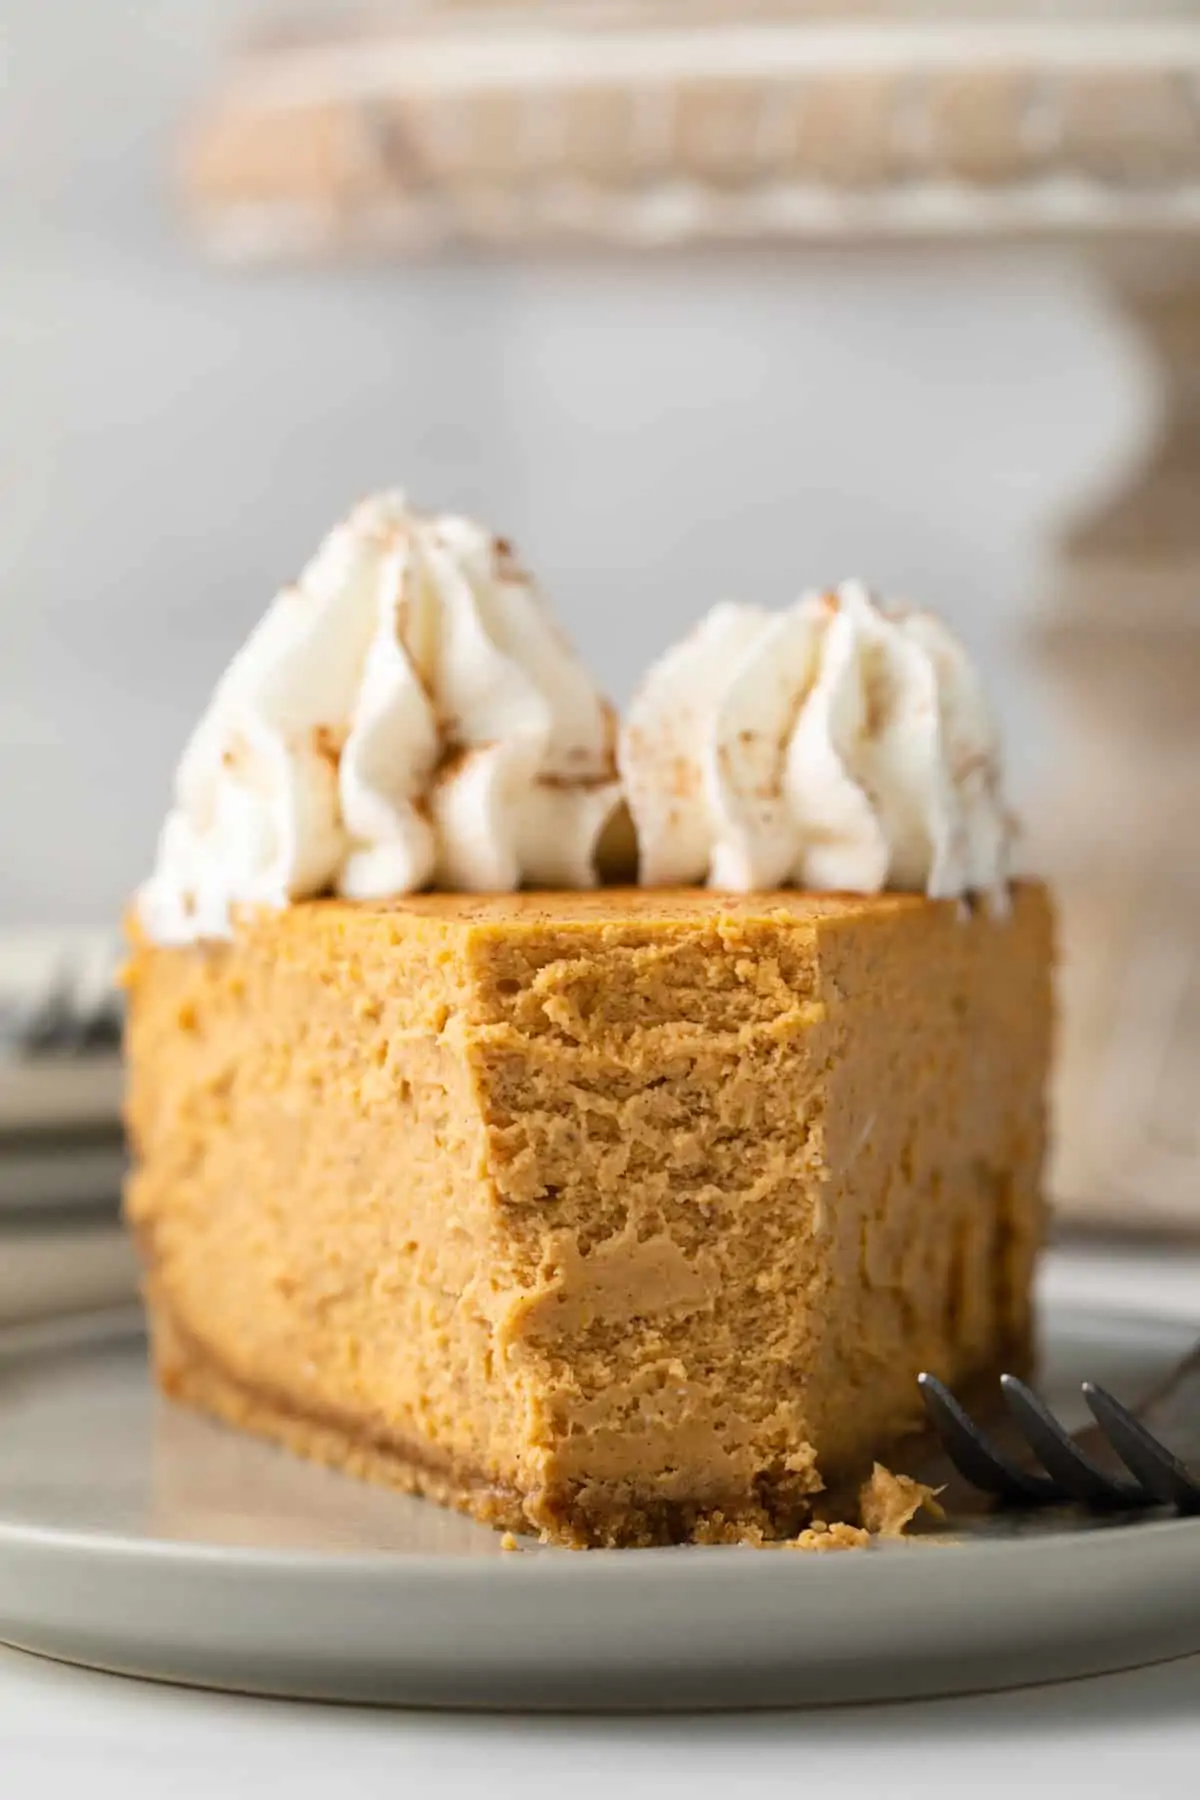
Delicate and creamy, this pumpkin cheesecake with gingersnap crust is the perfect ending to your holiday dinner. Each bite is filled with sweet fall aromas and the texture is mousse-like! It’s a truly decadent (but simple to make) fall dessert!

A decadent fall dessert
This pumpkin cheesecake with gingersnap crust is one to obsess over. It’s so light and creamy, you’ll want to eat it for breakfast! It’s basically a cheesecake version of my favorite pumpkin pie.
After one slice of this decadent fall treat, I can guarantee you’ll want to go back for seconds. It’s super creamy, almost mousse-like in texture, just like my Nutella cheesecake? SO GOOD!!
My favorite part is that you can make this delicate cheesecake a day ahead of time, so it’s in the fridge ready to wow your guests without any additional work that day. Just add whipped cream and serve. It’s the perfect ending to a holiday meal!

What you’ll need
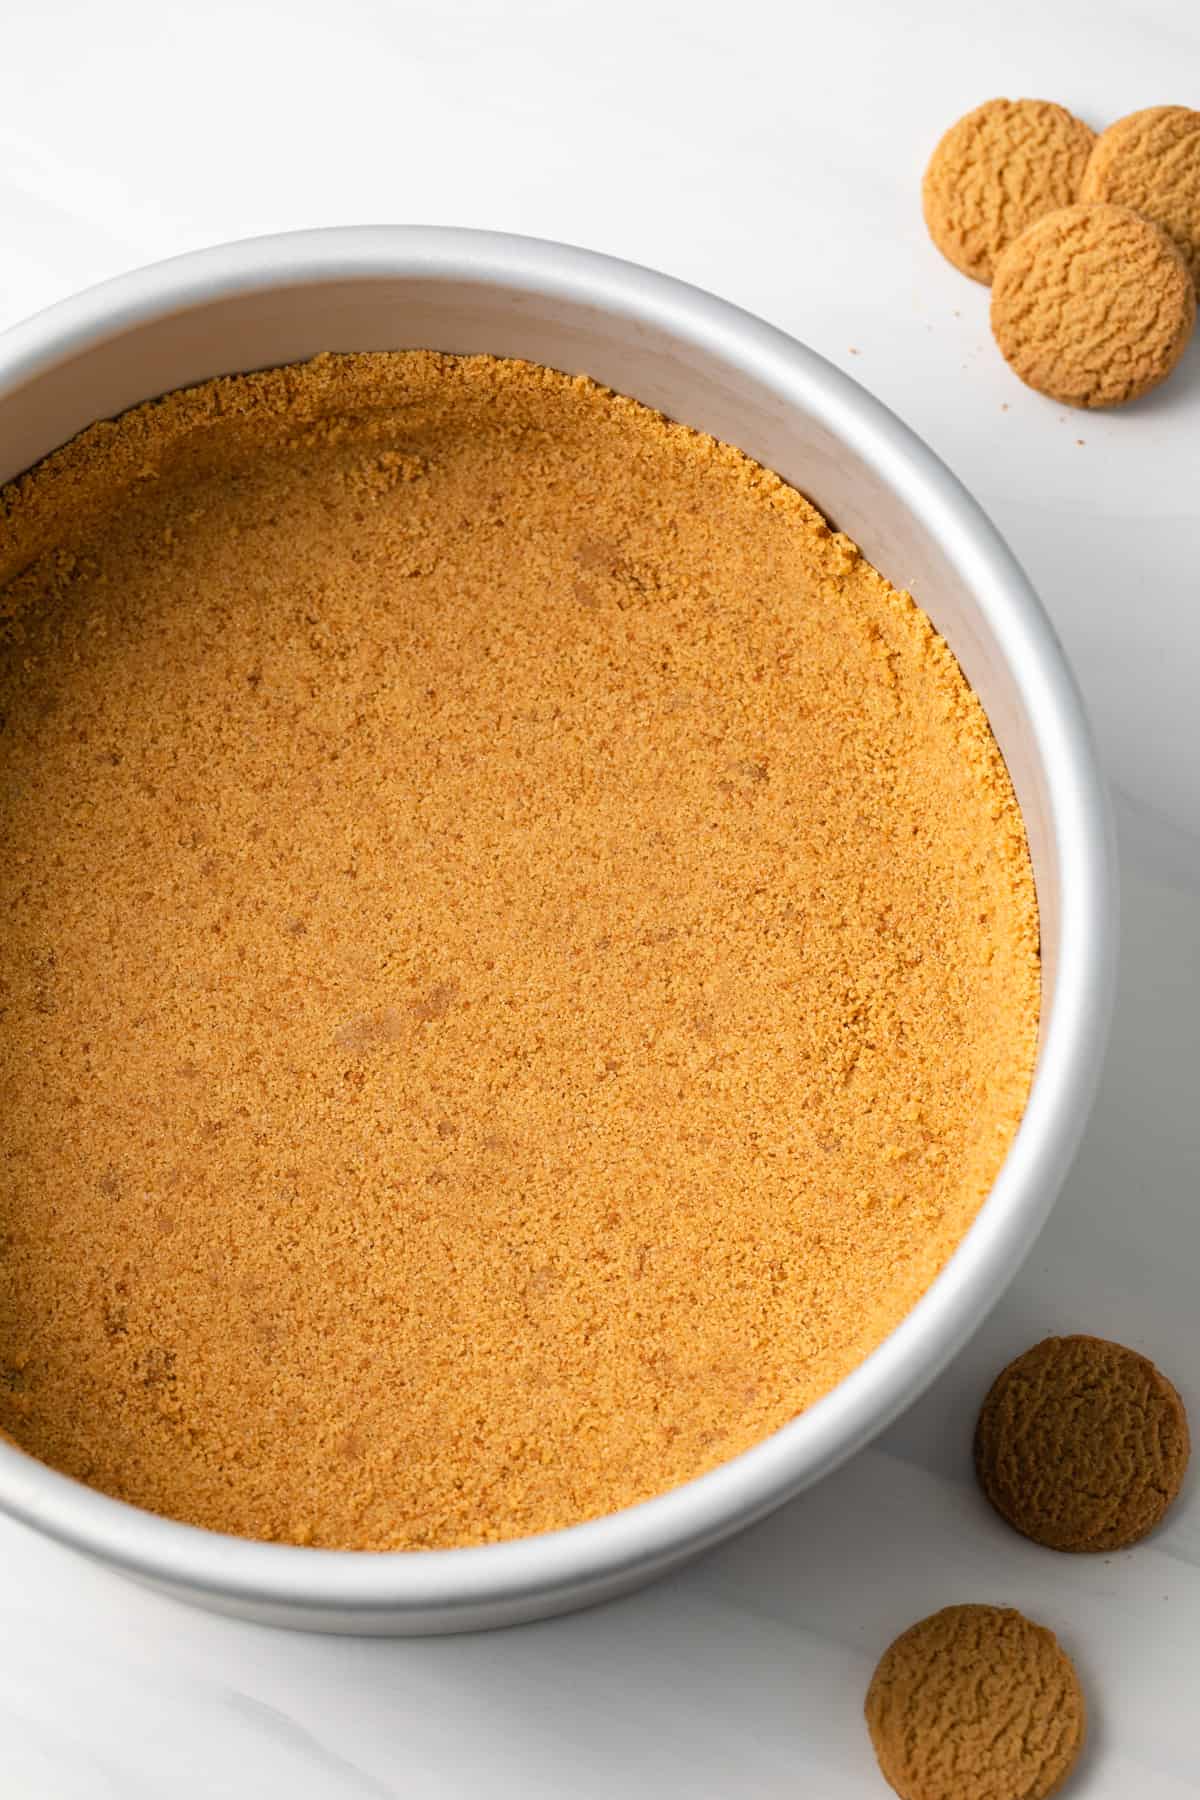
The homemade gingersnap crust is made with just 3 ingredients while the cheesecake features pumpkin puree and warm spices, next to all the typical cheesecake ingredients.
Ingredients
You can find the full ingredient amounts down below in the recipe card.
- Gingersnap cookie crumbs – You can make your own by placing gingersnap cookies in a ziploc bag and using a rolling pin to crush them into crumbs. If you don’t like gingersnaps, you can use graham crackers instead.
- Butter – You’ll want unsalted butter so that the crust is sweet, not salty.
- Pumpkin puree – Be sure to use pumpkin puree and not pumpkin pie filling.
- Cream cheese – Use full fat, brick-style cream cheese. Do not substitute low fat versions, as the texture will not be the same.
- Brown sugar – Divided for use in different parts of the recipe.
- Spices – Cinnamon, ginger, cloves, and nutmeg give this pumpkin cheesecake that warm pumpkin pie flavor. Or you can use my homemade pumpkin pie spice.
- Salt
- Heavy cream – You can use sour cream in place of heavy cream if needed.
- Vanilla extract – Choose a high quality pure vanilla for the best tasting results.
- Eggs – Eggs should be lightly beaten and room temperature.
- Homemade whipped cream – I use this 3 ingredient whipped cream recipe.
Helpful tools
- Stand mixer – While a stand mixer with paddle attachment make this recipe easier to put together, you can use a handheld electric mixer. Just be sure to whip the cream cheese well!
- Springform pan – Springform pans are often recommended when making cheesecakes but you can also use a tall cake pan with removeable bottom.
- Easy bath cheesecake wrap – I recently learned of these easy bath cheesecake wraps and they are a game changer! They allow you to bake the cheesecake in a water bath without the worry of water leaking in. I highly recommend them. You need the 10-inch wrap for a 9-inch pan.
How to make pumpkin cheesecake
Making this decadently creamy pumpkin cheesecake is far from difficult, just be sure to pay attention to the details and not rush the cooling time!
- Prepare the pan. Wrap the bottom layer of a springform pan tightly with aluminum foil. Preheat the oven to 350°F with the oven rack just below center.
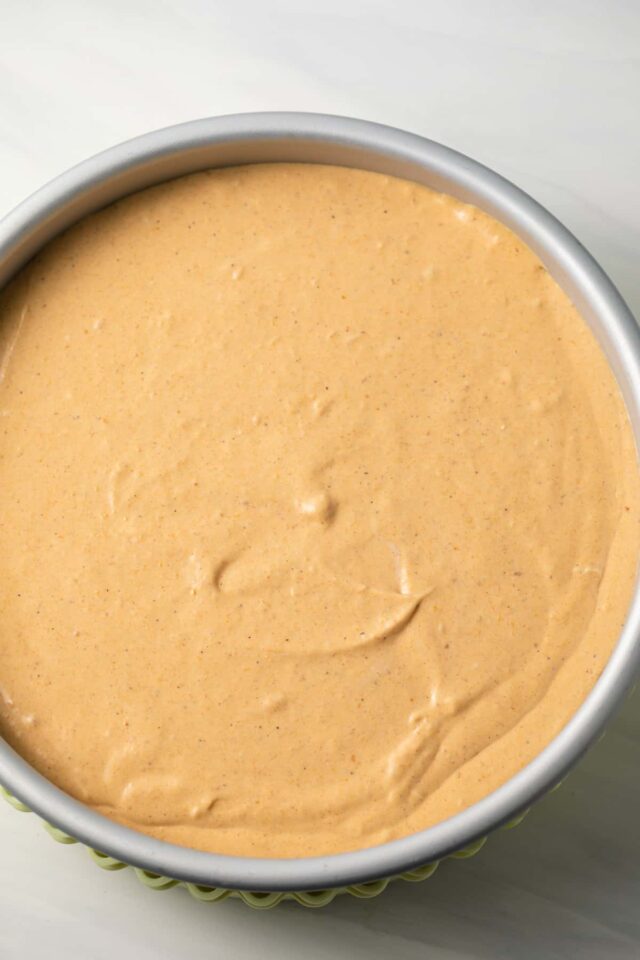
- Make the gingersnap crust. Combine all crust ingredients in a bowl. Press into the bottom of the pan and 2-inches up the sides. Bake for 10 minutes and set aside.
- Remove excess moisture from the puree. Fold four connected sheets of paper towels in half and lay across a baking sheet. Spread the pumpkin puree in an even layer and set aside.
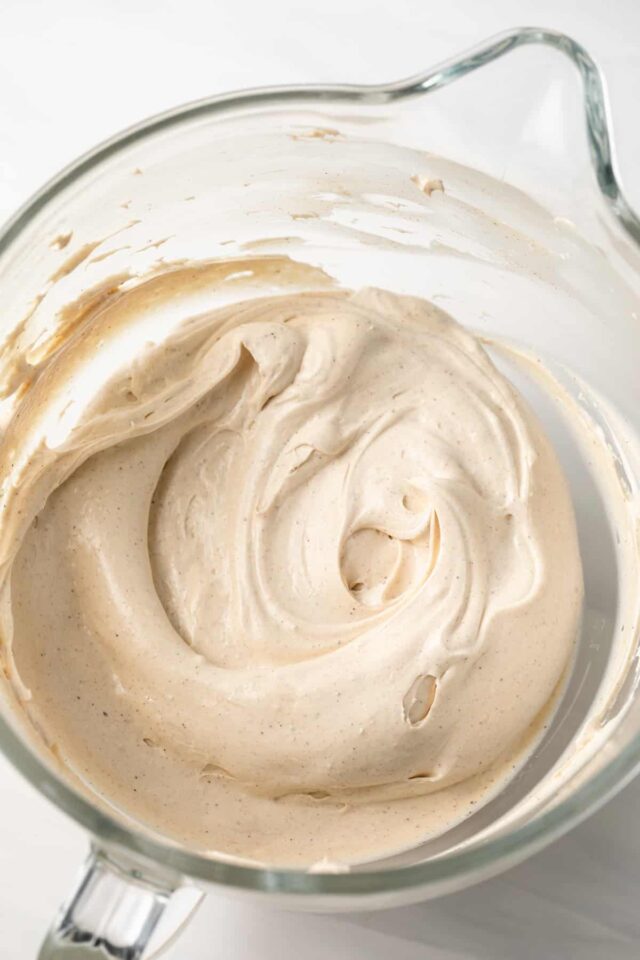

- Make the cheesecake filling. Beat cream cheese until smooth and creamy. Add in the sugar and spices, beat until combined then add in the vanilla and heavy cream on low until smooth.
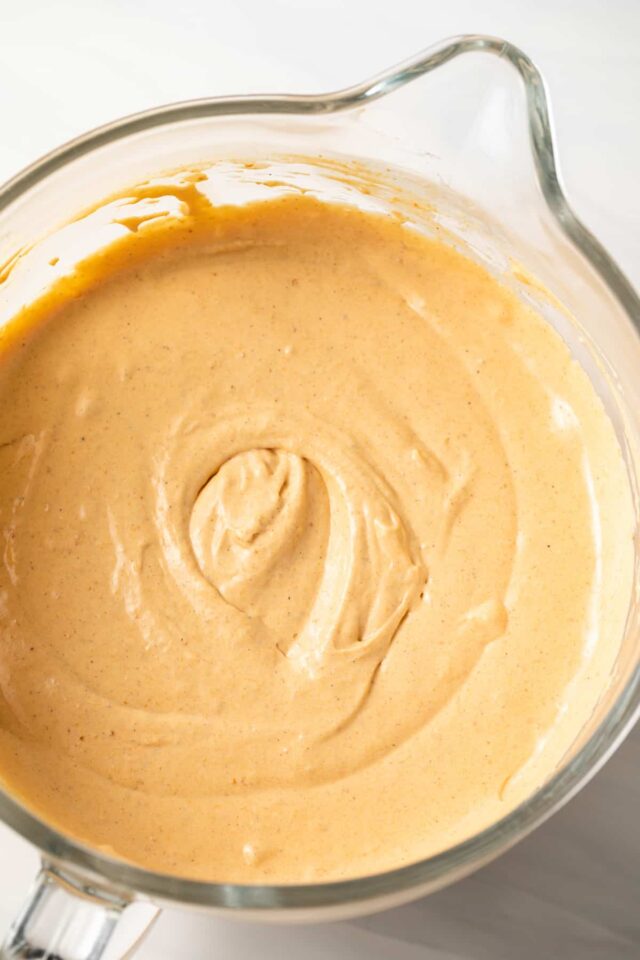
- Add the pumpkin. Gently scrape the pumpkin puree from the paper towel and transfer to the mixing bowl. Gradually add the eggs and mix until just combined. Pour over the crust.
- Make the water bath. Place the springform pan inside of a roasting pan. Add enough hot water to reach halfway up the sides.
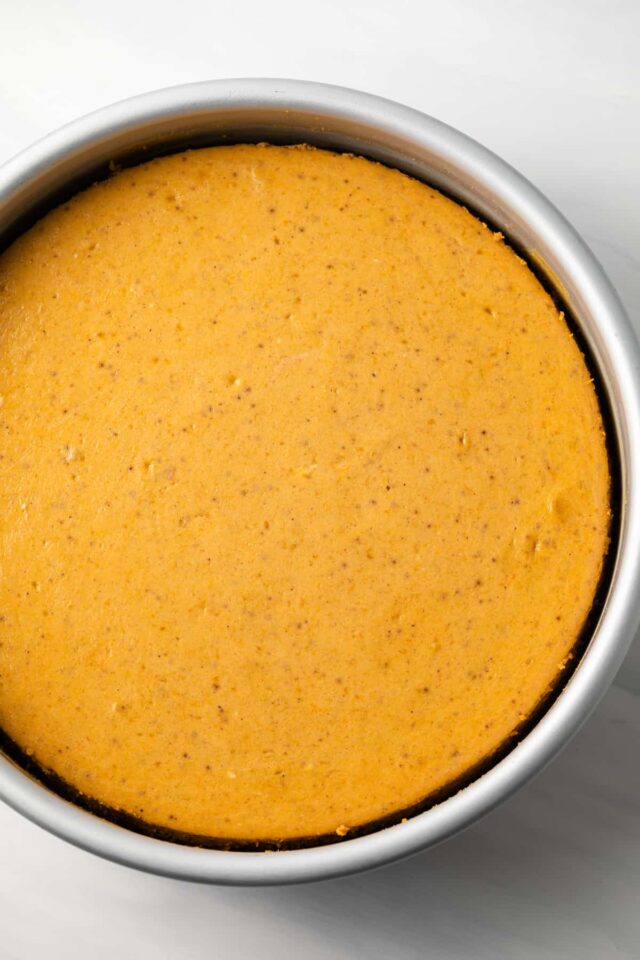
- Bake. Bake for an hour, until the edges are set and the center is slightly jiggly. Turn off the oven and allow the cheesecake to slowly cool in the waterbath for an hour.
- Chill. Remove the cheesecake from the water bath and place it on a wire rack. Leave it to cool completely then cover and refrigerate for 4 hours or overnight.
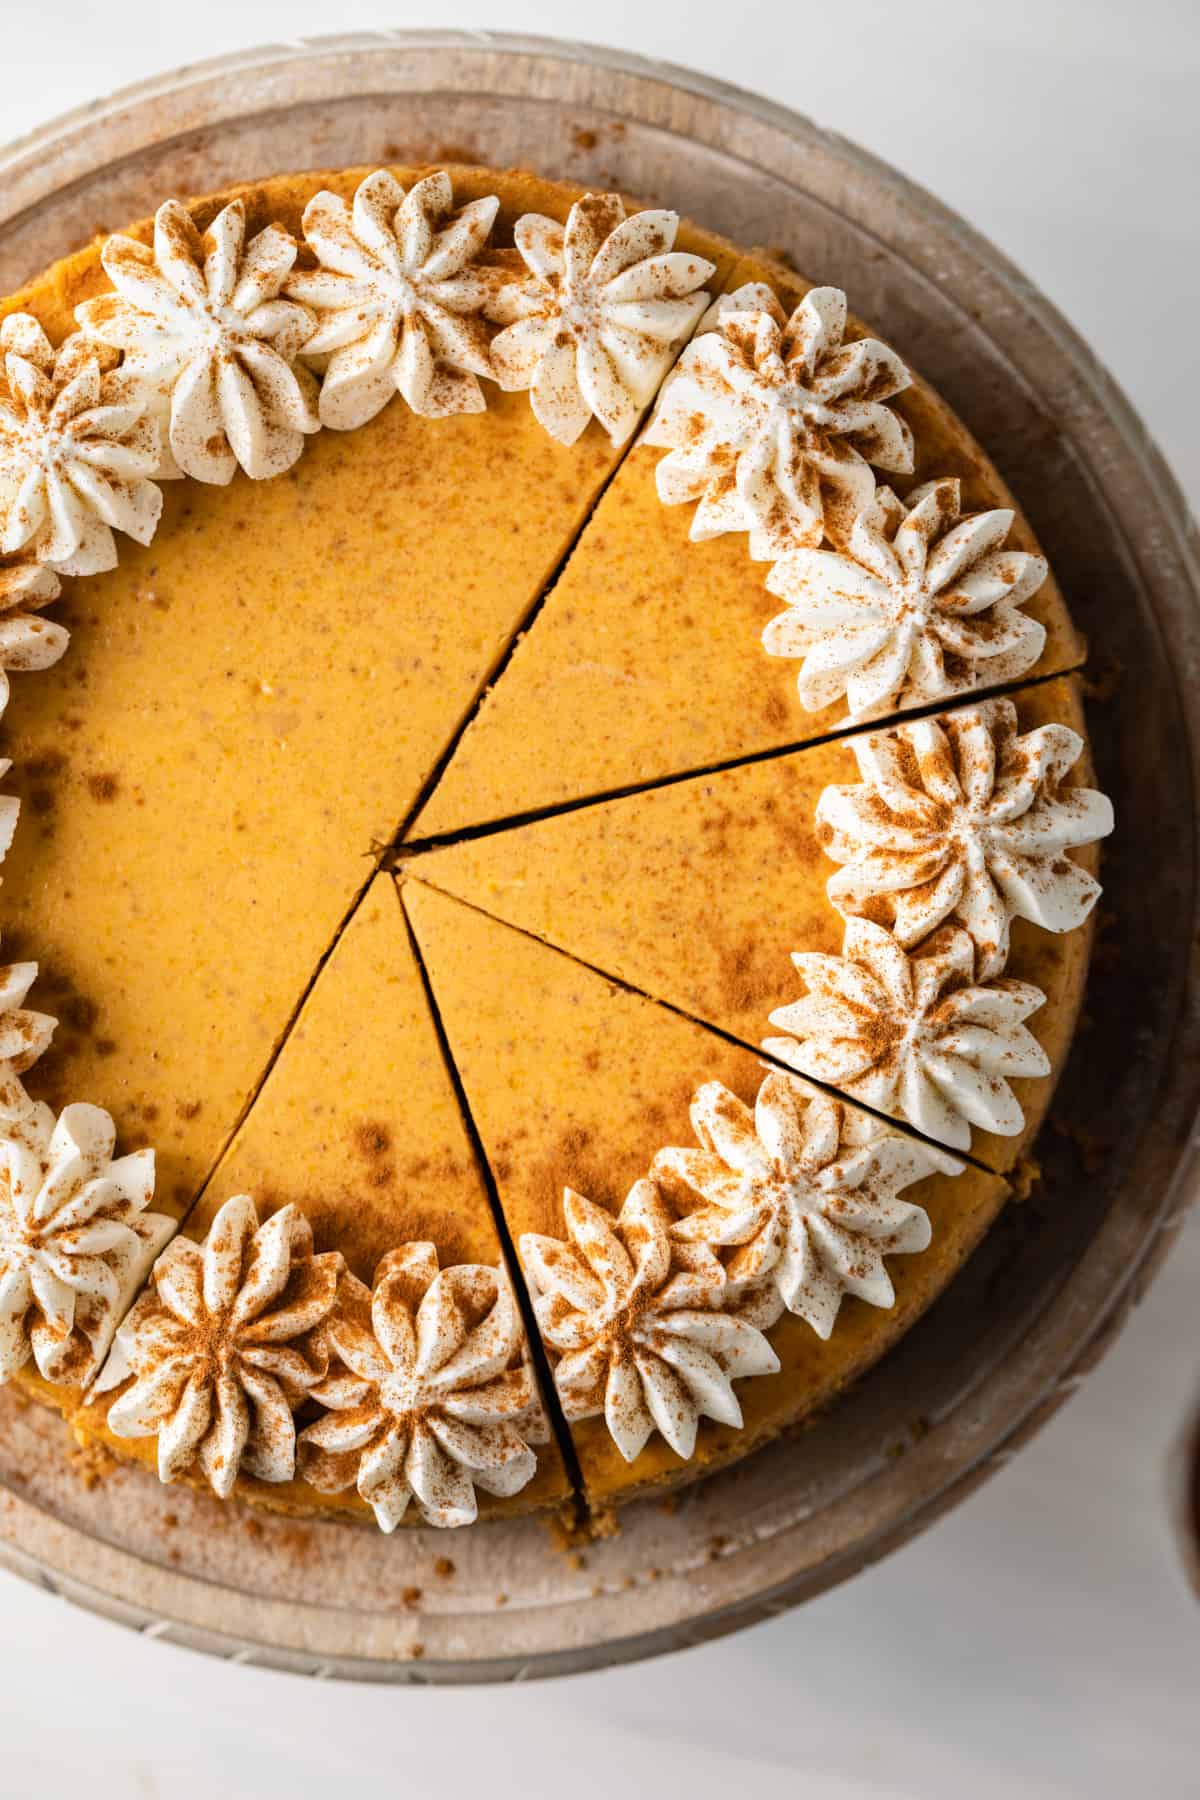
- Serve. Remove the sides of the pan and top with whipped cream before serving.
Tips for success
Cheesecake isn’t nearly as difficult as it can seem to make but for a creamy cheesecake with no cracks, there are a handful of things to keep in mind.
- Use room temperature cream cheese. Allow the cream cheese to come to room temperature before beating for the creamiest, smoothest texture.
- Be sure the foil completely covers the pan. The key to the water bath is to ensure that no water gets inside the pan to the crust. Be sure to tightly wrap the bottom with aluminum foil that comes further up the sides than the water will. Use a few layers to prevent any water leaks.
- Remove the moisture from the pumpkin puree. It’s very important to not skip the step of spreading the pumpkin out on paper towels. The moisture in pumpkin puree can cause things to get all funky with cheesecake. Using the paper towels helps prevent this by taking away any excess liquid.
- Do not overbake the cheesecake. The edges should set but the center still jiggly when you turn the oven off. Avoid baking until the center is set as the cheesecake will be overcooked.
- Do not open the oven door while the cheesecake cools. Once you turn the oven off, do not open the door. It’s important to keep all of the heat inside while the cheesecake continues to cook in the waterbath.
Serving Suggestions
Because the cheesecake is so light and creamy, it won’t feel too heavy on a full stomach. Top each slice with whipped cream and cinnamon when you’re ready to serve it.
Can I make this dessert advance?
Yes, you can and I highly recommend you do so. This isn’t a quick recipe. The cheesecake takes an hour to bake, an hour to rest, and needs at least four hours in the refrigerator (overnight is best).
I suggest making it the day before you plan to serve it but the cheesecake will keep for up to 4 days covered tightly in the refrigerator.
Can you freeze cheesecake?
Yep, you certainly can. This recipe, in particular, will keep for up to two months in an airtight container. If you really want to plan ahead for the holidays, make it well in advance then freeze it after it has set in the refrigerator for four hours.
Place the frozen cheesecake in the refrigerator to thaw overnight before serving.
More cheesecake recipes to try
Pumpkin Cheesecake
Ingredients
For the crust
- 2 ½ cups (350 g) gingersnap cookie crumbs
- ¼ cup (52 g) light brown sugar
- 4 tablespoons unsalted butter, melted
For the filling
- 15 ounces (425 g) pumpkin puree
- 24 ounces (678 g) full fat brick-style cream cheese, softened to room temperature
- 1 cup (210 g) light brown sugar
- 1 teaspoon ground cinnamon
- ½ teaspoon salt
- ½ teaspoon ground ginger
- ¼ teaspoon ground cloves
- ¼ teaspoon ground nutmeg
- ¾ cup (180 ml) heavy cream, room temperature
- 1 tablespoon vanilla extract
- 4 large eggs, lightly beaten, room temperature
- 1 cup (60 g) homemade whipped cream
Instructions
Make the crust
- Position the oven rack to the lower third position (just below center). Preheat the oven to 350°F. Wrap the outer bottom of a 9-inch springform pan tightly with a large sheet of aluminum foil. Or use a cheesecake wrap (linked in the products below).
- Combine the gingersnap crumbs, brown sugar, and melted butter in a bowl. Stir to combine.
- Press the crumb mixture into the bottom and about 2-inches up the sides of the prepared pan. Bake for 10 minutes. Set aside while you make the filling
Make the filling
- Reduce the oven temperature to 300°F.
- Take 4 connected sheets of paper towels and fold them in half. Lay the folded paper towels across a baking sheet. Spread the pumpkin puree in an even layer over the paper towels and set aside.
- In the bowl of a stand mixer fitted with the paddle attachment or in a large bowl and handle electric mixer, beat the cream cheese until smooth and creamy, about 1 minute. Stoping to scrape down the sides as needed.
- Add the sugar, cinnamon, salt, ginger, cloves, and nutmeg, Beat eat until well combined.
- Add the vanilla and heavy cream, beat on low speed until smooth.
- Lift one of the shorter sides of the paper towel slightly and gently scrape the pumpkin puree loose. Lift the edge of the paper towel a little higher and give it a gentle shake. The puree should begin to roll down the paper towel and form a log. Scrape loose as needed. Transfer the puree to a large mixing bowl. Beat on low speed to combine.
- With the mixer on low speed, gradually pour in the eggs. Continue to mix just until combined. Avoid over mixing.
- Pour the batter over the crust in the prepared pan. Place the pan inside a roasting pan. Fill the roasting pan with enough hot water to reach halfway up the sides of the cheesecake pan.
- Bake for 1 hour, OR until the edges are set and the center is slightly jiggly. Turn the oven off, leave the cheesecake in the water bath in the oven for another hour.
- Remove the cheesecake from the water bath and place it on a wire rack. Run a small knife around the outer edge of the cheesecake to loosen it from the pan and leave it to cool completely. Cover and refrigerate for at least 4 hours, preferably overnight.
- Remove the sides of the pan and top the cheesecake with whipped cream before serving.
Notes
- Gingersnaps: You can use graham cracker crumbs instead.
- Cream cheese: Make sure to allow the cream cheese to come to room temperature before using it.
- Don’t skip step 7! Removing excess moisture from the pumpkin puree is necessary in order to achieve the right texture.
- Prevent a soggy cheesecake! Read through my helpful tips on how to create a leakproof water bath.
- The baked and chilled cheesecake will keep for up to 4 days covered tightly and stored in the refrigerator.
- The cheesecake will keep for up to 2 months covered tightly and stored in the freezer. Thaw in the refrigerator overnight.
Nutrition
The nutrition information provided is for convenience and as a courtesy only. It is not guaranteed to be accurate because nutrition information can vary for a variety of reasons. For precise nutritional data use your preferred nutrition calculator and input the exact ingredients and brands you used in the recipe.
Can you use fresh pumpkin puree instead of canned pumpkin puree? if so, would it be the same ratio?
I’ve not tested this recipe with fresh pumpkin so I’m unsure if it would work the same.
What should one do when they forget to bake the crust before putting the batter in?!? Specific fix for this mix up!
Can I use graham crackers instead of ginger snap cookies? Do you think I would have to modify the crust ingredients if I do?
Graham crackers are fine to use without any adjustments to the recipe.
I always do the “bingo arm jiggle” test with cheesecakes. Think 25year old jiggle, not 80 year old jiggle. So excited to try this one!
Hi Jen! I made this cheesecake and it was a big hit, but the texture was runnier, not firm like most cheesecakes I’ve made. I removed the excess moisture from the pumpkin puree and refrigerated it overnight. Any tips on how to ensure a firm cheesecake in the future?
The cheesecake should be creamy but not runny. I’d double check the temperature of your oven with an oven thermometer. And don’t turn the oven off until the edges of the cheesecake are set. They’ll be firm to the touch. But the center should still look wet and jiggly. It will continue to set in the refrigerator.
Hi Jen! I made this cheesecake and it was a big hit, but the texture was runnier, not firm like most cheesecakes I’ve made. I removed the excess moisture from the pumpkin puree and refrigerated it overnight. Any tips on how to ensure a firm cheesecake in the future?
So i need to line my pan with parchment paper
Line the pan with heavy-duty foil, not parchment paper. Especially if you plan to use the water bath method.
That gingersnap crust sounds so tasty!