
Garlic Breadsticks
This post may contain affiliate links. Read the full disclosure here.
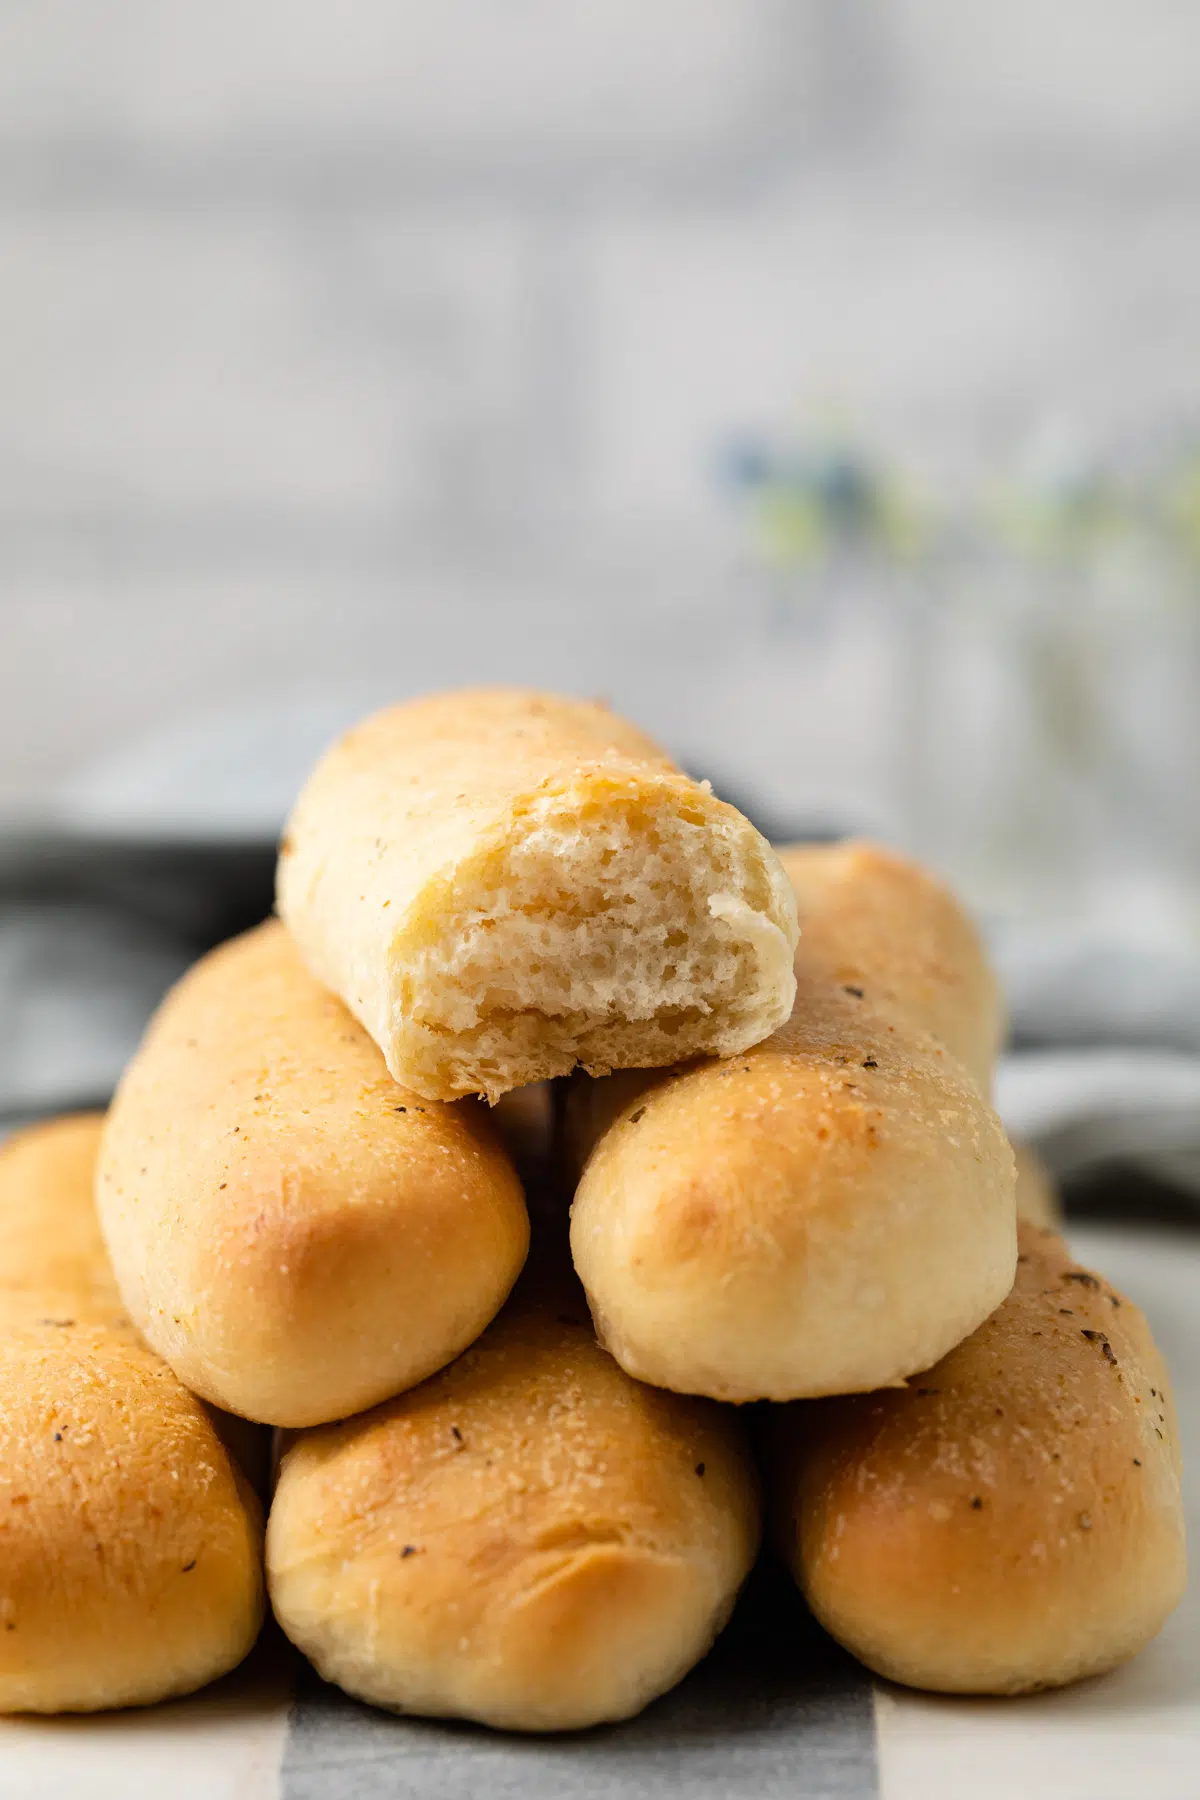
Soft, buttery garlic breadstick made completely from scratch! Whip up this simple recipe to serve alongside your next Italian dinner.

It’s not hard to make breadsticks at home. If you’ve made homemade pizza dough then you can certainly make breadsticks. The doughs are the same.
I have a great pizza dough on hand and it’s the perfect place to start. However, that recipe makes enough for two 12-inch pizzas and that would, in turn, be a whole lot of breadsticks.
So for the sake of not having breadsticks coming out of your ears, I reduced it enough to make eight chewy and soft breadsticks. A little crisp on the outside, soft and chewy on the inside. These homemade breadsticks are better than any restaurant or store-bought breadsticks you’ve had.
These breadsticks have a garlic bread flavor. They go great on the side of pasta, dipped in marinara sauce, or served with easy homemade spinach dip. You are going to fall in love with this breadsticks recipe.
If you love this recipe, you might also want to try this spicy sausage pizza and this buffalo chicken pizza.
Recipe Details
- Taste – Garlic-y and delicious.
- Texture – A crisp crust on the outside, soft and chewy on the inside.
- Ease – These are not hard to make.
- Time – About 2 ½ hours, but a lot of that is rise time for the dough.
What You’ll Need
Ingredients
- Flour – I just all-purpose for these breadsticks.
- Instant or rapid rise yeast – This allows the dough to rise.
- Garlic powder – Puts the garlic in garlic breadsticks.
- Salt – I always use kosher salt.
- Warm water – This should be between 105-115ºF to activate the yeast. If it is too hot the yeast will die.
- Olive oil – Use the best quality extra virgin olive oil you can find.
- Butter – Use sweet cream butter, not margarine.
- Garlic salt – For a little salty goodness.
- Oregano – This adds a little Italian flavoring.
Recommended tools
Stand mixer: I like to use a stand mixer when making doughs, and this Kitchen Aid stand mixer is my go-to. If you don’t have one, it really is worth the investment. You can use a handheld mixer if you don’t have a stand mixer, though. I use this one regularly in my kitchen.
Kitchen scale: I’ve given the recipe in both cups and weight measurements. When baking, I often use weights as measurements to be more precise. If you don’t have a kitchen scale, I recommend this one.
How to Make Garlic Breadsticks
This garlic breadsticks recipe is a recipe all-star – it’s easy, it makes your house smell delicious, and the breadsticks are oh so good.
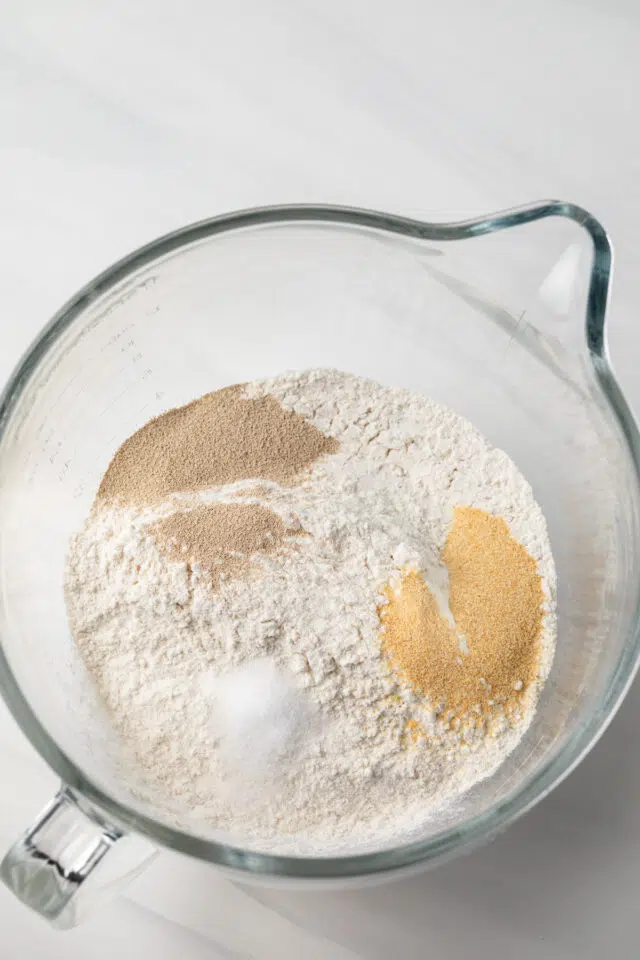
- Add the flour, yeast, garlic powder, and salt to the bowl of a stand mixer. Stir together with a whisk to combine.
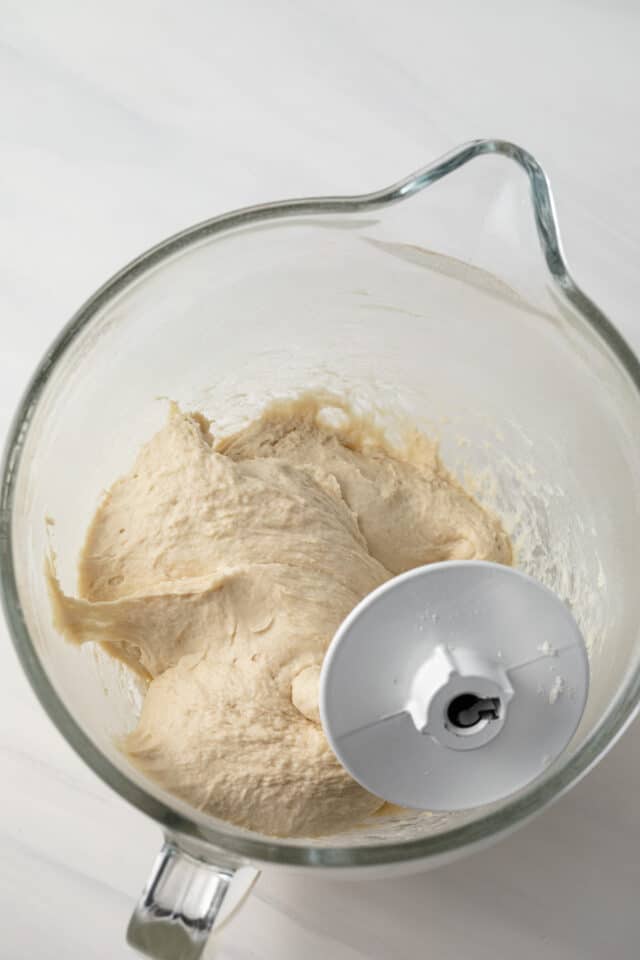
- Add the olive oil and warm water and mix (with the dough hook) until a slightly sticky dough forms, 5 minutes. If the dough is too sticky, mix in 2 more tablespoons of flour.
- Knead the dough by hand on a floured surface until smooth and elastic.
- Shape the dough into a ball and divide it in half, then divide each half into 7 equal pieces. Shape each piece into a breadstick.
- Arrange the breadsticks 2 inches apart on a parchment-lined baking sheet. Cover with a lint-free cloth and let rise in a warm place until almost doubled in size, about 45 minutes.


- Meanwhile, preheat the oven to 400°F.
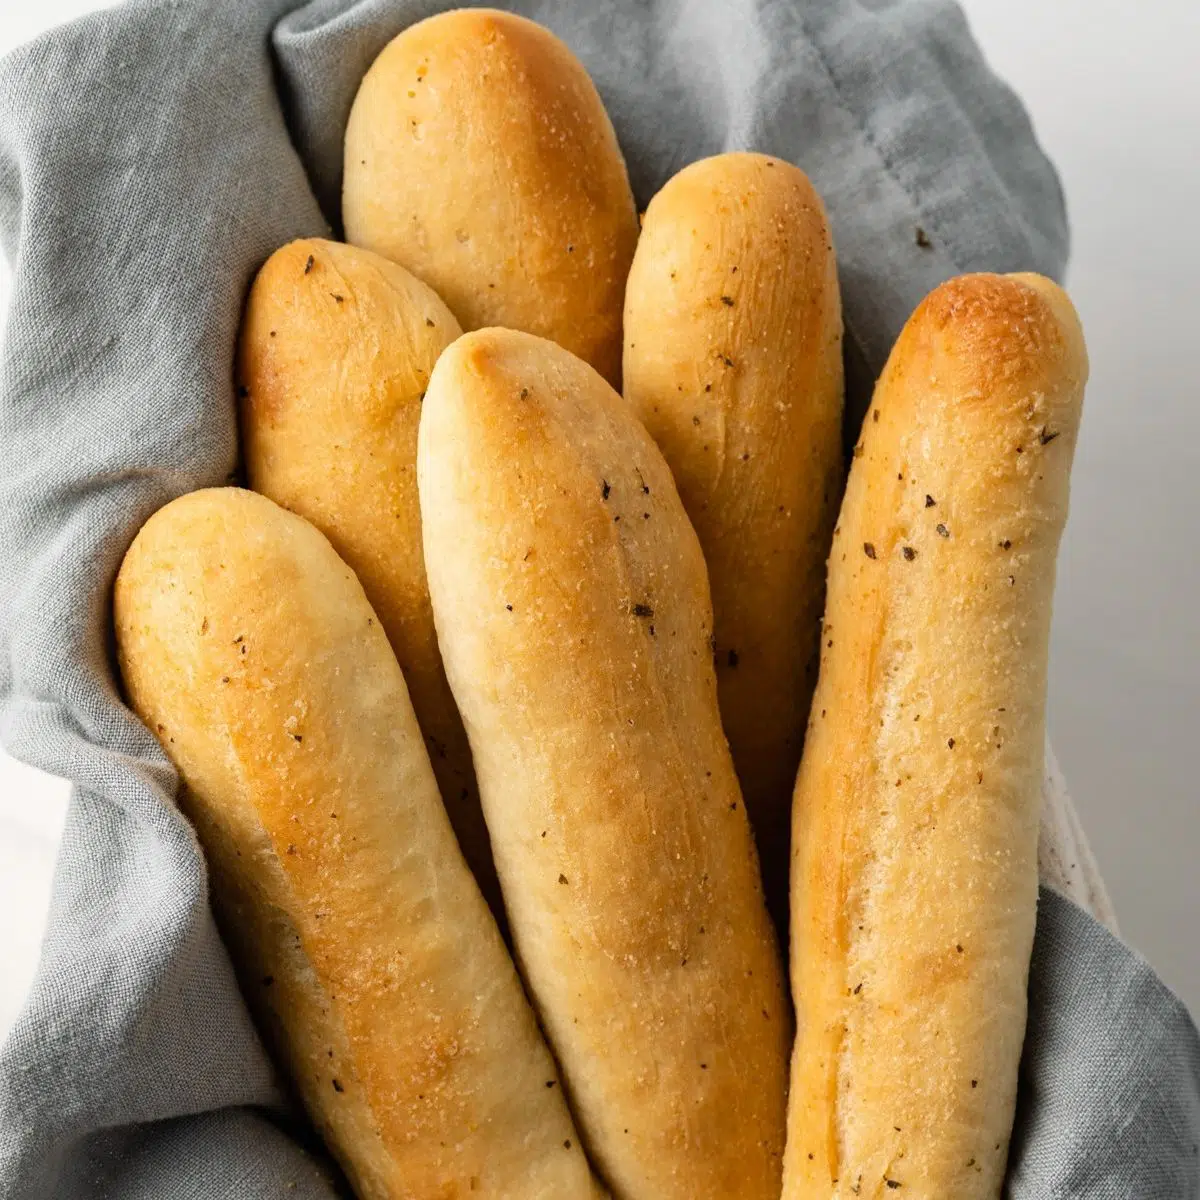
- Brush the breadsticks with 2 tablespoons of melted butter. Bake for 15-18 minutes until very lightly golden brown. Don’t overbake or they will be dry.
- Combine the remaining 2 tablespoons butter with garlic salt and oregano. Brush over warm breadsticks. Serve warm and enjoy!


Tips For Success
- Soft Breadsticks: To make soft breadsticks you need to have a slightly sticky dough.
- Don’t overbake: Make sure not to bake the breadstick too long. Overbaking will cause them to dry out and they won’t be as soft.
- Add cheese: Grate fresh Parmesan cheese onto the breadsticks before baking.
Storage & Freezing
Breadsticks will keep for up to 3 days at room temperature stored in an airtight container or wrapped in plastic wrap. Reheat in the microwave for a few seconds if you wish to warm them up.
To freeze the breadsticks, wrap them in foil, then place them in a freezer-safe bag. Freeze for up to 3 months. When ready to eat, heat in the microwave or oven until warmed through.
Garlic Breadsticks
Ingredients
For the Breadsticks
- 4 cups (520 g) all-purpose flour
- 2 ¼ teaspoons instant or rapid rise yeast, 1 packet
- 2 teaspoons garlic powder
- 1 teaspoon salt
- 1 ½ cups (360 ml) warm water, 105-115ºF
- ¼ cup (60 ml) extra virgin olive oil
For the Topping
- 4 tablespoons butter, melted
- 1 teaspoon garlic salt
- ⅛ teaspoon dried oregano
Instructions
Make the Breadsticks
- Add the flour, yeast, garlic powder, and salt to the bowl of a stand mixer. Stir together with a whisk to combine.
- Attach the dough hook and mix at low speed while adding the olive oil and warm water. Continue to mix until a slightly sticky dough forms, 5 minutes. If the dough is too sticky, slowly mix in 2 more tablespoons of flour.
- Knead the dough by hand on a floured surface until very smooth and soft, about 3 minutes.
- Shape the dough into a ball and divide it in half. Divide each half into 7 equal pieces. Shape each piece into a 7-inch-long breadstick.
- Arrange the breadsticks 2 inches apart on a parchment-lined baking sheet. Cover with a lint-free cloth and let rise in a warm place until almost doubled, about 45 minutes.
Make the Topping
- Meanwhile, preheat the oven to 400°F.
- Brush the breadsticks with 2 tablespoons melted butter. Bake for 15-18 minutes until very lightly golden brown. Don't overbake or they will be dry.
- Combine the remaining 2 tablespoons butter with garlic salt and oregano. Brush over warm breadsticks. Serve warm and enjoy!
Notes
- Add cheese: Grate fresh Parmesan cheese onto the breadsticks before baking.
Nutrition
The nutrition information provided is for convenience and as a courtesy only. It is not guaranteed to be accurate because nutrition information can vary for a variety of reasons. For precise nutritional data use your preferred nutrition calculator and input the exact ingredients and brands you used in the recipe.
Jen, these breadsticks look sooooooo good and dangerous!!! I would eat the entire basket!!! love garlic breadsticks!
Carb comfort food heaven! These look so perfect. I want to dunk a ton of these into every sauce imaginable!
Thanks, Mira!
Garlic breadsticks are one of the best things ever! These ones look great, love them!
Thank you so much, Stacey!
Garlic breadsticks are the #1 favorite side dish in my family. My boys go crazy for them. Sadly, I’ve never bothered to make my own. I think you have finally convinced me! These look too good to ignore. 🙂
Pinned! Have a great weekend, Jen!
Thanks, Blair!
Your breadsticks turned out beautifully! And who doesn’t love a good breadstick!?
Thanks so much, Marissa!
they are my weakness, can never resist them! They look perfect Jen! Have a great weekend 🙂
Mine too, Manali. Thanks so much!
Now THIS is what I’m talking about! Fluffy, garlicky breadsticks – is there anything more heavenly? (The answer is no, btw). Amazing!
You’re too kind, Hayley. Thank you!
These look amazing, Jen! I am such a sucker for garlic breadsticks and could make a meal out of them! <3
Thanks, Kelly. Homemade breadsticks are the best!
Oh I can never resist garlic breadsticks! These look perfect, Jen! I think I would devour the whole batch in no time!
Thank you so much, Gayle!
Your breadsticks turned out beautifully! And who doesn’t love a good breadstick!?