
Apple Slab Pie with Brown Butter Crust
This post may contain affiliate links. Read the full disclosure here.
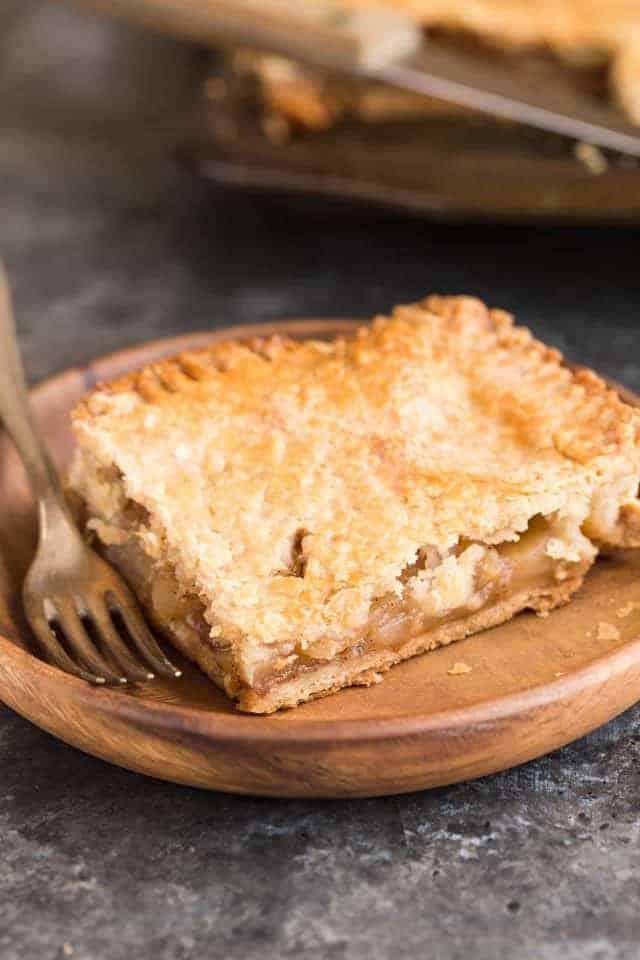
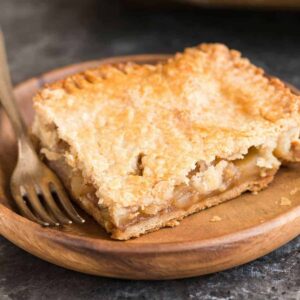
This Apple Slab Pie is way better than a traditional pie! It features a sturdy brown butter crust and gooey apple filling. Loaded with brown sugar and cinnamon, this apple pie is a total crowd pleaser!
Apple pies typically pop up around July 4th. It is an iconic American dessert after all. But why neglect this favorite classic pie the rest of the year, especially during the fall?
Now is prime apple season and everyone should be baking pies with freshly picked apples!
Caramel apple pecan streusel pie, apple streusel bars, and apple raisin custard pie are just a few of my favorite variations on apple pie. But today’s recipe may just top them all!
I’ve changed the crust to a brown butter crust and omitted the shortening altogether. Typically I’d used my favorite pie crust recipe that calls for a mix of butter and shortening. It’s super flaky and full of buttery flavor.
I took that perfect crust recipe and doubled it to make a king-size apple pie with sweet nutty notes from brown butter. Because this pie is so large I felt the crust needed to be extra sturdy. Two eggs did the trick. You can hold a slice of this slab pie in your hand and it won’t fall apart.
I also made apple pie with brown butter crust that is a normal size. If you need a pie that serves just 8 to 10, then you may want to grab that recipe instead.
What is a slab pie?
A slab pie is a thin pie that’s made in a rimmed baking sheet. Most often a jelly roll pan is used but a 9×13-inch cookie sheet will also work.
There’s way more crust than filling in a slab pie so if you’re a crust person, this pie is perfect for you.
The size of a slab pie makes it perfect for entertaining. You can get 24 servings out of it if needed. I cut my slices a bit larger so I usually end up with 18 servings.
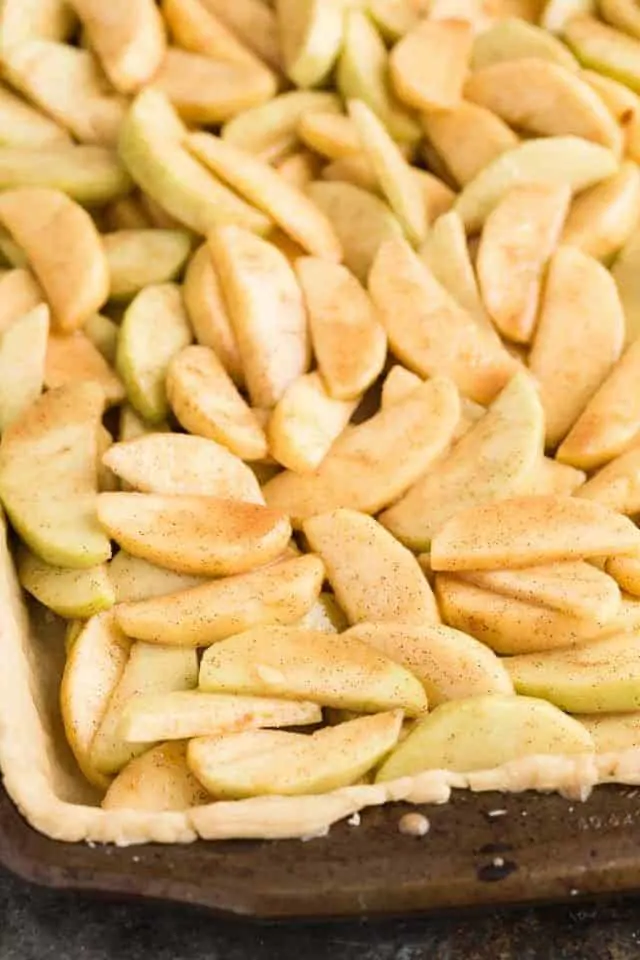
Rolling the crust for such a large scale pie can be a bit tricky and it takes patience. The bottom crust is always the most challenging because it needs to be rolled big enough to fit into the bottom and up the sides of the pan with a little excess to hang over.
You can use a jelly roll pan or 9×13-inch pan but refrain from going any bigger than that. You’ll be ready to pull your hair out if you try rolling the dough out any larger than that.

For the brown butter crust, you’ll need to first cook the butter and let it cool in the freezer. It’s still important to use very cold butter in this recipe so freeze the butter for about an hour. I like to pour it into a bowl lined with aluminum foil to make it easy to remove and slice into cubes for the pie dough.
After the dough is made, it needs to refrigerate for at least 30 minutes or up to 2 days. Since the crust requires so much chill time, I like to make it a day ahead. You save a bit of time this way.
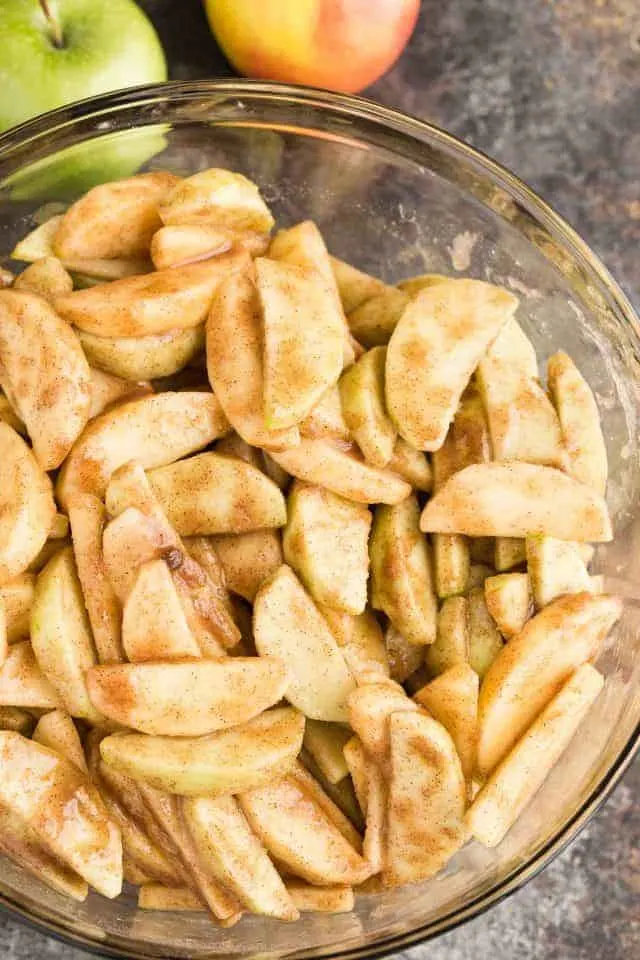
The filling for apple slab pie can be made with any variety of apple you like. Sometimes I use all Pink Lady or all Granny Smith. And other times I’ll use a combination of the two for ultimate flavor.
Peel and slice the apples into thin slices. You can also dice the apples if you prefer. I like big chunks of apple in my pies so I usually just cut them into long thin slices.
I used a combination of white and brown sugar with cinnamon in the pie filling. I love the combination of those flavors with the brown butter crust. It’s phenomenal!
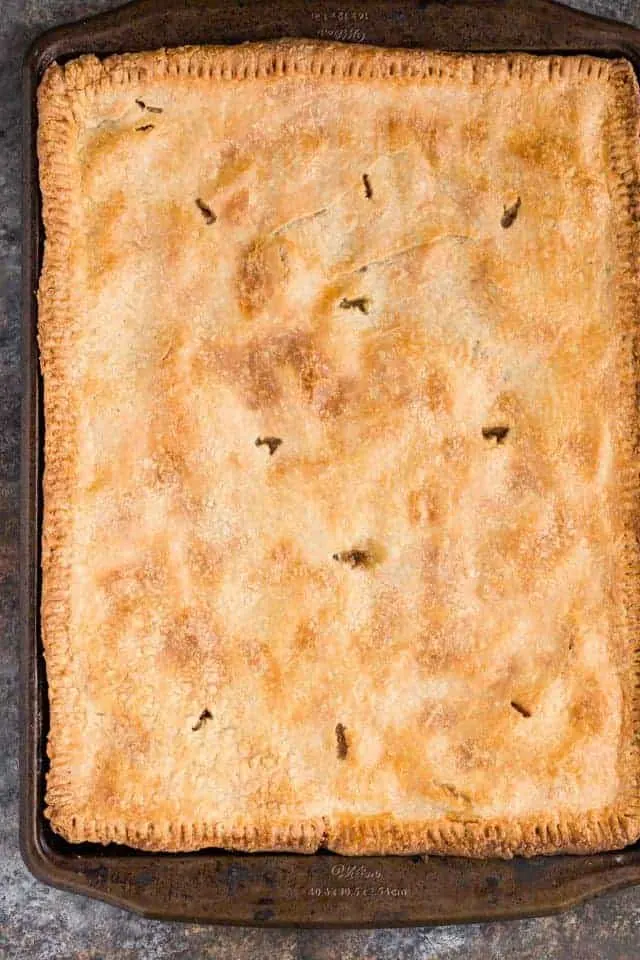
Top the pie with the other half of the crust and seal the edges. It’s easier to crimp the edges rather than flute them on a slab pie. But, feel free to decorate those edges any way you’d like.
Brush the top of the crust with a mix of egg yolk and milk for a gorgeous golden shine.
I’m pretty sure you are going to agree that this is the best apple slab pie you’ve ever had. My husband took it to work and got rave reviews from everyone!
Apple Slab Pie with Brown Butter Crust
Ingredients
For the crust
- 2 cups (452 g) unsalted butter
- 6 cups (780 g) all-purpose flour
- 2 tablespoons granulated sugar
- 2 teaspoons salt
- 2 large eggs
- ⅔ cup (160 ml) ice water
For the filling
- 4-5 pounds (1814 – 2267) peeled and sliced thin apples, about 14 medium apples
- 2 tablespoons fresh lemon juice
- ½ cup (100 g) granulated sugar
- ½ cup (102 g) light brown sugar, packed
- ½ cup (65 g) all-purpose flour
- 2 teaspoons ground cinnamon
- 1 large egg yolk
- 1 tablespoon milk
Instructions
Make the crust
- Heat the butter in a small saucepan over medium heat, whisk frequently. Continue to cook until melted. The butter will foam and then subside. Cook until brown bits develop in the bottom of the pan and the butter turns a light golden color, about 8 minutes. Remove from heat.
- Line a small bowl with foil, letting some excess to hang over the sides. Pour the brown butter into the bowl, leaving behind the dark bits in the bottom of the pot. Freeze for 1 hour.
- Remove the solidified brown butter from the bowl and cut into small chunks.
- In a large mixing bowl, combine the flour, sugar, salt, and brown butter. Use a pastry cutter, fork, or two knives to cut the butter into the flour until the mixture resembles coarse crumbs.
- Whisk the eggs and ice water together until well combined. Drizzle over the flour mixture and toss with a fork until the dough comes together. If the dough is too dry, add more ice water, one tablespoon at a time until moist enough to stick together.
- Divide the dough into two equal size balls. Flatten each into a disk. Wrap in plastic wrap and refrigerate for at least 30 minutes or up to 2 days.
- Set the oven rack to the lower third position and preheat to 400°F.
- On a lightly floured surface, roll one disk of dough into an 18×12-inch rectangle. (A silicone rolling pin works great for this!) Carefully transfer the dough to a 10×15-inch jelly roll pan, pressing it into the bottom and up the sides of the pan. Refrigerate for 15 minutes.
Make the filling
- In a large mixing bowl, combine the apples, lemon juice, both sugars, flour, and cinnamon. Stir to evenly coat the apples. Spread evenly into the prepared crust.
- On a lightly floured surface, roll the second disk of dough out into an 18×12-inch rectangle. Carefully place the dough over the filling. Trim off any excess, fold the edges over, and crimp with a fork to seal it.
- Whisk the egg yolk and milk together and brush the top of the dough. Cut several slits in the top of the crust to allow steam to escape.
- Bake for 55-60 minutes, until the crust is golden brown and filling is bubbly. Cool on a wire rack for 30 minutes. Serve warm or at room temperature.
Notes
- Apples: Use your favorite apple or any combination of apples for a unique flavor profile.
- The pie dough can be made ahead of time and stored in the refrigerator for up to 2 days or in the freezer for up to 3 months. Thaw in the refrigerator overnight.
- Fully baked pie will keep for up to 3 months stored in the freezer. Thaw in the refrigerator overnight and bring to room temperature before serving.
Nutrition
The nutrition information provided is for convenience and as a courtesy only. It is not guaranteed to be accurate because nutrition information can vary for a variety of reasons. For precise nutritional data use your preferred nutrition calculator and input the exact ingredients and brands you used in the recipe.
The best crust!
Made this today and it is pretty much perfect! Thank you! I can’t wait to experiment with other fillings!
Made this today and it is pretty much perfect! Thank you! I can’t wait to experiment with other fillings!
Does olive spread work instead of butter?
Generally, you can use 3/4 cups of olive spread in place of 1 cup butter. But, I’m not sure it will work with this recipe or how it affects the pie crust.
This apple pie is AMAZING it wowed my whole family and tasted heavenly, I got the recipe from supercook, an app that gives you recipes depending on what you have got in the fridge!
Swoon. Seriously, a slab of apple pie? This is the stuff of my dreams. Cannot wait to shovel this into my mouth as soon as possible.
Swoon. Seriously, a slab of apple pie? This is the stuff of my dreams. Cannot wait to shovel this into my mouth as soon as possible.