
Cheesy Pull-Apart Rolls with Garlic
This post may contain affiliate links. Read the full disclosure here.
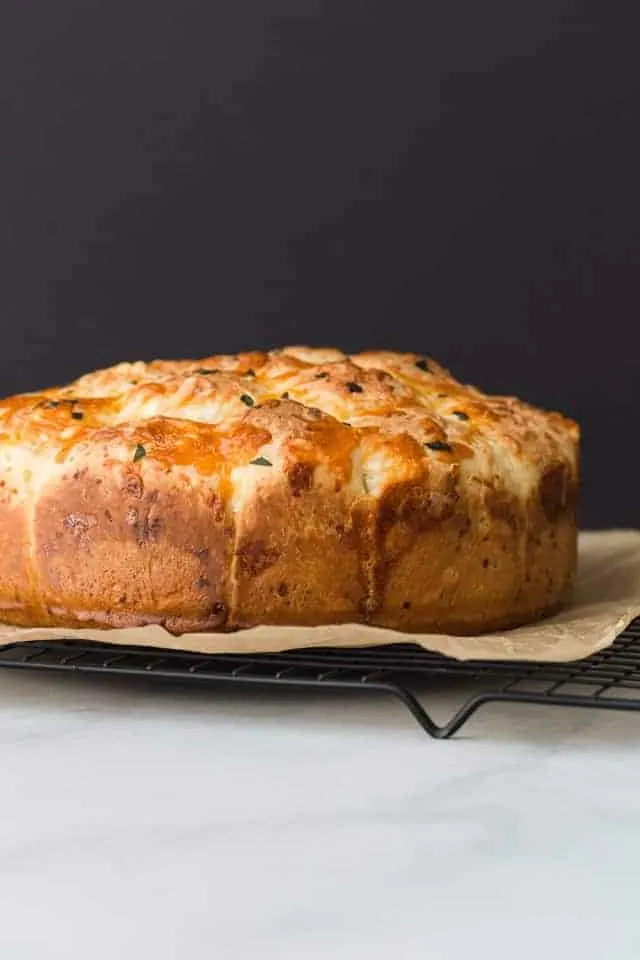
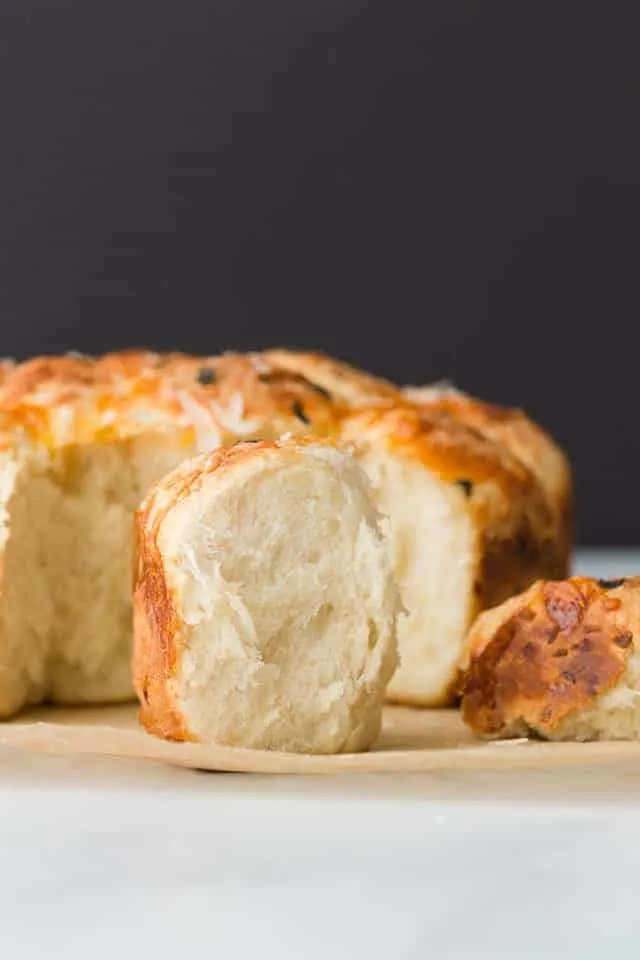
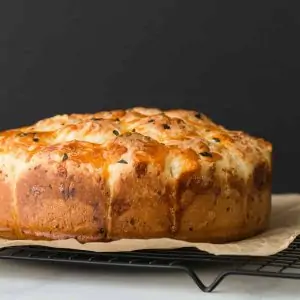
These Cheesy Pull-Apart Rolls are loaded with garlic, sharp cheddar, and parmesan cheese. The ultimate cheesy roll to serve alongside soup and salad.
This is a sponsored post written by me on behalf of Red Star® Yeast.
Cheesy Pull-Apart Rolls with Garlic
Cheesy pull-apart rolls have been on my list of yeast bread to make for quite some time now. I’ve been wanting to add a savory roll ever since I shared my Hawaiian sweet rolls with you.
I love working with yeast, especially when it’s Red Star Yeast. They are my absolute favorite brand to use and always yield incredible results.
For these pull-apart rolls, I used active dry yeast but you can use instant yeast instead. Instant yeast will give you a quicker rise time so keep a close eye on the dough as it proofs.
The great thing about cheesy pull-apart bread is that you can use any cheese you like. I opted for sharp cheddar and parmesan. But I bet gouda or gruyere would also taste incredible.
The dough requires two rises. Once before it’s shaped into rolls and once after. This makes the process a bit long so make sure you plan ahead.

Can you make pull-apart rolls ahead of time?
Cheesy pull-apart rolls with garlic can be made in advance. Baked rolls will keep for up to 1 week stored in the refrigerator or for up to 3 months stored in the freezer. Thaw frozen rolls in the refrigerator overnight and warm in a 300°F for 10 minutes.
The dough for cheesy pull-apart rolls can be made ahead of time as well. Let the dough rise for the first time in step 6, gently fold it over on itself to release some of the air then cover the bowl with plastic wrap.
Refrigerate the dough for up to 2 days. Remove it from the refrigerator and continue with step 7.
The dough can also be frozen for up to 2 months. Thaw it in the refrigerator overnight and continue with step 7.
Main ingredients for cheesy pull-apart rolls
Yeast – is recommended for making pull-apart rolls from scratch. It provides ultimate baking activity in all yeast dough which results in big, fluffy rolls.
Garlic Powder – There’s a ton of garlic powder in these rolls. It packs so much flavor and makes the house smell fantastic as the rolls are baking.
Cheese – These rolls are called cheesy for a reason. Two whole cups of shredded cheese get mixed in the dough plus more sprinkled over the top of the rolls. The recipe calls for sharp cheddar and parmesan but feel free to swap those out for other cheeses that you desire.
How to make cheesy pull-apart rolls with garlic?
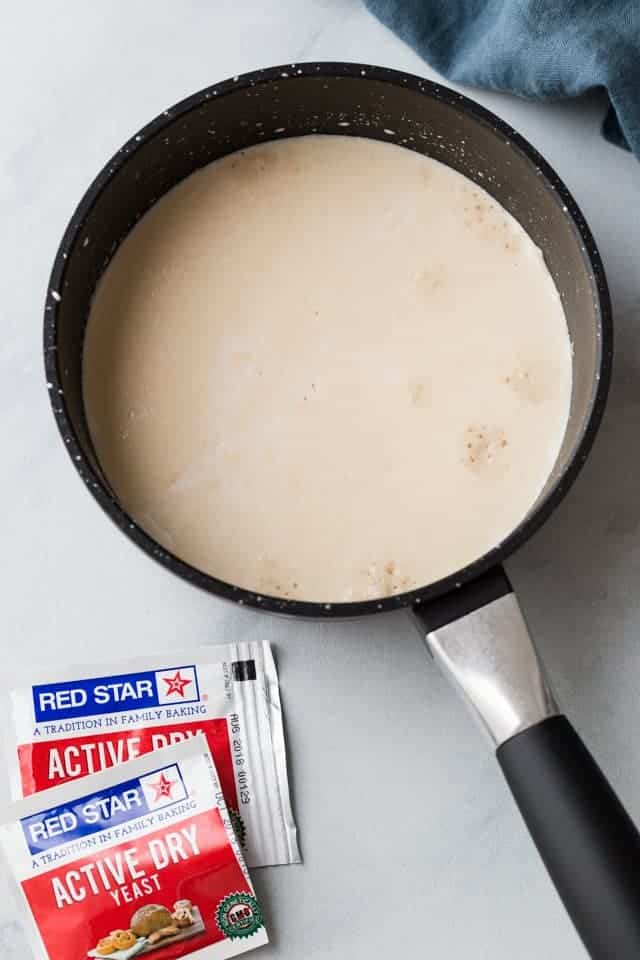
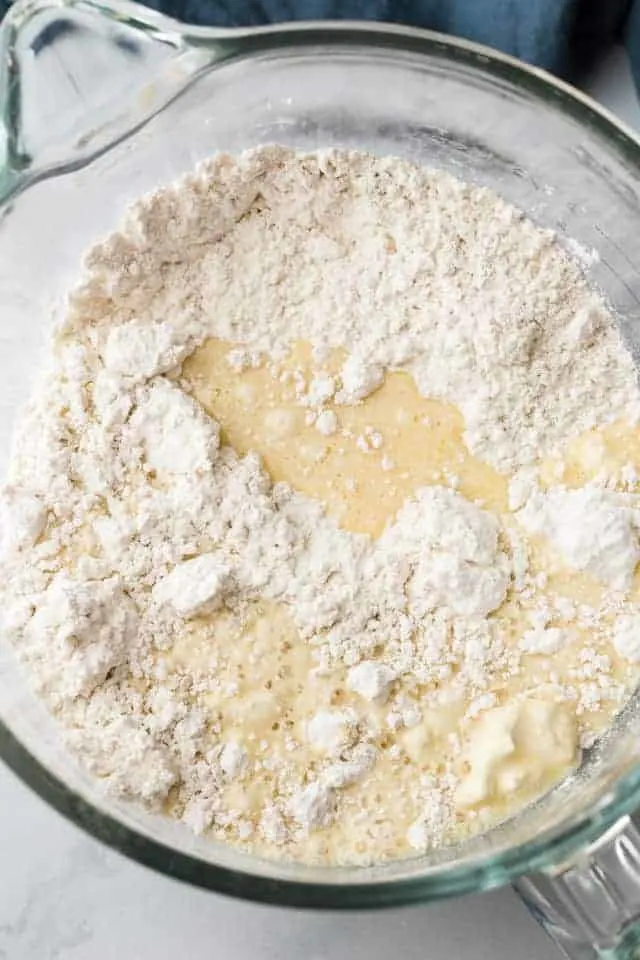
Step 1: Proof the yeast then combine wet and dry ingredients
Proof the yeast in warm milk with sugar then stir in an egg. Pour the yeast mixture into a large mixing bowl with flour, salt, and garlic powder. Mix until soft dough forms.
Step 2: Mix in the cheese
Add the cheese and continue to mix until combined. Beat in softened butter then let the mixer run until the dough is smooth and elastic.
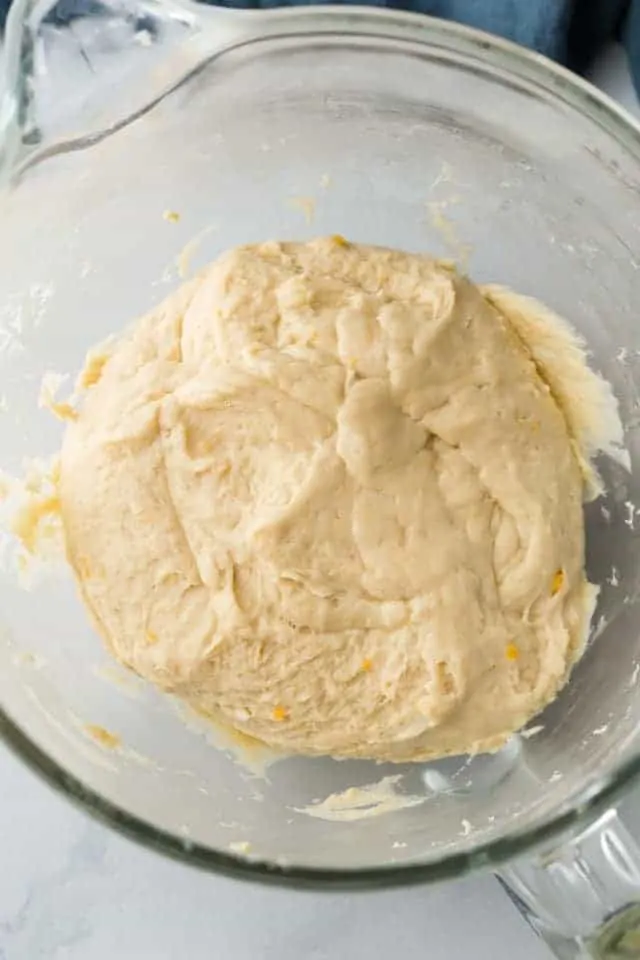
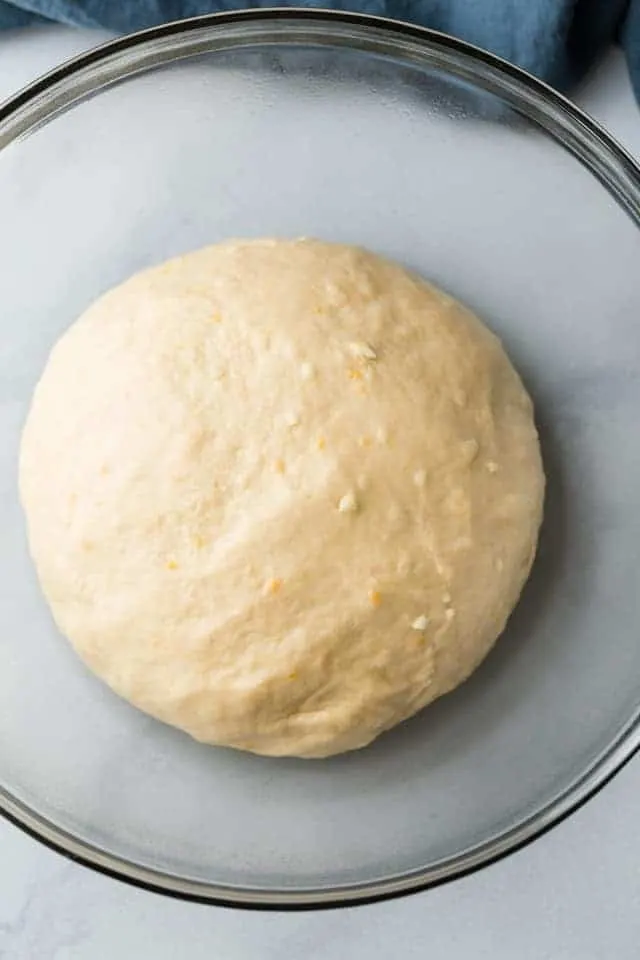
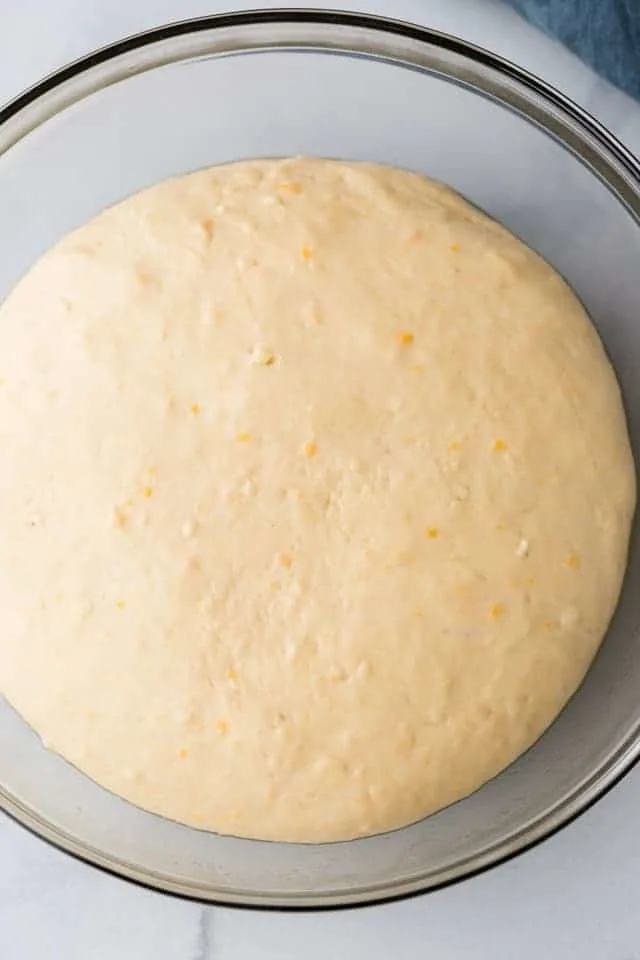
Step 3: Let the dough rise
Cover the dough with plastic wrap and let it rise until it’s doubled in size.
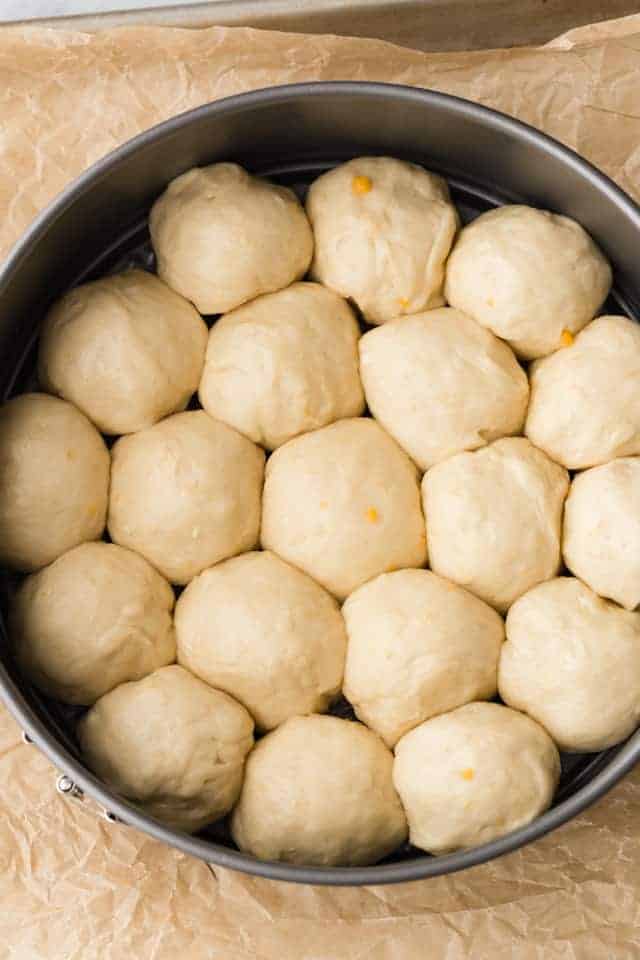
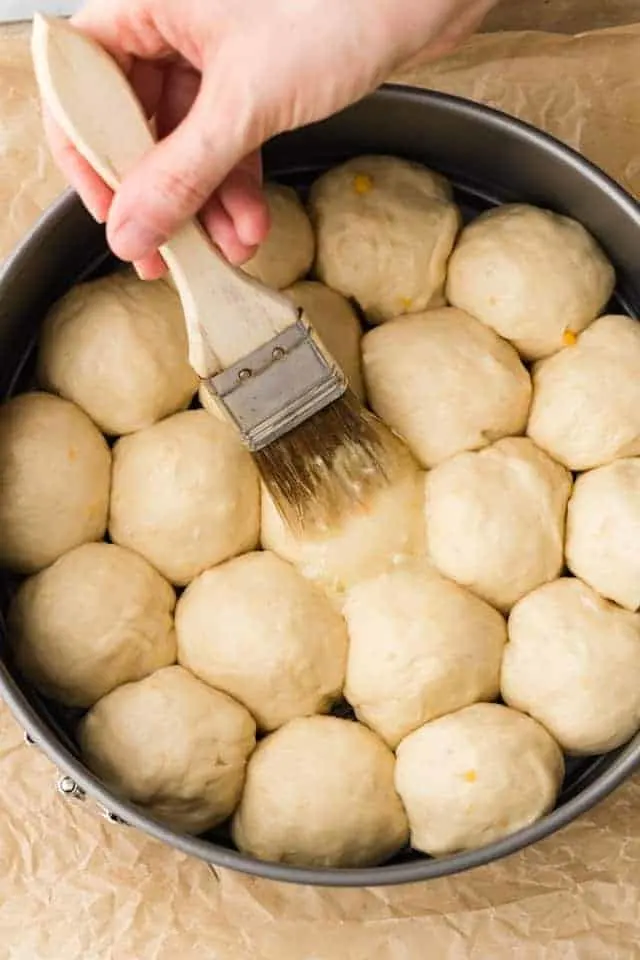
Step 4: Shape the dough
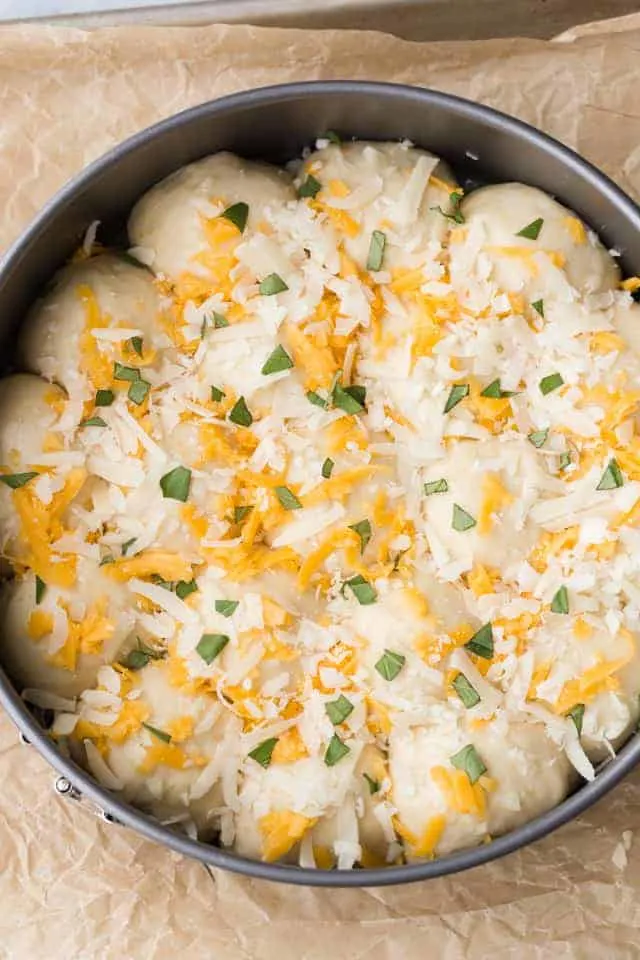
Shape the dough into 16 equal-sized balls and place them in a 9-inch springform pan. Brush the tops with melted garlic butter and let rise once more for about 30 minutes.
Step 5: Top with cheese and bake
Sprinkle the top of the rolls with more cheese and fresh basil then bake in a 350°F oven for 30-40 minutes.
Tips for this cheesy garlic pull-apart rolls recipe
- Plan ahead since the dough requires two rises.
- The dough for these rolls is a super soft dough. It may stick to the bowl a bit but shouldn’t be super sticky when you touch it with your fingertip. Add a little more flour if the dough seems too sticky.
Please visit RSY.com for more recipes, yeast baking tips, coupons and more. You can also follow Red Star Yeast on social media on Instagram, Facebook, Pinterest, Twitter, and Google Plus.
Cheesy Garlic Pull Apart Rolls
Ingredients
- 1 cup (240 ml) whole milk
- 2 tablespoons granulated sugar
- 2 ¼ teaspoons active dry yeast, 1 envelope
- 2 large eggs, room temperature
- 4 cups (520 g) all-purpose flour
- 2 teaspoons salt
- 1 ½ teaspoons garlic powder
- 1 ¼ cups (125 g) shredded cheddar cheese, divided
- 1 ¼ cups (125 g) shredded Parmesan, divided
- 7 tablespoons (98 g) unsalted butter, softened and divided
- 1 large garlic clove, minced
- ½ teaspoon fresh basil, minced
Instructions
- In a small saucepan, heat the milk and sugar over low heat until it reaches 105-115ºF. Remove from heat, stir in the yeast, and set aside for 5 mins.
- Whisk in the egg and set aside.
- Add the flour, salt, and garlic powder to the bowl of a stand mixer. Fit the mixer with the dough hook attachment.
- With the mixer on low speed, gradually pour the yeast mixture into the flour. Continue to beat on low until the flour is incorporated, stop and scrape down the sides and bottom as needed. Continue beating until a soft dough forms, about 4 minutes.
- Add 1 cup (100g) of the cheddar cheese and 1 cup (100g) of the parmesan cheese. Beat on low speed until just combined. Gradually beat in 5 tablespoons (70g) of the softened butter.
- Continue to beat until dough is smooth and elastic, about 5 minutes. (The dough will be soft and may stick to the bowl a bit. Add a little more flour if the dough seems too sticky.)
- Scrape the dough into a lightly oiled bowl. Brush a little oil over the top of the dough. Cover and set in a warm place to rise for 1 hour or until doubled in size.
- Preheat the oven to 350ºF. Line a baking sheet with parchment paper and set a 9-inch springform pan on the baking sheet.
- Divide the dough in half. Divide each half into 8 equal-sized pieces. (You should end up with 16 pieces total.) Roll each piece into a ball.
- Arrange the dough balls in the springform pan, seam side down.
- Melt the remaining 2 tablespoons (28g) of butter and stir in the garlic. Brush over the top of the dough.
- Loosely cover the pan with a clean towel and let rise for 30 minutes.
- Top the rolls with the remaining cheddar and parmesan cheeses. Sprinkle with fresh basil.
- Bake until golden brown, about 30-40 minutes. Serve warm.
Notes
- I don’t recommend using anything other than whole milk. It’s needed for the best texture and taste.
- Instant yeast can be used instead of active dry yeast. The rise time may be a bit less.
- You can substitute the cheeses. Try white cheddar, Gouda, or Gruyere.
- Rolls will keep stored in an airtight container in the refrigerator for up to 1 week.
- Or in the freezer for up to 3 months. Thaw in the refrigerator overnight. Warm up in a 300°F oven for 10 minutes.
- The dough can also be made the night before. After the dough has risen for 1 hour in step 6, gently fold the dough over onto itself inside the mixing bowl and cover the bowl tightly with plastic wrap. Refrigerate overnight or up to 2 days, then remove from the refrigerator and continue with step 7.
- OR freeze the dough for up to 2 months, then allow to thaw in the refrigerator overnight and continue with step 7.
Nutrition
The nutrition information provided is for convenience and as a courtesy only. It is not guaranteed to be accurate because nutrition information can vary for a variety of reasons. For precise nutritional data use your preferred nutrition calculator and input the exact ingredients and brands you used in the recipe.
Why is there no step describing when to add the eggs? I added them in with the butter but that is missing from your recipe.
It is literally step 2 of the recipe!
Hi. I was wondering if it was okay to make smaller balls to make a few more than 12? I’m making this for a group and we don’t quite have enough for 2 batches but a little over 12.
I haven’t made the recipe this way but I imagine it would be fine. The rolls may need less time to bake since they’re smaller.
I make all my bread and rolls using a bread machine. It is the easiest way that I have found to get consistently good results. For recipes such as this with sticky dough it gets kneaded without adding more flour which can have an effect on the quality of the bread.
My machine has an initial 30 minute rest period that allows the ingredients to warm up so I could skip heating the milk and just put the ingredients in the bread machine. It also has the ideal temperature for the first rise. When the dough cycle was done I just took the dough out, divided it, formed it into balls and followed the rest of the recipe directions. My only problem was that I have a countertop convection oven that doesn’t make temperature adjustments for using convection as my range oven does. The bread was getting very brown long before it was baked inside. I had to lower the temperature and put foil on top to keep it from getting way too brown.
The bread turned out okay, tasted quite good but I would reduce the temperature to 325° next time and get much better results. It was a bit over browned. I am posting this as an alternative because many people who have bread machines do not know that you can take any recipe such as this for rolls or bread that is formed in a non-traditional loaf and use a bread machine with a dough cycle or if you have a very old machine, take the dough out after the first rise.
Thanks, Nancy. I’m glad that you had success with using the bread machine for the dough.
I love such recipes. Where each step is described, moreover, there are many photos that help in as much detail as possible to understand the recipe. I just started cooking, but with your recipes, I’ll become a real staple chef 🙂
I love such recipes. Where each step is described, moreover, there are many photos that help in as much detail as possible to understand the recipe. I just started cooking, but with your recipes, I’ll become a real staple chef 🙂
These rolls are heavenly, so soft and fluffy!
It’s hard to go wrong with cheesy bread, but you make this recipe look so easy! I could see this for future family dinner meals. Shared to my favorite bread recipe pinterest board!
Thank you so much for sharing, Marly!
Yes to cheesy garlic yeast rolls. Looks so light and fluffy!
It’s hard to go wrong with cheesy bread, but you make this recipe look so easy! I could see this for future family dinner meals. Shared to my favorite bread recipe pinterest board!
Yes to cheesy garlic yeast rolls. Looks so light and fluffy!