
Homemade Thin Mints
This post may contain affiliate links. Read the full disclosure here.
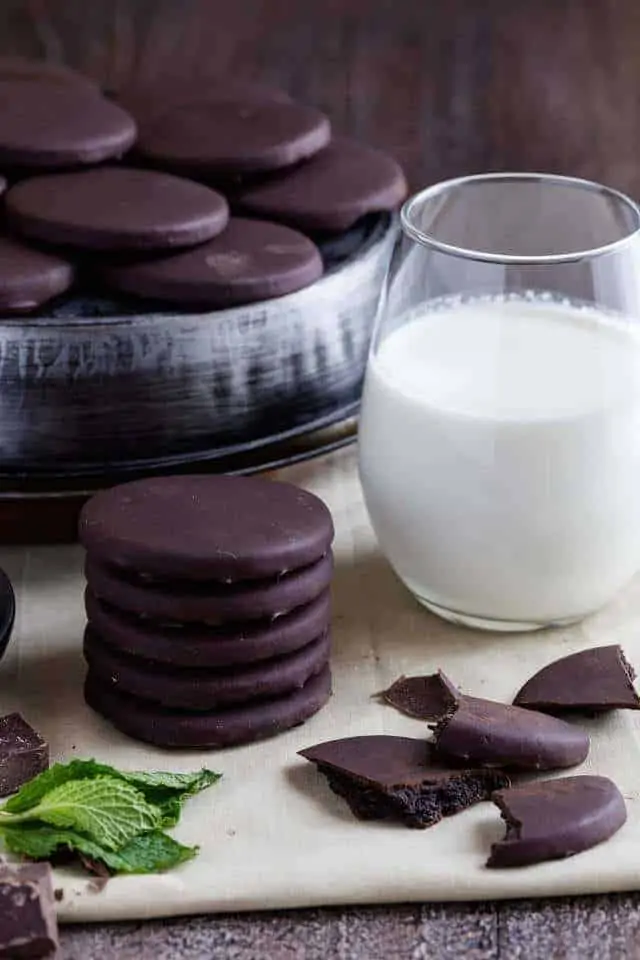
Homemade Thin Mints are just like the real thing! Crisp mint chocolate cookies coated in chocolate. They taste amazing! These cookies are easy to make and everyone will rave about them. The perfect balance between mint and chocolate will have you reaching for cookie after cookie. The dough can be made ahead and frozen or the fully baked cookies can be frozen for a quick snack.

Chocolate and mint are one of those combinations that you either love, hate, or just have to be in the mood for. I fall in the last category.
I don’t typically turn to mint chocolate when I have a sweet craving. But, once in a while, I do swoon a bit thinking about Andes mint cookies, Andes Mint cupcakes, peppermint fudge cake, or thin mints.
I’ve seen Girl Scouts selling cookies everywhere lately. The cookies are so delicious – no one has to beg me to buy any. But I opted to buy some of the cookies I might not make myself (Caramel Delights, anyone?), thinking I would try to make some others at home.
Thin mints are probably top of everyone’s list of favorite Girl Scout cookies. So, why not start there? I was a Girl Scout, after all.
I adapted Dorie Greenspan’s basic chocolate cookie recipe found in her book, Dorie’s Cookies. Her recipe yielded about 80 cookies, so I reduced it pretty dramatically. Not that I couldn’t eat 80 thin mints, but I’m not sure I want to. I also added peppermint extract to give the dough a perfect minty crunch.
The result is a crispy cookie with the perfect balance of mint and chocolate.
After baking, I coated the cookies with melty mint chocolate. I added just a dash of mint to the chocolate coating to make sure it wasn’t over-powering.
For melting the chocolate, I used the double boiler method. Place a heatproof bowl over a pot of barely simmering water. The steam from the water will heat the bowl and melt the chocolate.
The chocolate begins to thicken as it cools and can make things difficult. I found that leaving the bowl of chocolate over the double boiler while dipping kept cookies will keep it at the optimal consistency. Just the chocolate a stir after every second cookie or so.
Let the chocolate set and the cookies will ready to devour!
.
Recipe Snapshot
- TASTE: Chocolate mint
- TEXTURE: Crispy
- EASE: A little extra effort is required.
- TIME: About an hour plus chilling time
What You’ll Need
Ingredients
- Flour: I use all purpose flour in this recipe
- Cocoa powder: Unsweetened Dutch-processed baking cocoa powder gives these cookies the perfect chocolaty flavor.
- Butter: Unsalted, as usual, and softened to room temperature.
- Sugar: White granulated sugar for sweetness.
- Egg white: To help bind the ingredients together. Save yolk for a creme brulee.
- Flavoring: Vanilla extract (homemade recipe here), peppermint extract (used in both the dough and the coating) and a pinch of kosher salt.
- Chocolate: Melting chocolate for the coating. Use a bar of dark or semisweet chocolate, coarsely chopped. I prefer dark chocolate in this recipe.
- Vegetable oil: Just a touch to make the melted chocolate smooth and dip-able.
Recommended Tools
- Double boiler
- Mixing bowls
- Whisk
- Cookie cutter
- Baking sheets
- Parchment paper
- Rolling pin
How to Make Homemade Thin Mints
These homemade thin mints take a little bit of extra effort between the rolling and the cutting and the dipping, but they are so worth it. I promise. After chilling the dough, preheat your oven to 350 and line the baking sheets with parchment paper.
Be sure to check out the full recipe and ingredient list below
Make the cookies
- Using a stand mixer fitted with the paddle attachment or with a hand-held mixer, beat the butter and sugar together on medium speed until smooth and creamy, about 3 minutes.
- Beat in the egg white followed by the vanilla and peppermint extract. Gradually add the flour in 3 additions, beating just until incorporated after each one. Scrape down the sides of the bowl as needed.
- Divide the dough in half. Working with one half at a time. Place the dough between two pieces of parchment paper and roll it to a ¼ inch thickness. Leaving the dough in between the parchment paper, transfer it to a baking sheet. Refrigerate for at least 3 hours or freeze it for 1 hour.
- Working with one slab of dough at a time. Remove the top layer of parchment paper and cut circles with a 2-inch cookie cutter. Place the cookies on the prepared baking sheets about 1 and ½ inches apart. Gather the scraps of dough, reroll and chill to continue cutting and baking.
- Bake for 15 to 18 minutes, until the cookies feel firm to the touch. Cool on the baking sheet for 5 minutes before transferring them to a wire rack to cool completely.


Make the coating
- Combine the chocolate, oil, and extract in a double boiler or a medium heatproof bowl set over a pot of barely simmering water. Stir continuously until melted and smooth.
- Dip each cookie into the melted chocolate, turning with a fork to coat and tapping off any excess. Place cookies onto a parchment-lined baking sheet. Refrigerate the cookies until set, about 10 minutes. Cookies are best when served cold.


Handy tip:
Bake these cookies ahead of time and keep them in your freezer. Then when you have a craving for thin mints and can’t find a girl scout, all you’ll have to do is make the coating and dip the cookies. Voila!
Tips For Success
- When you first beat in the egg white, the dough may appear curdled, this is normal – don’t panic!
- When refrigerating or freezing the dough, it’s okay to stack the slabs of rolled dough on top of one another (with a layer of parchment in between).

Storage & Freezing
- The dough can be rolled out and kept in the refrigerator for up to 3 days or frozen for up to 2 months. Cut and bake as directed, even straight from the freezer.
- Baked (uncoated or coated) cookies will keep for up to 7 days in an airtight container stored in the refrigerator or up to 2 months in the freezer.
Homemade Thin Mints

Ingredients
For the cookie
- 2 cups (260 g) all-purpose flour
- ½ cup (42 g) unsweetened Dutch-processed cocoa powder
- ½ teaspoon salt
- 1 cup (226 g) unsalted butter, softened
- ⅔ cup (113 g) granulated sugar
- 1 large egg white
- 1 teaspoon vanilla extract
- ½ teaspoon peppermint extract
For the coating
- 12 ounces (339 g) dark or semisweet chocolate, coarsely chopped
- ½ teaspoon vegetable oil
- ¼ teaspoon peppermint extract
Instructions
Make the cookies
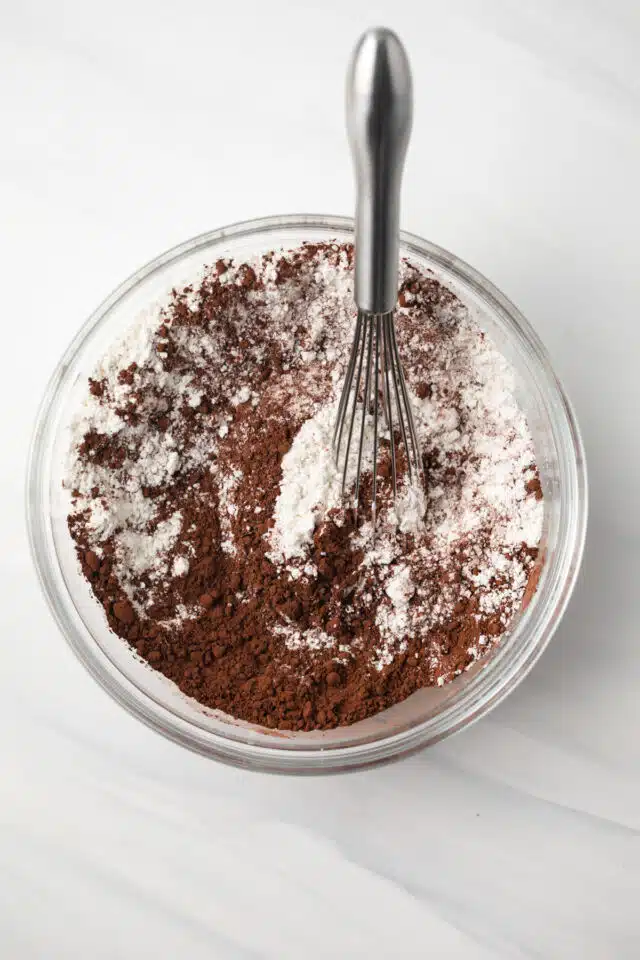
- In a medium bowl, combine the flour, cocoa powder, and salt. Stir with a whisk; set aside.
- Using a stand mixer fitted with the paddle attachment or with a hand-held mixer, beat the butter and sugar together on medium speed until smooth and creamy, about 3 minutes. Beat in the egg white followed by the vanilla and peppermint extract. The dough may appear curdled, this is normal. Gradually add the flour in 3 additions, beating just until incorporated after each one. Scrape down the sides of the bowl as needed.
- Divide the dough in half. Working with one half at a time. Place the dough between two pieces of parchment paper and roll it to a ¼ inch thickness. Leaving the dough in between the parchment paper, transfer it to a baking sheet. It’s okay to stack the slabs of rolled dough. Refrigerate for at least 3 hours or freeze it for 1 hour.
- Preheat the oven to 350°F. Line 2 baking sheets with parchment paper.
- Working with one disk at a time. Remove the top layer of parchment paper and cut circles with a 2-inch cookie cutter. Place the cookies on the prepared baking sheets about 1 and ½ inches apart. Gather the scraps of dough, reroll and chill to continue cutting and baking.
- Bake for 15 to 18 minutes, until the cookies feel firm to the touch. Cool on the baking sheet for 5 minutes before transferring them to a wire rack to cool completely.
Make the coating
- Combine the chocolate, oil, and extract in a medium heatproof bowl set over a pot of barely simmering water. Stir continuously until melted and smooth.
- Using a fork, dip each cookie into the melted chocolate, turning to coat and tapping off any excess. Place cookies onto a parchment-lined baking sheet. Refrigerate the cookies until set, about 10 minutes. Cookies are best when served cold.
Notes
- The dough can be rolled out and kept in the refrigerator for up to 3 days or frozen for up to 2 months. Cut and bake as directed, even straight from the freezer.
- Baked (uncoated or coated) cookies will keep for up to 7 days in an airtight container stored in the refrigerator or up to 2 months in the freezer.
Nutrition
The nutrition information provided is for convenience and as a courtesy only. It is not guaranteed to be accurate because nutrition information can vary for a variety of reasons. For precise nutritional data use your preferred nutrition calculator and input the exact ingredients and brands you used in the recipe.
these are the best! I have made them twice now. They’re so good in the freezer too. 10/10 great recipe
How on earth was your chocolate so nice & thin on the cookie? My chocolate melted but was never liquid like the example shows.
You keep heating until the chocolate is melted and smooth. It will get there. Don’t use chocolate chips, they don’t melt as smoothly.
Thin Mints are my favourite, I make this recipe every year and everyone always loves them!
Only changes I make are to use food grade peppermint oil as it’s much stronger in flavour than peppermint extract (perhaps something other bakers might like to try for a stronger mint flavour!) and I also like to temper my chocolate for an extra little snap.
wow!!! i was worried about the texture at first, but baked for around 17 minutes (on stone cookie tray!!! my batch on a thin metal baking sheet burned) was the perfect thin mint texture. snaps & crunches without chewiness, great balance of salt and sugar. for those who don’t like the flavor of dark chocolate, you may want to add more sugar to the dough. i did just about triple the amount of peppermint as well.
this recipe made me feel talented, thanks 😀